Paint Not Sticking to Caulk: Why It Happens
Paint not sticking to caulk usually happens because the caulk is not paintable, the caulk has not dried long enough, the surface is dirty or slick, or moisture is preventing the paint from bonding.
This is common around baseboards, window trim, door trim, crown molding, bathrooms, kitchens, and wall seams. The paint may peel, bead up, crack, fisheye, or stay tacky instead of drying into a smooth finish.
The fix depends on what kind of caulk was used. Sometimes cleaning, sanding, priming, and repainting will solve it. Other times, the caulk has to be removed and replaced with paintable caulk.
Paint Not Sticking to Caulk: Quick Cause and Fix Table
| Cause | What It Looks Like | Best Fix |
|---|---|---|
| Non-paintable caulk | Paint beads up, peels, or separates | Remove and replace with paintable caulk |
| Caulk not dry yet | Paint smears, cracks, or stays tacky | Let caulk dry fully before repainting |
| Dirty or dusty caulk | Paint lifts or looks patchy | Clean, dry, and repaint |
| Slick or glossy caulk | Paint does not grip evenly | Light prep or removal may be needed |
| Moisture problem | Paint bubbles, peels, or stays soft | Fix moisture before repainting |
The most important rule is simple: if the caulk will be painted, it needs to be labeled paintable.
Why Paint Does Not Stick to Caulk
Paint needs a clean, dry, compatible surface. Caulk can interfere with that if it is the wrong type, still curing, contaminated, too slick, or exposed to moisture.
Regular wall paint and trim paint are not designed to stick to every kind of caulk. Some caulks are made to repel water, stay rubbery, or resist surface bonding. That can be useful in the right location, but it creates problems when you try to paint over them.
Paint may fail on caulk because of:
- Non-paintable caulk
- Silicone caulk
- Caulk that is still wet or soft
- Dust or sanding residue
- Grease or surface contamination
- Glossy or slick caulk
- Old failing caulk
- Moisture behind or around the seam
- The wrong primer
- Paint applied too heavily
If the paint is not sticking to caulk in a long, even line, the problem is probably the caulk type or surface condition rather than your brush technique.
Non-Paintable Caulk Is the Most Common Problem
Non-paintable caulk is one of the biggest reasons paint fails.
Some caulks are designed for sealing, not painting. Standard silicone caulk is a common example. It can work well in wet areas when used correctly, but regular paint usually does not bond well to it unless the product is specifically labeled paintable.
If you paint over non-paintable caulk, the paint may sit on the surface instead of bonding to it.
Signs the caulk may be non-paintable include:
- Paint beads up on the caulk
- Paint separates into small spots
- Paint peels off in strips
- The caulk feels rubbery or slick
- The caulk line stays shiny under the paint
- Touch-up paint will not cover evenly
- The paint scratches off easily after drying
Do not keep adding more paint to non-paintable caulk. Heavy paint buildup will not solve the bond problem. It usually makes the line look thicker and messier.
Silicone Caulk Can Be Hard to Paint
Silicone caulk is often used around tubs, showers, sinks, backsplashes, and other moisture-prone areas. Many standard silicone caulks are not paintable.
That does not make silicone bad. It just means it needs to be used in the right place. If you need to paint the seam, regular silicone is usually the wrong choice unless the label clearly says it is paintable.
Some caulks are hybrid products or paintable silicone formulas. These are different from standard non-paintable silicone.
Be careful with silicone caulk near painted areas such as:
- Baseboards
- Door casing
- Window casing
- Crown molding
- Painted built-ins
- Wall seams
- Drywall-to-trim gaps
- Cabinet trim
If the caulk feels slick and paint will not stick, a bonding primer may help in limited situations, but it will not make every silicone bead paintable. If the caulk is truly non-paintable, removal and replacement is usually the better fix.
Paintable Caulk Matters
Paintable caulk is made so paint can bond to it after the caulk dries.
For most interior painted trim and wall seams, paintable caulk or acrylic latex caulk is the practical choice. It is commonly used around baseboards, door trim, window trim, crown molding, and small gaps where trim meets drywall.
Acrylic latex caulk is usually beginner-friendly because it is easy to apply, easy to smooth, and usually cleans up with water before it dries.
Use paintable caulk for painted areas like:
- Interior baseboards
- Door trim
- Window trim
- Crown molding
- Wall-to-trim seams
- Painted cabinet trim
- Small drywall and molding gaps
- Painted built-ins
Always check the label. Do not choose caulk by color alone. A white caulk is not automatically paintable.
For trim seams, this guide to the best caulk for trim before painting explains why paintable acrylic latex caulk is usually the practical choice.
The Caulk Was Painted Too Soon
Paint may not stick if the caulk has not dried or cured enough.
Caulk can feel dry on the surface while still being soft underneath. If you paint too soon, the brush can smear the bead, trap moisture, or create a paint film that cracks as the caulk continues drying.
This is especially common when the caulk bead is too thick.
Caulk may not be ready for paint if:
- It feels soft when lightly touched
- It dents easily
- It looks shiny or wet
- It smears under the brush
- It feels gummy
- The bead is thick
- The room is cool or humid
- The product label says to wait longer
Follow the dry time on the caulk label. If the room is humid, the bead is thick, or airflow is poor, give it extra time before painting.
If the caulk was still soft, review how long caulk should dry before painting before trying another coat.
Dirty or Dusty Caulk Can Stop Paint From Bonding
Paint will not stick well to dust, grease, soap residue, or sanding debris.
This is common around baseboards because dust collects along the top edge. It is also common near bathrooms and kitchens where moisture, cleaners, grease, or residue may be present.
Even paintable caulk can fail if the surface is dirty.
Common surface contaminants include:
- Dust
- Sanding residue
- Grease
- Soap film
- Old cleaner residue
- Mildew stains
- Loose paint
- Caulk remover residue
- Silicone residue from old caulk
A microfiber cloth is useful for wiping trim and caulk lines before painting. If the surface needs deeper cleaning, use a cleaner that is safe for the material and let everything dry fully before painting.
Do not paint over wet, dirty, or gummy caulk.
Glossy or Slick Caulk Can Be Difficult to Cover
Some caulk dries with a slick surface that paint does not grip well.
This can happen with certain caulk types, old caulk, contaminated caulk, or caulk that was smoothed with too much water or the wrong product. If the surface is glossy and paint slides around, the paint may peel or separate after drying.
Slick caulk may cause paint to:
- Bead up
- Pull away from the seam
- Leave thin spots
- Fisheye
- Dry unevenly
- Peel when touched
- Look shiny through the finish coat
A light scuff with a sanding sponge may help if the caulk is paintable and fully dry. Wipe away dust with a microfiber cloth before priming or painting.
If the caulk is non-paintable or silicone-based, sanding alone may not fix the problem.
Old Caulk May Be Failing Under the Paint
Old caulk can dry out, shrink, crack, or pull away from the surface.
Painting over old failing caulk may hide the problem for a short time, but it usually does not create a lasting repair. If the caulk underneath is loose, brittle, or contaminated, the paint on top may fail too.
Old caulk may need to be replaced if:
- It is cracked through the bead
- It is peeling away from trim
- It has gaps along the edge
- It feels brittle
- It is stained or dirty
- It was applied too thick
- It has old paint peeling from it
- It moves when pressed
If the caulk is still firmly bonded and paintable, cleaning and repainting may work. If the caulk has failed, remove it and redo the seam.
Moisture Can Keep Paint From Sticking
Moisture is another common reason paint does not stick to caulk.
This can happen near windows, exterior doors, bathrooms, kitchens, basements, and any area with condensation or leaks. Moisture can get behind the paint or caulk and push the finish loose.
Do not cover moisture problems with more caulk or paint. The problem usually comes back.
Moisture may be involved if:
- Paint bubbles near the caulk line
- The caulk feels damp or soft
- The seam keeps peeling
- Stains appear near the trim
- The area smells musty
- The wall or trim feels swollen
- The same spot fails repeatedly
Let the area dry and fix the moisture source before repainting. If trim is swollen, soft, or moldy, the repair may need more than caulk.
The Wrong Primer Can Also Cause Problems
Primer can help in some situations, but it is not a magic fix.
A primer needs to match the surface problem. For clean, dry, paintable caulk, regular primer or trim paint may work depending on the paint system. For difficult glossy areas, a bonding primer may help if the surface is compatible.
But primer will not reliably solve non-paintable caulk. It also will not fix wet, dirty, soft, or failing caulk.
Primer may help when:
- The caulk is paintable and fully dry
- The surface is slightly slick but compatible
- The surrounding area has bare wood or raw drywall
- You need better adhesion before finish paint
- A bonding primer is suitable for the surface
Primer is not enough when:
- The caulk is non-paintable
- The caulk is wet or gummy
- The seam is dirty or greasy
- Silicone residue remains
- The caulk is peeling or cracked
- Moisture is causing failure
When in doubt, test a small area before coating the whole seam.
How to Tell Whether Caulk Is Paintable
The easiest way to tell is to read the label.
A paintable caulk should clearly say it can be painted. It may also say acrylic latex, paintable sealant, paintable trim caulk, or suitable for doors, windows, molding, and interior trim.
If you did not apply the caulk yourself, you may need to inspect and test it.
Signs the caulk is likely paintable include:
- The label says paintable
- It is acrylic latex caulk
- It was sold for trim, molding, doors, or windows
- Paint covers it evenly after proper drying
- It does not repel paint during a small test
- It dries to a surface that accepts primer or paint
Signs the caulk may not be paintable include:
- It feels slick or rubbery
- It was used around a tub, sink, or shower
- Paint beads up on contact
- Paint peels after drying
- It has a shiny silicone-like surface
- You cannot confirm that it is labeled paintable
If you cannot tell, test a hidden section. Clean it, let it dry, apply a small amount of primer or paint, and see whether it bonds after drying.
When Primer Helps and When Removal Is Needed
Primer can help only when the caulk is compatible with paint.
If the caulk is paintable, clean, dry, and firmly attached, primer may improve adhesion and help the finish coat look even. A bonding primer may help on some difficult surfaces, especially if the label says it can be used there.
If the caulk is non-paintable, contaminated, wet, soft, or failing, removal is usually the better answer.
Try primer when:
- The caulk is labeled paintable
- The caulk is fully dry
- The caulk is firmly bonded
- The surface has been cleaned
- The paint is only slightly uneven
- The problem is mild adhesion, not total rejection
Remove and replace the caulk when:
- The paint beads up immediately
- The caulk is standard silicone
- The caulk is not labeled paintable
- The caulk is gummy or soft
- Paint peels off in strips
- The caulk is cracked or loose
- The seam has silicone residue
- Moisture is trapped behind the caulk
Do not paint over non-paintable caulk and expect a durable finish. It is usually better to remove it and use paintable caulk.
Step-by-Step Fix for Paint Not Sticking to Caulk
Before fixing the problem, figure out whether the caulk is paintable. That decision controls the repair.
If the caulk is non-paintable or failing, remove it. If it is paintable but dirty or underprepared, clean and repaint it properly.
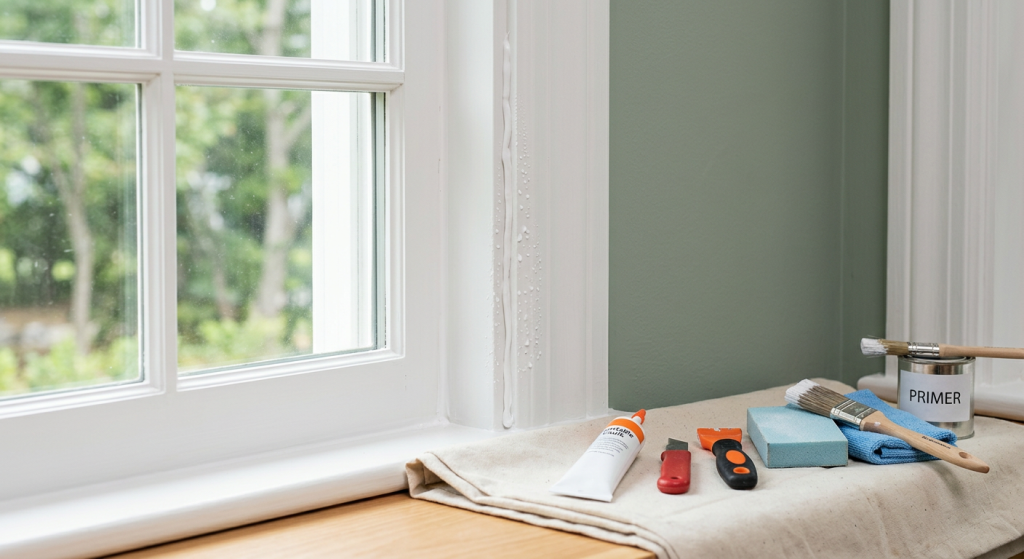
Tools and materials you may need:
- Paintable caulk
- Acrylic latex caulk
- Primer
- Bonding primer when needed
- Caulk remover
- Utility knife
- Sanding sponge
- Microfiber cloth
- Angled brush
- Painter’s tape
- Touch-up paint
- Caulk smoothing tool
Work carefully around painted trim and drywall. The goal is to fix the seam without making a larger repair area.
Follow this repair process:
- Inspect the caulk to see whether it is paintable, loose, slick, or damaged
- Let any wet or soft caulk dry fully before deciding whether it can stay
- Clean the caulk line with a microfiber cloth
- Remove dust, grease, and loose paint
- Lightly scuff paintable caulk with a sanding sponge if needed
- Wipe away sanding dust
- Apply primer or bonding primer only if the caulk is compatible
- Let primer dry according to the label
- Paint the seam with an angled brush using light coats
- Avoid heavy paint buildup
- Let the paint dry before deciding whether another coat is needed
If the paint still beads up or peels after this process, the caulk likely needs to be removed and replaced.
How to Remove and Replace Caulk That Will Not Hold Paint
When the caulk is the wrong type, replacement is usually the cleanest fix.
This is common when non-paintable silicone was used on painted trim or wall seams. New paintable caulk should not be applied over old silicone residue or failed caulk.
To remove and redo the seam:
- Protect the floor or nearby surface with a drop cloth
- Score along the caulk line carefully with a utility knife
- Pull out loose or failed caulk
- Use caulk remover if needed and safe for the surface
- Scrape gently without gouging the trim or drywall
- Remove residue as thoroughly as possible
- Clean the seam with a microfiber cloth
- Let the surface dry fully
- Prime bare wood or raw drywall if needed
- Apply a thin bead of paintable caulk
- Smooth it with a caulk smoothing tool
- Let it dry according to the label
- Paint with an angled brush and light coats
Do not apply a thick bead to cover old problems. Heavy buildup takes longer to dry and can crack or look bulky after painting.
Using Painter’s Tape for a Cleaner Caulk Line
Painter’s tape can help keep the caulk line neat, especially for beginners.
It is useful around baseboards, trim edges, and visible seams. The key is to remove the tape while the caulk is still workable.
To use painter’s tape with caulk:
- Apply painter’s tape along one or both sides of the seam
- Leave only a narrow gap exposed
- Apply a thin bead of paintable caulk
- Smooth the bead before it skins over
- Remove the tape while the caulk is still soft
- Let the caulk dry fully before priming or painting
Painter’s tape helps shape the bead, but it does not make non-paintable caulk paintable.
Common Mistakes When Trying to Paint Caulk
Most caulk painting problems come from using the wrong product or rushing the process.
Adding more paint is rarely the answer if the first coat will not stick.
Common homeowner mistakes include:
- Painting over non-paintable caulk
- Assuming all white caulk is paintable
- Painting over silicone caulk
- Painting caulk before it dries
- Painting over dusty baseboard seams
- Skipping surface cleaning
- Using heavy coats to force coverage
- Using primer on wet or dirty caulk
- Leaving old failed caulk in place
- Applying new caulk over silicone residue
- Ignoring moisture near the seam
- Using touch-up paint before fixing the cause
If paint refuses to bond, stop and identify the surface problem. More paint usually makes the repair thicker, not better.
Prevention Tips for Future Painted Trim and Wall Seams
Preventing this problem is much easier than fixing it later.
The best approach is to choose the right caulk before you start painting.
Use this checklist before painting caulk:
- Choose paintable caulk for any seam that will be painted
- Use acrylic latex caulk for many interior trim projects
- Avoid non-paintable caulk on painted trim
- Read the label before applying caulk
- Clean dust from baseboards and trim
- Prime bare wood or raw drywall when needed
- Apply a thin, smooth bead
- Let caulk dry according to the label
- Wait longer in humid or cool rooms
- Use primer when the surface needs it
- Paint with light coats and an angled brush
- Keep touch-up paint handy for small corrections
A clean, dry, paintable caulk line should accept paint much better than a slick or contaminated seam.
When to Remove and Redo the Caulk Instead of Touching It Up
Touch-up paint is only useful when the caulk underneath is sound.
If the caulk is the wrong product or the surface is failing, touching up will not last. The paint may peel again, bead up again, or stay tacky.
Remove and redo the caulk when:
- The caulk is not paintable
- The caulk is standard silicone
- Paint beads up immediately
- The caulk is soft or gummy
- The caulk is dirty beyond cleaning
- Old paint is peeling from the caulk
- The bead is cracked or loose
- Moisture has damaged the seam
- The repair has already failed once
It takes more time to remove and redo caulk, but it gives the new paint a better chance to bond correctly.
When the Problem Is More Than Caulk
Sometimes paint failure on caulk points to a larger issue.
If the same seam keeps failing, look beyond the paint and caulk. There may be moisture, movement, or damaged trim behind the problem.
Watch for warning signs like:
- Repeated peeling in the same area
- Damp trim or drywall
- Musty smells
- Soft or swollen wood
- Staining near a window or door
- Cracks that keep reopening
- Caulk pulling away from both sides
- Paint bubbling near the seam
Fix the moisture, movement, or damaged trim before repainting. Caulk should finish a small seam, not cover an active problem.
Final Thoughts
Paint not sticking to caulk usually means the paint is being asked to bond to the wrong surface. The caulk may be non-paintable, silicone-based, too wet, dirty, slick, old, or affected by moisture.
For painted trim and wall seams, use paintable caulk or acrylic latex caulk, let it dry fully, clean the surface, and paint with light coats. Primer or bonding primer may help when the caulk is paintable and properly prepared.
If the caulk is non-paintable, gummy, loose, contaminated, or failing, do not keep painting over it. Remove it, clean the seam, apply the right paintable caulk, and let it dry before repainting. That gives the finish a much better chance of staying smooth, clean, and durable.