how to replace a toilet flapper: beginner homeowner guide
How to replace toilet flapper parts is a simple beginner repair when the problem is limited to the rubber flapper inside the toilet tank. The flapper is the part that lifts when you flush, lets water leave the tank, and then seals the opening so the tank can refill.
When it wears out, the toilet may run, flush weakly, refill on its own, or leak water from the tank into the bowl. Most standard flapper replacements only require shutting off the water, emptying the tank, removing the old flapper, matching the size and style, and adjusting the chain.
Go slowly, avoid forcing brittle parts, and stop if the shutoff valve leaks or the tank hardware looks badly corroded.
| What you notice | Possible flapper issue | Quick check | Likely next step |
|---|---|---|---|
| Toilet keeps running | Flapper not sealing | Look for gaps or movement | Replace or adjust flapper |
| Random refill sound | Slow tank-to-bowl leak | Watch the flapper after refill | Replace worn flapper |
| Weak flush | Flapper closes too soon | Check chain length | Adjust chain or replace |
| Warped rubber | Old or damaged flapper | Touch gently with gloves | Match and replace |
How to Replace Toilet Flapper Parts: Start With the Symptoms
A toilet flapper is a rubber or plastic-and-rubber valve at the bottom of the toilet tank. When you press the handle, the chain lifts the flapper. Water rushes from the tank into the bowl, then the flapper drops back down to seal the flush valve opening.
A bad flapper usually causes one of two problems. It either does not seal well, which lets water leak from the tank to the bowl, or it does not lift and close correctly, which can affect the flush.
You may hear the toilet refill even when no one used it. This is sometimes called ghost flushing. The toilet may also run constantly, need handle jiggling, or produce a weak flush because the flapper closes too soon.
A flapper may need replacement if it looks warped, cracked, slimy, stiff, or uneven. If the rubber leaves residue on your glove when you touch it, that is another sign it may be breaking down.
Before buying a replacement toilet flapper, look at the existing part. Size and style matter. Some toilets use a common 2-inch flapper, while others use a larger 3-inch flapper or a model-specific design. A universal flapper can help in many standard toilets, but it still needs to match the flush valve size and toilet style.
If the toilet will not flush even though it does not seem clogged, check our toilet will not flush but not clogged guide first.
Shut Off Water and Empty the Tank
Before touching parts inside the tank, shut off the toilet’s water supply. The shutoff valve is usually on the wall or floor behind the toilet. Turn it clockwise until it stops. Do not force it if it feels stuck, rusty, or starts leaking.
Remove the tank lid carefully and set it on a towel. Toilet tank lids are heavier and easier to chip than many people expect. Place it somewhere flat and safe, not balanced on the toilet seat.
Flush the toilet once to empty most of the water from the tank. Some water will remain at the bottom, which is normal. A small towel, sponge, or small bucket can help remove extra water if needed.
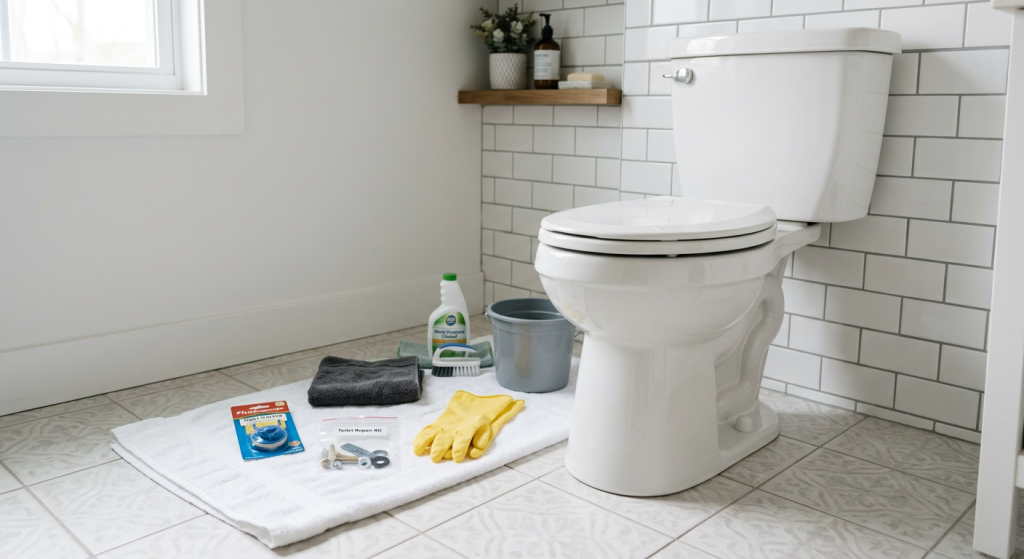
Helpful supplies for this repair:
- Replacement toilet flapper
- Gloves
- Towel
- Small bucket
- Flashlight
- Basic cleaning supplies
Use the flashlight to look inside the tank before removing anything. Check whether the flapper connects to two side ears on the overflow tube or slides over a central post. Also look for corrosion, cracked plastic, or parts that seem brittle.
If the shutoff valve leaks after you turn it, stop the repair and call a plumber. A flapper replacement should not turn into a valve repair or pipe problem.
Remove the Old Flapper and Match the Replacement
Once the tank is mostly empty, disconnect the chain from the flush handle arm. It may be clipped through one of several holes. Notice which hole it uses before removing it. You can take a quick photo with your phone if that helps you remember the setup.
Next, remove the old flapper from the overflow tube or flush valve mounts. Many standard flappers have two rubber ears that slip off small pegs. Others may have a ring that slides down over the overflow tube. Move gently. Old rubber can tear, and old plastic parts can crack if you twist them too hard.
After the flapper is out, compare it to the replacement. The most important things are the flush valve size, attachment style, and general shape. If the old flapper is marked with a brand, size, or part number, use that information when choosing a new one.
Match these details before installing:
- 2-inch or 3-inch flush valve size
- Side-ear or ring-style attachment
- Chain connection style
- Toilet brand or model, if visible
- Adjustable float or no float
- Similar shape and sealing surface
A toilet repair kit may be useful if several tank parts are worn, but do not replace more than necessary unless you are comfortable with the work. This guide is focused on a standard flapper replacement, not rebuilding the whole toilet tank.
Wipe the flush valve seat gently before installing the new flapper. This is the rim where the flapper seals. Mineral buildup or debris can keep a new flapper from sealing. Use a soft cloth or sponge, not sharp tools.
Install the New Flapper and Adjust the Chain
Attach the new flapper the same way the old one was installed. If it uses side ears, connect them to the pegs on the overflow tube. If it uses a ring-style design, follow the flapper’s setup so it sits correctly around the overflow tube.
The flapper should move freely up and down. It should sit flat over the flush valve opening without twisting, folding, or pulling to one side. If it looks crooked, remove it and reseat it before turning the water back on.
Reconnect the chain to the flush handle arm. Chain length matters more than many beginners realize. If the chain is too tight, it can hold the flapper slightly open and cause the toilet to run. If the chain is too loose, the handle may not lift the flapper enough for a full flush.
A good starting point is a little slack in the chain when the handle is at rest. The chain should not be stretched tight, and it should not sag so much that it gets caught under the flapper.
Press the handle while the tank is still empty and watch the flapper move. It should lift cleanly and fall back into place without catching. If the chain snags or the flapper drops too soon, adjust the clip to a different hole on the handle arm.
Do not overtighten or force any clips, hooks, or brittle plastic parts. Most flapper parts are designed to clip into place with light hand pressure.
Turn Water Back On and Test the Flush
Turn the shutoff valve counterclockwise to let water back into the toilet tank. Watch the tank as it fills. Look closely at the new flapper, the flush valve opening, and the chain. The flapper should stay seated while the tank fills.
Once the tank reaches its normal water level and the fill valve stops, wait for a minute. If the toilet stays quiet, that is a good sign. If water keeps running into the bowl or the fill valve turns on again, the flapper may not be sealing or the chain may be too tight.
Flush the toilet and watch the full cycle. The flapper should lift, stay open long enough for a good flush, and then close smoothly. The tank should refill and stop without needing you to jiggle the handle.
After the first test flush, check for:
- A strong, normal flush
- The flapper closing flat
- A chain that does not catch
- No water trickling into the bowl
- No refill sound after the tank stops
- No leak at the shutoff valve
If the flush is weak, the chain may be too loose or the flapper may be closing too soon. If the toilet runs, the chain may be too tight, the flapper may be the wrong size, or the flush valve seat may still have buildup.
Make small adjustments one at a time. Changing too many things at once makes it harder to know what fixed the problem.
If the fill valve keeps running after the flapper is working, see our toilet fill valve not shutting off guide.
Common Mistakes to Avoid
Replacing a toilet flapper is usually simple, but a few mistakes can keep the toilet from working correctly.
Avoid these beginner flapper mistakes:
- Buying a flapper without checking the size
- Leaving the chain too tight
- Leaving so much slack that the chain catches
- Forcing old rubber or brittle plastic parts
- Scraping the flush valve seat with sharp tools
- Ignoring a leaking shutoff valve
Another common mistake is assuming the flapper is always the problem. A running toilet can also be caused by the fill valve, water level, flush valve seat, handle, or chain. If the new flapper is correctly matched and adjusted but the toilet still runs, the issue may be elsewhere in the tank.
Do not keep bending, prying, or tightening parts to make them work. Toilet tank parts are usually plastic, rubber, and porcelain. They are meant to fit together cleanly, not be forced.
Also avoid using harsh cleaners inside the tank. Some products can wear down rubber parts faster. Basic cleaning supplies and gentle wiping are usually enough for the area around the flapper seat.
When to Call a Plumber
Call a plumber if the shutoff valve leaks, will not turn, or feels like it may break. A beginner flapper replacement should start with a working shutoff valve. If you cannot safely stop water to the toilet, the job should not continue.
You should also stop if the tank parts are badly corroded, the overflow tube is cracked, the flush valve assembly is loose, or the toilet continues running after you install a properly matched flapper. Those problems may require more than a simple flapper swap.
If water appears outside the toilet, around the tank bolts, behind the toilet, or on the floor, stop and trace the leak before using the toilet again. A flapper leak usually sends water from the tank into the bowl, not onto the floor.
Call a plumber if you are unsure what part is failing or if the repair would require major valve replacement, pipe work, toilet removal, or rebuilding the tank.
Final Thoughts
Learning how to replace toilet flapper parts is a useful beginner repair for a running toilet, weak flush, ghost flushing, or water leaking from the tank into the bowl. Start by shutting off the water, emptying the tank, removing the old flapper, and matching the replacement carefully.
Install the new flapper gently, adjust the chain, and test the flush before calling the job done. If the shutoff valve leaks, parts are badly corroded, or the toilet still runs after a proper replacement, stop and call a plumber.