
how to recaulk windows the right way
If you are learning how to caulk windows, start by removing failed material and confirming that the joint should actually be sealed. The bonding surfaces must be clean, sound, dry unless the product allows damp application, and compatible with the new sealant. The bead must contact both sides of the joint and be allowed to cure properly. Caulk cannot repair rot, failed flashing, cracked glass, structural movement, missing materials, or unexplained water intrusion.
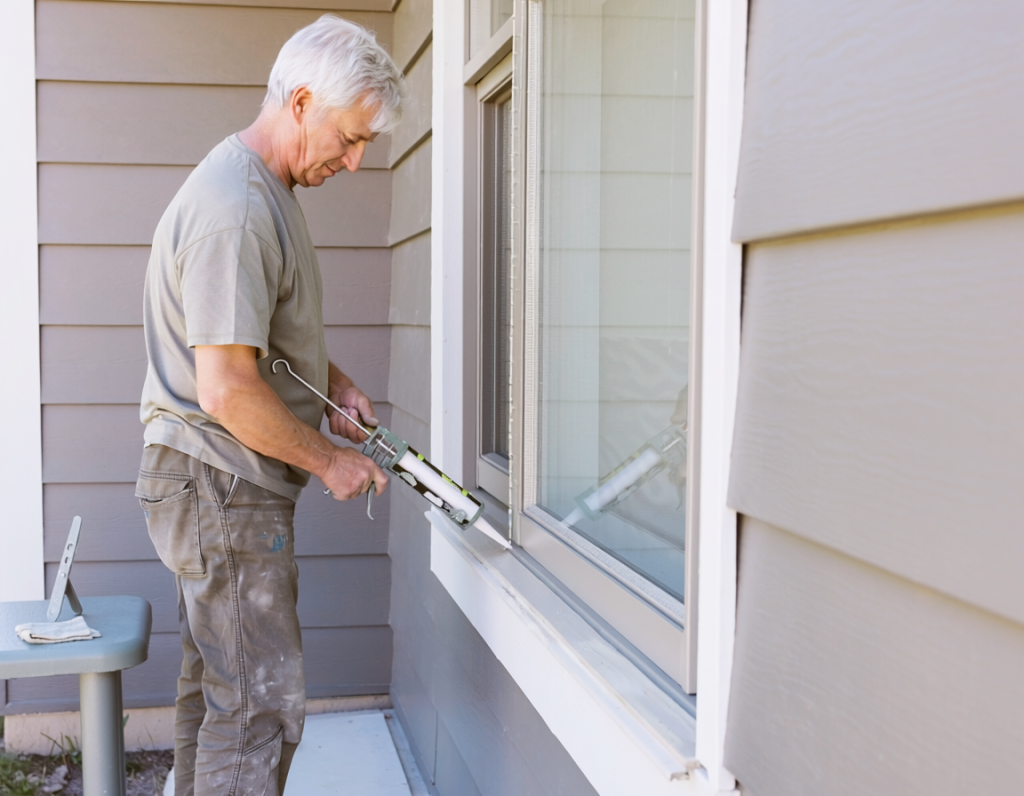
| Joint condition | Recommended action | Why |
|---|---|---|
| Old bead cracked, loose, or separating | Remove failed material and recaulk if the joint is appropriate | New caulk needs sound bonding surfaces |
| Joint dirty or damp | Clean and dry before sealing | Dirt and moisture can weaken adhesion |
| Wood or trim soft or rotten | Repair damage first | Caulk cannot restore deteriorated material |
| Unusually deep gap | Evaluate joint depth and possible backing | Deep cavities should not be filled solid with caulk |
| Weep hole, track, drain, or moving joint | Leave unsealed | These components need to drain or move |
| Water entering from an unclear source | Diagnose the source first | Another building component may be leaking |
When Window Caulk Needs Replacement
Exterior window caulk does not need replacement simply because it looks older.
Look for actual signs of failure, such as:
- cracks
- missing sections
- hardened or brittle material
- shrinkage
- peeling
- bubbles
- separation from one side of the joint
- recurring gaps
- failed adhesion
Discoloration alone does not always mean a bead has failed.
Before you recaulk windows, consider why the old material deteriorated. Installing new sealant without correcting the underlying problem can lead to the same failure again.
Possible causes include:
- poor surface preparation
- persistent moisture
- excessive joint movement
- incompatible materials
- the wrong type of sealant
- an oversized joint
- deteriorated surfaces
For example, a bead that repeatedly pulls away from one material may indicate poor compatibility, movement beyond the sealant’s capability, or a damaged substrate.
A joint that remains wet may have a drainage or water-intrusion problem that must be corrected before sealing.
Confirm That the Joint Should Be Caulked
Caulk belongs in suitable fixed joints between stationary materials.
Depending on the window and surrounding construction, appropriate locations may include:
- fixed trim-to-siding joints
- stationary frame-to-trim joints
- suitable exterior perimeter joints
- confirmed fixed interior air-leak joints
Do not assume every visible gap around a window should be filled.
Windows contain components that need to move, drain, or remain accessible.
Leave These Components Unsealed
Do not caulk:
- weep holes
- drainage slots
- tracks
- moving sash edges
- locks
- hinges
- window operators
- removable panels
- joints designed to move
- joints designed to drain
- unidentified openings
- glazing components unless the product and window system specifically allow it
If you are unsure about a particular opening, review where not to caulk around windows before applying sealant.
If the purpose of an opening is uncertain, leave it unsealed until you can identify what it does.
Blocking drainage can trap water inside the window assembly. Sealing moving components can interfere with normal operation.
Tools, Materials, and Working Conditions
Basic Tools and Materials
A typical recaulking project may require:
- the correct caulk or sealant
- a caulk gun
- a utility knife
- a plastic caulk-removal tool or scraper
- pliers where useful
- clean rags
- a small brush or vacuum
- surface-compatible cleaner
- painter’s tape if desired
- disposable gloves
- eye protection
- a drop cloth
- backer rod only when appropriate
The correct sealant depends on the materials, movement, exposure, joint dimensions, paintability requirements, and weather conditions.
If you have not chosen the product yet, review the best caulk for exterior windows before beginning the application process.
Do not use an open flame, heat gun, aggressive grinder, or power-tool removal method for ordinary window caulk.
These methods can damage glass, paint, siding, trim, flashing, or other nearby materials.
Check Conditions Before Starting
Read the sealant label before beginning.
Check:
- air temperature
- surface temperature
- rain forecast
- direct sunlight
- freezing restrictions
- damp-surface restrictions
- rain-ready time
- paint-ready time
- full-cure time
Air temperature alone does not tell you whether conditions are suitable.
A dark exterior surface in direct sun may be much hotter than the air, while shaded masonry or trim may remain considerably cooler.
Also remember that rain-ready does not mean fully cured.
A product may tolerate light rain after a specified time but still require much longer to reach full cure.
How to Remove Old Window Caulk
Successful recaulking usually starts with removing material that has lost adhesion or become unstable.
Step 1: Cut Along Both Sides
Use a sharp utility knife carefully to score along both edges of the failed bead.
Angle the blade away from the glass.
Use light, controlled passes instead of forcing the knife through thick material.
Avoid cutting into:
- vinyl
- siding
- flashing
- painted surfaces
- wood
- window seals
Stop if the glass moves, the frame shifts, or the surrounding material appears damaged.
Those signs indicate that the project may involve more than ordinary caulk replacement.
Step 2: Pull Away Loose Sections
Once the edges are scored, lift an accessible section of the old bead and pull slowly.
A plastic removal tool or pliers may help with loose material.
Do not pry against the glass.
If the bead resists removal, rescore the bond rather than applying increasing force.
Pulling aggressively can damage surrounding paint, trim, siding, or window components.
Step 3: Remove Unstable Residue
Remove:
- loose flakes
- brittle sealant
- dirt
- dust
- unstable paint where appropriate
- material that will prevent good adhesion
You do not need to damage a sound surface in pursuit of perfectly bare material.
The goal is a stable, compatible bonding surface.
Old silicone and other incompatible residues may interfere with adhesion of some new sealants. Follow the new product’s surface-preparation requirements.
Do not experiment with random solvents. A cleaner that works on one material may stain, soften, or damage another.
Step 4: Inspect the Exposed Joint
With the old bead removed, inspect the joint before applying anything new.
Look for:
- rot
- soft wood
- cracked trim
- loose siding
- missing materials
- active moisture
- failed flashing
- unusually large gaps
- movement
If any of these conditions are present, address the underlying problem first.
New caulk should not be used to conceal damaged materials.
How to Clean and Prepare the Joint
Surface preparation strongly affects adhesion.
Joint-Preparation Sequence
Use this basic order:
- Remove remaining loose debris.
- Clean both bonding surfaces.
- Remove grease, dust, soap, and other residue.
- Allow the joint to dry unless the sealant specifically allows damp application.
- Address loose paint or unstable material.
- Confirm that both sides of the joint are sound.
- Check joint width and depth.
- Install backer rod only when appropriate.
- Apply painter’s tape if desired.
Painter’s tape is optional.
It can help create a cleaner edge, particularly for beginners, but do not position the tape over areas where the sealant needs to bond.
A successful bead needs direct contact with both sides of the joint.
If the gap is unusually deep, do not automatically fill the entire cavity with sealant. Joint depth may need to be controlled with an appropriate backing material.
How to Apply and Smooth the New Bead
Prepare the Cartridge and Gun
Before loading the cartridge:
- inspect it for damage
- verify the product label
- review expiration or storage information if provided
- read the application instructions
Cut the nozzle slightly smaller than you think you need at first.
You can enlarge the opening if necessary, but you cannot make an oversized nozzle smaller again.
Pierce the inner seal when required and load the cartridge correctly into the gun.
A short test bead on scrap material can help you get a feel for the flow before working on the window.
Position the Nozzle
Hold the nozzle so the sealant is directed into the joint rather than simply smeared across the surface.
The bead should contact both bonding surfaces.
Maintain:
- a consistent angle
- steady gun pressure
- controlled movement
Some manufacturers or sealant types may recommend a particular technique, so do not treat one universal push-versus-pull method as mandatory.
The goal is reliable contact and a continuous bead.
Apply a Steady Bead
Move at a consistent pace while applying steady pressure to the trigger.
Try to create a continuous bead without:
- thin smears
- oversized mounds
- air pockets
- skipped sections
- repeated starts and stops
Release gun pressure when you reach the end of the joint so sealant does not continue flowing unnecessarily.
Do not fill a large wall cavity solid with caulk.
A gap that requires a large quantity of material may need backing, repair, or further evaluation.
Tool and Smooth the Bead
Tooling shapes the bead and helps press the sealant against both sides of the joint.
It can:
- improve surface contact
- remove excess material
- shape the bead
- reduce weak edges
- eliminate some voids
Use a purpose-made caulk tool or, when allowed by the product’s safety instructions, a gloved finger.
Do not use saliva to tool sealant.
Do not assume soapy water or another liquid is compatible with every product. Some tooling liquids can interfere with adhesion or curing.
One controlled tooling pass is usually better than repeatedly working the bead.
Overtooling can make the bead too thin or pull it away from the joint edges.
If painter’s tape is used, remove it while the bead is still workable when the product instructions call for that timing.
Curing and Final Inspection
After application, allow the sealant to cure according to the manufacturer’s directions.
Several different timing terms may appear on the label.
Skin-over time describes when the outer surface begins forming a film.
Rain-ready time indicates when the product may tolerate specified exposure to rain.
Paint-ready time tells you when compatible paint may be applied.
Full-cure time is the period required for the material to reach its intended cured state.
These are not interchangeable.
During curing:
- leave the bead undisturbed
- avoid washing it too soon
- avoid painting too soon
- protect it from rain when required
- follow temperature and moisture restrictions
A bead that feels dry at the surface may not be fully cured underneath.
Check the Finished Joint for These Problems
After application and again after curing, inspect for:
- missing sections
- pull-away at corners
- poor adhesion
- bubbles
- cracks
- sagging
- unusually soft areas
- water collecting where it should drain
- sealant over a moving component
- sealant over a drainage component
Minor cosmetic imperfections do not necessarily affect performance.
Concentrate on adhesion, continuity, drainage, movement, and the condition of the surrounding materials.
Common Recaulking Mistakes
Mistakes That Can Weaken the Repair
Avoid:
- applying over loose old caulk
- sealing over dirt
- sealing over moisture when the product does not allow it
- sealing over mildew
- applying over unstable paint
- using an incompatible sealant
- cutting the nozzle too large
- making the bead too thin
- filling a deep cavity solid with sealant
- excessive smearing
- overtooling
- using an unapproved solvent or tooling liquid
- applying before unsuitable rain or freezing weather
- painting too early
- blocking drainage
- blocking moving parts
- caulking over rot
- caulking over unresolved water damage
Repeated recaulking will not stop water that is coming from another location.
Possible sources include:
- flashing
- roofing
- siding
- wall penetrations
- masonry or stucco cracks
- drainage failures
- failed glazing
- condensation
- concealed moisture
If water keeps appearing after the joint has been recaulked, do not automatically add another bead.
Identify the source first.
Caulk performs best when it seals the specific fixed joint it was intended to seal. It is not a universal repair material for unexplained water around a window.
Safety and When to Call a Professional
Professional help is appropriate when:
- the work is above safe ground-level reach
- ladder or roof access is required
- glass is cracked, loose, shifting, or unstable
- rainwater enters and the source is unclear
- the frame, sill, trim, siding, or wall is rotten or damaged
- the gap is unusually wide, deep, or moving
- flashing, glazing, or drainage may be involved
- siding, trim, glass, or window parts would need removal
- painted surfaces may contain lead
- widespread mold or hidden moisture is present
- the window cannot open, close, lock, drain, or remain secure
- you cannot determine whether the joint should be sealed
- you cannot safely work with a sharp tool near the glass
Do not continue an ordinary recaulking project when the condition involves unstable glass, significant damage, unsafe access, or an unidentified water source.
Final Thoughts
Knowing how to caulk windows correctly starts with sealing only appropriate fixed joints.
Remove failed material, prepare clean and sound surfaces, apply a continuous bead that contacts both sides of the joint, and follow the product’s curing instructions.
Do not use caulk to conceal rot, failed flashing, structural movement, blocked drainage, damaged glass, or unexplained water intrusion. When the underlying joint and surrounding materials are sound, careful preparation and application give the new sealant the best chance to perform as intended.