
sliding glass door weatherstripping: types and replacement basics
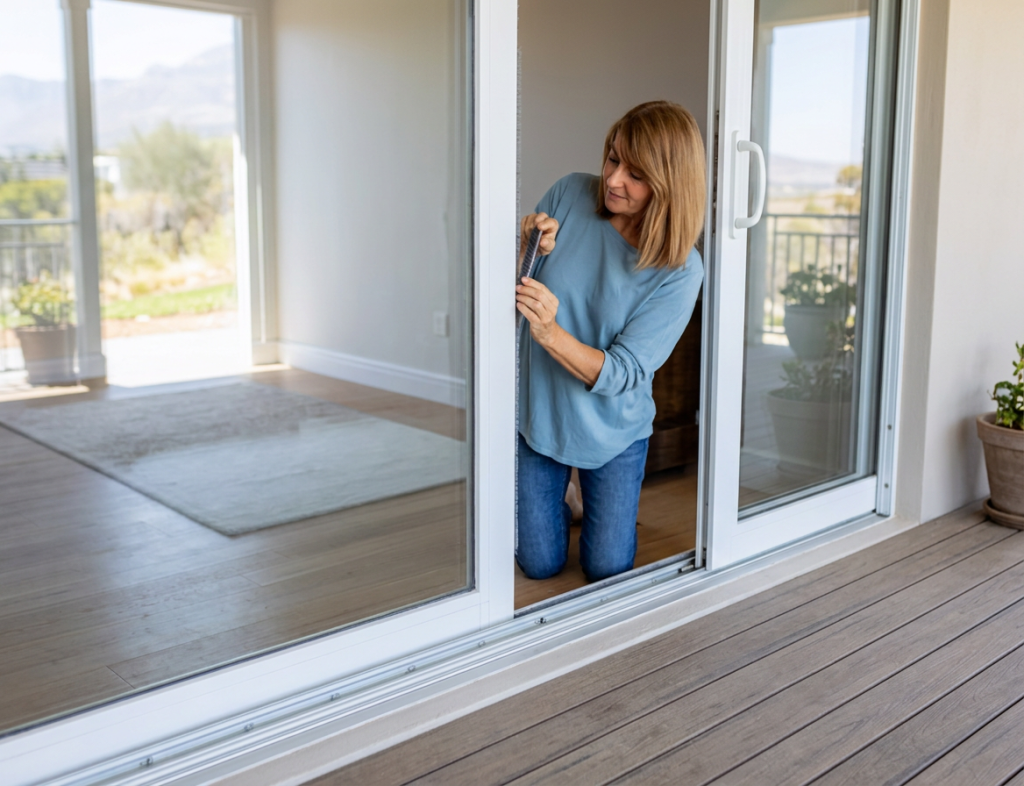
Sliding glass door weatherstripping helps limit air movement where the moving panel meets the frame, jamb, or stationary panel. Replacement works best when the new material matches the original seal’s location, profile, dimensions, orientation, and attachment method. One sliding door may use several different seal types, so generic foam or oversized weatherstripping can create drag, interfere with locking, or block drainage rather than improve the door.
| Weatherstripping type | Common sliding-door use | Main matching concern |
|---|---|---|
| Pile or brush seal | Panel edges, jambs, meeting areas | Backing width, pile height, channel fit |
| Fin-pile seal | Moving contacts needing improved airflow resistance | Fin orientation, backing width, pile height |
| Bulb/compression seal | Jamb, head, or closed-position contacts | Bulb size, base shape, intended compression |
| Vinyl/rubber flap | Panel edges and frame contacts | Width, flexibility, direction |
| Interlocking meeting seal | Where moving and stationary panels overlap | Door-specific shape and alignment |
| Adhesive-backed foam | Suitable accessible compression areas | Thickness, adhesion, compatibility |
What Sliding-Door Weatherstripping Does
Weatherstripping is designed for joints that move or make contact when the door closes. Some sliding door seals use fibers that brush lightly against an adjacent surface as the panel moves. Others compress when the door reaches its fully closed position. In either case, a properly fitted seal should reduce unwanted airflow while still allowing the panel to slide, close, latch, and lock normally.
Weatherstripping is different from caulk. Caulk is generally used at suitable fixed joints where movement is limited. Weatherstripping is intended for moving or closing contacts. Neither material repairs worn rollers, distorted frames, defective locks, damaged glass, structural movement, rot, or rainwater problems.
That distinction matters because adding thicker weather stripping for a sliding glass door will not correct a mechanical problem. If the panel no longer sits correctly in the opening, the door itself may need attention before replacement weatherstripping can work as intended.
Common Types of Sliding Glass Door Weatherstripping
Pile or Brush Weatherstripping
Pile weatherstripping consists of dense fibers attached to a narrow backing. It is commonly found along panel edges, jambs, and meeting areas where the moving door needs light, continuous contact without excessive friction.
Matching pile requires more than finding material that looks similar. Backing width determines whether the strip fits its channel, while pile height and density determine how firmly it contacts the opposite surface. Pile that is too short may leave an air gap. Material that is too tall or dense can increase sliding resistance or prevent the panel from closing fully.
Fin-Pile Weatherstripping
Fin-pile combines brush fibers with a thin flexible fin running through the pile. The fin can improve resistance to airflow while allowing the seal to remain relatively low-friction.
When replacing fin-pile, note the backing width, pile height, fin height, and the direction the fin faces. An ordinary brush seal may not perform the same way even when its overall dimensions appear similar. Photographing the original installation before removal can help preserve the correct orientation.
Bulb and Compression Seals
Bulb seals compress when the panel closes against a jamb, head, or other contact surface. Depending on the door, the material may be rubber, vinyl, silicone, or a similar flexible compound.
The replacement profile must provide the intended amount of compression. Diameter, wall thickness, base shape, groove dimensions, and orientation can all matter. An oversized bulb may make the door difficult or impossible to close. An undersized one may barely contact the mating surface and provide little sealing benefit.
Flap, Leaf, and Flexible Vinyl Seals
Flexible flap or leaf seals depend heavily on orientation. They may be installed along panel edges or other frame contacts and are designed to flex in a particular direction as the door moves or closes.
A replacement should normally face the same direction as the original. If installed backward, it may fold underneath itself, rub excessively, or enter an area where rollers or other moving parts travel.
Interlocking Meeting-Stile Seals
At the point where the moving panel overlaps the stationary panel, some doors use shaped interlocking components combined with weatherstripping. These parts help create the meeting seal while maintaining the proper relationship between the panels.
Meeting-stile components can be door-specific. A generic substitute may not reproduce the original overlap, sealing surface, or locking relationship. If replacement requires dismantling the stationary panel or meeting stile, the job is no longer a simple beginner weatherstripping replacement.
Adhesive-Backed Foam Tape
Adhesive foam can be useful at certain accessible compression points, but it is not a universal replacement for channel-mounted pile, bulbs, or interlocking seals. Foam may lose adhesion, compress permanently, or interfere with normal closure if it is too thick.
Use it only where the door’s original design and available surface are compatible with adhesive weatherstripping. Keep it away from roller paths, drainage areas, and moving joints where loose material could enter the track.
Signs the Existing Seal Needs Replacement
Worn weatherstripping often shows both visible and functional changes. Pile may become flattened, sections may pull loose, and center fins can split. Rubber or vinyl seals may become brittle, cracked, or permanently flattened. Adhesive-backed material can release from the frame, while other seals may shrink enough to create gaps at corners or ends.
Bunched material or weatherstripping that has begun entering the track also deserves attention. You may notice daylight or repeatable airflow at a location where the seal should be making contact.
However, uneven contact does not always mean the weatherstripping has failed. If a seal contacts properly near one end of the door but leaves a noticeable gap near the other, panel alignment may be the real problem. Installing taller or thicker material to compensate can create excessive drag without fixing the underlying geometry.
How to Match Replacement Weatherstripping
Record the Location and Orientation
Before removing anything, photograph the existing seal in place. Record whether it is installed on the moving panel, jamb, head, bottom edge, meeting stile, stationary panel, or another fixed section.
Pay particular attention to the direction of fins and flaps. Include nearby channels, locks, drainage openings, and hardware in your photographs so the replacement can be installed in the same relationship.
Remove Only an Accessible Sample
A short intact sample can make replacement matching much easier. Remove one only when it is readily accessible and can be taken out without disturbing glass, retainers, or major door components.
Stop if obtaining a sample would require lifting the glass panel, removing the door from its track, dismantling the stationary panel, or removing retainers. Those steps extend beyond basic accessible-seal replacement.
Measure the Profile Carefully
Several dimensions may matter depending on the seal. For pile products, measure the backing width and pile height. Fin-pile may also require fin height and orientation. Bulb seals may depend on bulb diameter and base shape, while flap seals can require an accurate flap width and overall profile thickness.
For channel-mounted products, the channel or kerf width is especially important. A seal that matches only the overall thickness may still fail to fit the mounting system.
Remember that worn material may no longer represent its original dimensions accurately. Manufacturer information, model numbers, old labels, diagrams, or supplier profile-matching guides can sometimes provide a more reliable comparison.
Match the Attachment Method
Sliding door seals may slide into a channel, press into a groove or kerf, adhere to a prepared surface, attach with clips, or use retainers or fasteners.
Match the original attachment method whenever possible. An adhesive strip should not automatically replace a channel-mounted or retained profile simply because it is easier to install. The replacement must remain secure without interfering with the door’s operation.
Basic Replacement Process
Prepare the Door and Work Area
Confirm that you have the correct replacement profile before removing the old material. Note the original orientation, corner arrangement, and nearby drainage openings, tracks, locks, and service points.
Limit the project to weatherstripping you can reach without moving heavy glass or dismantling the door. Keep the panel stable and avoid working in a way that could allow it to leave its track.
Remove Accessible Old Material
Simple adhesive-backed or accessible channel-mounted weatherstripping can often be removed carefully by hand. Work gradually instead of using excessive force.
Do not pry near the glass, loosen retainers, or lift the door panel. If the old seal will not release without force or component removal, stop rather than turning a small weatherstripping job into a door-disassembly project.
Clean the Mounting Area
Remove ordinary dirt, loose fibers, and old residue using methods that are compatible with the frame material. Adhesive-backed products generally need a clean, dry surface to bond correctly.
Avoid aggressive scraping or strong solvents that could damage finishes or nearby components. The goal is to create a clean mounting surface without altering the door.
Install the Replacement in Its Natural Length
Install the new material in the same orientation as the original. Channel backing should seat correctly, and fins or flaps should face the proper direction.
Do not stretch weatherstripping during installation. Stretched material can later shrink and open gaps at the ends. Adhesive-backed seals should also be applied without pulling them tight.
Trim material on a stable work surface when possible. Finished corners and ends should not contain excessive overlap, large gaps, or bunching.
Test the Completed Installation
Open and close the door several times after installation, then verify that the lock engages normally. The panel should move without unusual resistance while the weatherstripping maintains its intended light contact or compression.
Watch the seal as the door moves. No material should enter the track, interfere with rollers, or cover drainage openings. If the panel will not close or lock without excessive force, do not assume an oversized seal will eventually wear in.
When Weatherstripping Is Not the Real Problem
New weatherstripping cannot correct a crooked panel, worn or uneven rollers, a bent track, damaged threshold, distorted frame, structural movement, or a latch that no longer pulls the panel into position. It also cannot repair a loose stationary panel, missing door components, or water-damaged materials.
One useful clue is uneven seal contact. If the weatherstripping touches properly near one end but has a substantial gap at the other, alignment or door geometry is more likely than uniform weatherstripping wear. In that situation, review the broader causes of sliding glass door drafts before installing progressively thicker seals.
Replacement weatherstripping works best when the door is already operating in the position its manufacturer intended.
Protect Tracks, Drainage, and Door Operation
Sliding door assemblies may contain roller channels, drainage paths, weep openings, adjustment access points, and other service areas. These openings can look like gaps that should be sealed, but blocking them may cause operational or moisture problems.
Keep these areas unobstructed:
- roller travel paths
- weep holes and drainage openings
- locks, latches, and fasteners
- adjustment and service access
- joints that must move during normal operation
Do not fill the track with caulk or foam, bridge drainage channels, or permanently seal moving joints. For the same reason, understanding where not to caulk around windows can help prevent well-intended sealing work from trapping water or interfering with normal movement.
Any replacement material should preserve normal opening, closing, locking, drainage, and emergency operation.
Common Mistakes
A common mistake is buying replacement weatherstripping before examining the original profile closely. Overall thickness alone is rarely enough. Backing width, channel size, pile height, fin orientation, bulb shape, and attachment method may all affect whether the replacement actually fits.
Another mistake is treating similar-looking products as interchangeable. Plain pile may not substitute properly for fin-pile, and a flexible flap installed backward may fold or drag. Stretching adhesive weatherstripping during installation can lead to shrinkage and open ends later.
Thick foam installed around an entire door is another frequent problem. Added material can make the panel difficult to slide, prevent the latch from engaging, cover drainage features, or interfere with service access. Oversized weatherstripping should not be installed with the expectation that it will eventually wear into the correct shape.
Safety and When to Call a Professional
Professional service is appropriate when:
- glass is cracked, loose, shifting, or unstable
- the panel feels as though it could leave the track
- a heavy glass panel must be lifted or removed
- the stationary panel or retainers must be dismantled
- the correct weatherstripping profile cannot be identified
- the door will not open, close, lock, or remain secure
- rollers, tracks, locks, frames, or thresholds need repair
- rainwater enters the opening
- surrounding trim, walls, or flooring are soft, rotten, warped, or widely stained
- widespread mold or concealed moisture is present
- the opening is severely out of square
- structural movement is suspected
- emergency-exit or security concerns exist
- questionable older coatings would need to be disturbed
Beginner weatherstripping work should remain limited to accessible seals. Do not lift the glass panel, remove the sliding door from its track, dismantle the stationary panel, pry near glass, remove retainers, or disturb coatings that may be hazardous.
Final Thoughts
Successful sliding glass door weatherstripping replacement begins with identifying what the manufacturer originally used. Match the profile, dimensions, orientation, and attachment method rather than simply choosing a material that looks close.
The finished seal should reduce unwanted airflow without interfering with sliding, closing, latching, locking, drainage, or service access. Keep beginner repairs limited to accessible weatherstripping, and treat mechanical, structural, or water-related problems as separate issues that require their own evaluation.