
how to fix a drafty door without replacing it
If you want to know how to fix a drafty door, start by finding exactly where outside air is entering. The right repair may be new perimeter weatherstripping, a door sweep or bottom seal, better threshold contact, a hardware or alignment correction, or sealing a confirmed fixed joint around the frame. Do not add foam, caulk, tape, or extra seals until you have confirmed a repeatable air leak and identified its source.
| Where the draft is felt | Likely issue | General repair category |
|---|---|---|
| Along top or side edges | Worn seal or uneven contact | Weatherstripping or alignment |
| Beneath the door | Sweep, bottom seal, threshold, or alignment | Bottom-door repair |
| At one corner | Uneven gap or door alignment | Hardware/alignment evaluation |
| Between frame and trim/wall | Failed stationary joint or concealed gap | Fixed-joint evaluation |
| Around glass, mail slot, or pet door | Component seal or fastener problem | Component-specific repair |
| Near door surface without detectable airflow | Cold surface rather than air leakage | Confirm before sealing |
Confirm Where the Air Is Entering
Begin with the exterior door fully closed and locked as it normally would be. Locking matters because many doors are designed so the latch or deadbolt helps pull the slab into its intended sealed position. Testing a door while it is partly closed can make a normal opening look like a failed seal.
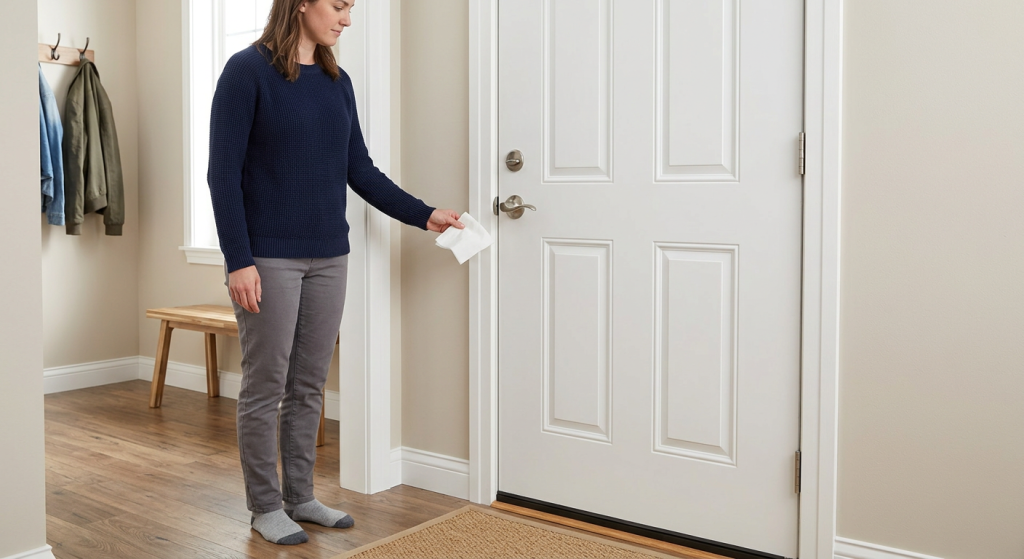
Move your bare hand slowly around the top, both sides, and bottom of the door. Check the edges of glass inserts, mail slots, pet doors, and the trim where the door frame meets the wall. A lightweight tissue can also help reveal consistent airflow. Windy weather often makes leaks easier to find, although indoor fans, heating vents, moving curtains, and pressure changes inside the house can produce misleading air movement.
Also distinguish actual airflow from a cold surface. Glass, metal, and even wood can feel chilly enough to create the sensation of a draft when no outside air is moving through the opening. Confirm that the airflow is repeatable before adding a sealing product.
Avoid using candles, matches, lighters, incense, smoke, or any other flame-based method to locate drafts. A hand or lightweight tissue is sufficient for a basic homeowner inspection.
Check the Door in a Logical Order
Confirm Complete Closure
Before inspecting seals, make sure nothing is preventing the door from closing normally. Rugs, mats, debris, loose weatherstripping, screens, or stored items near the opening can keep the slab from reaching its designed closed position.
The door should close and lock without slamming, lifting the handle side, forcing the slab sideways, or leaning against it. If you routinely have to use force, the draft may be a symptom of an alignment or hardware problem rather than simply worn weatherstripping.
A door that does not reach its proper closed position cannot seal consistently. Adding thicker material around the perimeter may make that problem worse by increasing resistance.
Check the Gap Around the Perimeter
Look at the spacing between the door slab and frame around the top and sides. The gap does not have to appear perfectly identical everywhere, but major differences deserve attention.
A noticeably wider corner, sloping top edge, hinge-side rubbing, or latch-side contact at only one point can indicate sagging, warping, hinge movement, strike misalignment, or frame movement. Daylight showing where weatherstripping should make contact is another useful clue.
If the door springs back after you close it or requires pressure to remain latched, do not try to conceal the condition with thicker weatherstripping. Correct sealing depends on the door first sitting reasonably well in the opening.
Check Weatherstripping Contact
Inspect the existing weatherstripping around the top and sides. Look for missing sections, tears, flattened areas, brittleness, looseness, paint buildup, or locations where the seal no longer contacts the door.
Weatherstripping should usually compress lightly and consistently when the door is closed. It should not be crushed excessively, folded over, or so thick that the door becomes difficult to latch.
If the slab and frame are sound and reasonably aligned, damaged or incomplete weatherstripping may be the correct repair. The replacement should be compatible with the location, mounting method, clearance, and amount of compression required rather than simply being the thickest material available.
Check the Bottom of the Door
Air beneath a door can come from several different places. The sweep may be worn or damaged, the bottom seal may have lost contact, the threshold may be dirty or poorly positioned, or the door may sit unevenly in the opening.
Look for visible daylight, a torn sweep, missing material, debris on the threshold, or contact that is firm at one end but absent at the other. Uneven bottom contact may indicate alignment rather than a failed seal.
Do not stack multiple sweeps or strips in an attempt to close the gap. Excess material can drag, interfere with closing, or create a trip or operating problem.
Check the Latch and Hinges
A properly operating latch should hold the door in its intended closed position without allowing excessive movement. With the door latched, notice whether the slab still moves loosely toward and away from the frame.
Watch for sagging, rubbing, clearly loose hinge hardware, strike misalignment, or a lock that is difficult to operate. Tightening clearly loose, accessible screws may be reasonable, but more involved hinge or strike correction can change door alignment and security.
Do not drill new holes, shim hinges, enlarge strike openings, or rehang the door as part of a basic draft-sealing project.
Match the Leak Location to the Repair
Worn Perimeter Weatherstripping
Replacing perimeter weatherstripping makes sense when the existing seal is damaged or missing, the door and frame are otherwise sound, and the gap around the perimeter is reasonably consistent.
Replacement material must fit the original location and attachment method while allowing the door to close and lock normally. Profile, thickness, clearance, and intended compression all matter. Universal foam is not automatically appropriate for every door.
If a new seal causes the door to require force, the material may be too thick or the underlying alignment problem may not have been addressed.
Draft Beneath the Door
A bottom draft may involve the sweep, door-bottom seal, threshold contact, debris, alignment, or a combination of these conditions. Identifying which part has failed prevents unnecessary stacking of sealing products.
A sweep and perimeter weatherstripping perform different jobs, so reviewing door sweep vs weatherstripping can help clarify which type of seal belongs at the leak location.
The goal is consistent contact that limits airflow without making the door difficult to operate.
Door Alignment or Hardware Problems
Weatherstripping cannot compensate for severe sagging, warping, looseness, or misalignment. A door that must be lifted, slammed, pushed sideways, or forced to lock should have its alignment and hardware evaluated before additional seals are installed.
Clearly loose accessible hardware may sometimes be tightened, but continuing rubbing, frame movement, significant sagging, or latch trouble may require professional adjustment. Correcting the mechanical problem first gives weatherstripping a better chance of sealing properly.
Fixed Frame Joints and Door Components
Fixed Frame-to-Wall Joints
Not every exterior door air leak occurs between the slab and weatherstripping. Cracked or separated stationary joints where the frame, casing, or adjacent wall materials meet can also admit air.
Caulk may be appropriate at a confirmed fixed joint when the surrounding materials are dry, secure, and in good condition. Do not simply caulk every visible seam. Active water leakage, rot, movement, loose trim, or a concealed opening may need further evaluation before sealing.
Avoid applying caulk to hinges, locks, moving door edges, weatherstripping contact surfaces, drainage openings, or the threshold indiscriminately.
If you see daylight or feel airflow around the jamb, casing, or adjacent trim, the cause may involve a gap between door and frame rather than worn perimeter weatherstripping.
Mail Slots, Pet Doors, and Glass Inserts
Mail slots, pet doors, and glass inserts have their own seals, fasteners, and moving parts. Test each component separately rather than assuming that air felt nearby is coming through the main door perimeter.
Look for an accessible gasket that no longer contacts, a loose cover, or a component that does not close properly. Homeowner maintenance should remain limited to accessible parts that can be serviced without removing glass or compromising the door’s security.
A failed component seal may require replacement specific to that component rather than more weatherstripping around the door slab.
Temporary Draft-Control Options
Temporary measures can make a room more comfortable while you plan a permanent repair. A removable interior draft stopper placed at the floor may reduce airflow beneath a door. Removable sealing material can sometimes be used at a confirmed stationary interior joint, and a suitable temporary interior film may help when a glazed opening itself is contributing to heat loss.
These products should remain temporary and should not interfere with the door’s essential functions. Do not block the door from opening, cover the latch, deadbolt, or handle, allow material to enter the hinge or threshold area, trap moisture, or restrict an emergency exit.
Temporary products also should not conceal water damage, decayed materials, severe misalignment, or a failed lock. Those conditions need evaluation rather than cosmetic draft control.
When Basic Sealing Is Not Enough
Weatherstripping, sweeps, caulk, and temporary draft products are useful only when the surrounding door system is fundamentally sound. They cannot repair a badly warped door slab, severely damaged frame, rotten wood, unstable glass, failed lock, major hinge problem, damaged threshold, active water intrusion, or visible structural movement.
If moisture staining extends beyond the immediate opening, wood feels soft, or water enters during rain, treat the problem as more than an air-sealing issue. Covering damaged materials can hide continued deterioration without correcting its cause.
These conditions do not automatically mean the entire door must be replaced. A professional may determine that a threshold, hardware component, frame section, lock, or another individual part can be repaired while the rest of the door remains serviceable.
Common Mistakes
One of the most common mistakes is treating a cold surface as proof of outside airflow. Confirm the leak before buying materials. Otherwise, extra foam or caulk may do nothing to improve comfort.
Another mistake is installing thick weatherstripping without checking door clearance and alignment first. Excessive material can make the door difficult to close or lock. Similarly, stacking sweeps beneath the door may create drag while leaving the actual cause untouched.
Caulking moving edges is also ineffective and can interfere with normal operation. Keep caulk away from hinges, weatherstripping contact areas, movable joints, and drainage or service openings.
Do not slam a door against newly installed seals in the hope that they will compress into shape. If normal closing requires excessive force, stop and determine whether the seal is incorrect or the door has an alignment problem.
Finally, do not use a temporary draft stopper as a permanent repair for a failed bottom seal, water-damaged threshold, or security problem. Temporary comfort measures should not replace diagnosis.
Safety and When to Call a Professional
Professional evaluation is appropriate when:
- glass is cracked, loose, shifting, or unstable
- the door cannot open, close, latch, lock, or remain secure
- the slab or frame is badly warped
- the frame, threshold, sill, trim, or surrounding wall is soft, rotten, loose, or damaged
- water enters during rain
- widespread staining, mold, or concealed moisture is suspected
- the opening is severely out of square
- structural movement is visible
- major hinge, frame, or hardware alteration is required
- the door would need to be removed or rehung
- emergency exit or security could be affected
- unsafe ladder or exterior access would be required
- lead paint or another hazardous material may be disturbed
- you cannot identify which component has failed
Basic draft troubleshooting should not require removing the door slab, dismantling glass inserts, rehanging the door, modifying structural framing, or disturbing questionable coatings.
Final Thoughts
The most reliable way to fix a drafty exterior door is to confirm real airflow, locate the strongest leak, and match that location to the correct repair. The problem may be perimeter weatherstripping, a bottom seal, threshold contact, alignment or hardware, a fixed frame joint, or a separate door component.
Choose repairs that preserve normal closing, locking, drainage, security, and emergency use. If the door has water damage, significant movement, unstable glass, serious alignment trouble, or a security problem, broader evaluation is more appropriate than adding another layer of sealing material.