outside AC Unit Not Turning On? What to Check First
Outside AC unit not turning on? It is easy to think the entire system has quit.
A very common version of this issue is when the indoor part seems to run, but the outdoor unit never starts. That outdoor unit is also called the condenser, and most homeowners use those terms interchangeably.
The encouraging part is that some of the most common causes are simple. A thermostat setting, power problem, dirty filter, or condensate safety switch can all keep the condenser from coming on.
The key is knowing what you can safely check yourself and where to stop. Once the problem involves electrical components, damaged wiring, or refrigerant-related repairs, it is time to call a licensed HVAC technician.
Why the outside AC unit is not turning on
In many homes, the reason an outside AC unit is not turning on comes down to thermostat settings, electrical power, airflow trouble, or a safety control that has shut the system down.
The indoor part of your AC system moves air through the house. The outdoor unit releases the heat that was removed from inside. If the outdoor unit never starts, the system cannot cool the house properly.
That is why you may still feel air coming from the vents but notice that the home is not actually getting cooler.
Common reasons the outside AC unit may not turn on
- Thermostat settings are wrong
- A breaker has tripped
- The disconnect near the unit is off or has an issue
- The air filter is badly clogged
- Debris is restricting the outdoor unit
- A condensate drain problem has triggered a safety switch
- A capacitor, contactor, or fan motor has failed
- An indoor system problem is preventing the signal from reaching the outdoor unit
Check the thermostat settings first
This is the easiest and safest place to begin.
Make sure the thermostat is set to Cool and not Heat or Fan. Then lower the temperature setting a few degrees below the current room temperature.
Also check the fan setting. In many homes, it should be on Auto. If it is set to On, the indoor blower can keep moving air even when the outside unit is not running. That can make it seem like the AC is working when it is not.
If your thermostat uses batteries, replace them if the display is blank, faded, or acting oddly.
After making changes, give the system a few minutes. Some air conditioners have a short delay before the outdoor unit starts again.
Safe DIY checks
- Confirm the thermostat is set to Cool
- Lower the set temperature by 3 to 5 degrees
- Set the fan to Auto
- Replace thermostat batteries if needed
- Wait a few minutes to allow for a delayed startup
If the thermostat still does not seem to be calling for cooling, the issue may involve thermostat wiring, the thermostat itself, or an indoor control problem. That is usually a professional repair.
Check the breaker and AC disconnect
Air conditioners need steady power, and the outdoor unit often has more than one place where power can be interrupted.
Start with the main electrical panel. Look for a breaker labeled AC, air conditioner, condenser, or HVAC. If it has tripped, reset it one time.
Then check the disconnect box mounted near the outdoor unit. This is the shut-off box used to cut power during service. You can do a basic visual check to see whether it looks obviously off, loose, or damaged.
If your system uses a furnace or air handler indoors, make sure that part of the system still has power too. In some cases, the outdoor unit stays off because the indoor equipment is not powered properly.
Safe DIY checks
- Inspect the breaker panel
- Reset a tripped breaker once
- Look at the disconnect for obvious damage or an off position
- Check that the indoor unit has power
If the breaker trips again, stop there. Repeated tripping can point to a deeper electrical or mechanical problem, and that is not a beginner DIY situation.
Look for a clogged air filter or airflow issue
A dirty filter can cause more trouble than many homeowners expect.
When the filter gets packed with dust, airflow drops. On some systems, that can lead to freezing, overheating, or system shutdowns that affect whether the outdoor unit runs the way it should.
Turn the system off before removing the filter. Hold it up in good light. If it looks heavily coated with dust and debris, replace it.
Also take a quick look at your supply and return vents inside the house. Closed or blocked vents can add to airflow problems.
Safe DIY checks
- Turn the system off before removing the filter
- Replace a dirty air filter
- Make sure supply vents are open
- Check that return vents are not blocked
If the system starts working again after a filter change, keep watching it. If cooling still seems weak or inconsistent, there may be another issue behind it.
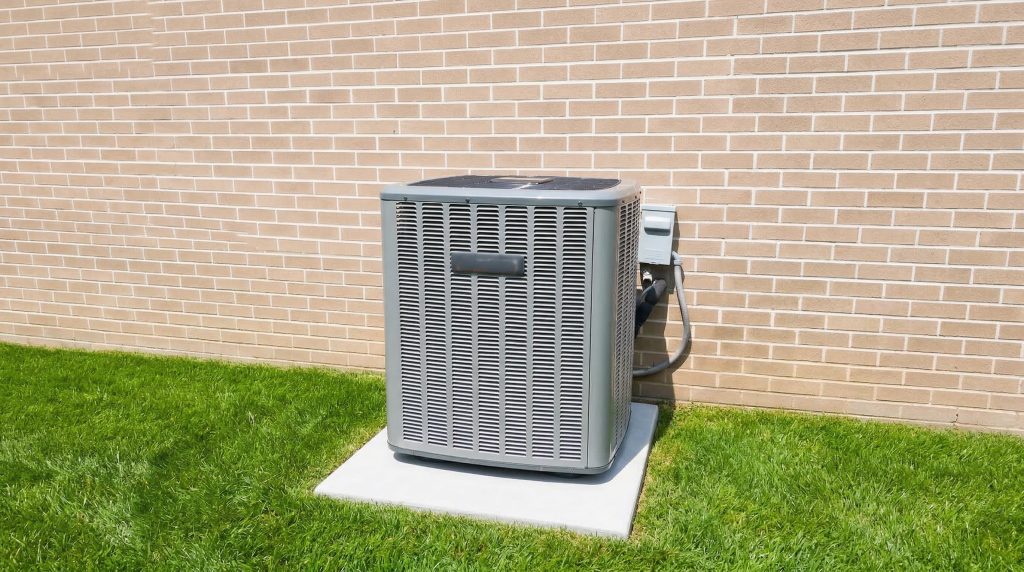
Clear debris around the outdoor unit
The outdoor unit needs room to breathe.
Leaves, grass clippings, weeds, dirt, and other debris can collect around the condenser. When airflow around the unit is restricted, the system may struggle to run properly or may shut down on a protective control.
Do a simple visual inspection. Clear away loose debris and trim back plants that are crowding the unit.
You can also look at the outer fins on the sides of the condenser. If they are covered with dirt or fluff, airflow may be reduced.
Be careful around the fins because they bend easily.
Safe DIY checks
- Remove leaves and debris from around the base
- Trim back plants that are too close
- Look for heavy dirt buildup on the outer fins
Do not remove panels or spray water near electrical areas unless you know the correct cleaning process. A separate guide on cleaning an outdoor AC unit safely is a better place for that full job.
Check for a tripped condensate safety switch
This is a common cause that many newer homeowners do not know about.
Your air conditioner removes moisture from indoor air, and that water leaves through a condensate drain line. If the line clogs, water can back up.
Some systems have a safety switch that shuts the system down to help prevent overflow or water damage. When that switch trips, the outside AC unit is not turning on because the system is trying to protect itself.
You may notice water near the indoor unit, a full drain pan, or a system that stopped without another obvious explanation.
Safe DIY checks
- Look for standing water near the indoor unit
- Check for a full drain pan if it is visible
- Inspect the drain area for obvious overflow
If you suspect a drain issue but are not sure how your system is set up, this is a reasonable stopping point. Some homeowners do clear drain lines themselves, but it is also easy to miss the real problem or make a mess.
Signs of a bad capacitor, contactor, or fan motor
This is usually where safe DIY ends.
A capacitor helps motors start and keep running. A contactor acts like an electrical switch that tells the outdoor unit when to come on. The fan motor spins the fan that moves air through the condenser.
If one of these parts fails, the outdoor unit may stay completely off, make a humming noise, or try to start and then shut back down.
Signs you might notice
- The outdoor unit stays silent while the thermostat is calling for cooling
- The unit hums, clicks, or buzzes
- The fan is not spinning
- The breaker trips when the unit tries to start
- The unit starts only sometimes
These symptoms can overlap, so it is hard to know which part is bad without testing tools and hands-on experience.
Do not try this as a beginner
- Do not open electrical panels
- Do not test live voltage
- Do not touch or discharge a capacitor
- Do not force the fan by hand with power connected
- Do not attempt refrigerant repairs
This is professional-only territory. Even when the unit appears off, the risk of electrical shock is real.
When the outside unit problem is really an indoor system issue
Sometimes the condenser is not the actual source of the problem.
The indoor part of the system may fail to send the signal that tells the outdoor unit to start. That can happen because of a thermostat issue, control board problem, blown fuse, condensate safety switch, or loss of power to the air handler or furnace.
That is part of what makes this issue confusing. Homeowners naturally focus on the outside unit because it is the part that is not running, but the actual fault may be inside the home.
A common example is when the indoor blower still runs, but the outdoor unit does nothing. That can point to several possible causes, including thermostat trouble, an indoor control issue, or a failed electrical component outside.
If you have already checked the thermostat, filter, breaker, and visible drain issues, you have covered the safest homeowner-level troubleshooting steps.
When to call an HVAC professional
Call an HVAC technician when the simple checks do not solve the problem or when the issue moves beyond safe DIY.
Stop and call a pro if
- The breaker trips again after you reset it
- The outdoor unit hums, clicks, or buzzes but does not start
- The fan is not spinning
- You see burnt wires, melted insulation, or scorch marks
- Standing water keeps coming back
- The disconnect or visible wiring looks damaged
- The system keeps shutting down
- You are not comfortable going beyond the thermostat and filter
It also makes sense to call for help if the system is older and has been having repeated cooling issues. At that point, you may be deciding between another repair and a larger replacement plan.
If you are troubleshooting a heating problem instead, it also helps to understand why your furnace is blowing cold air and what you can safely check first.
How to help prevent this problem in the future
A little maintenance can go a long way toward preventing summer AC trouble.
Change the filter on schedule. Keep the area around the outdoor unit clear. Pay attention to unusual noises, weak airflow, or cooling that seems less effective than normal.
Before hot weather arrives, it also helps to do a basic system check. Make sure the thermostat works properly, the outdoor unit is free of debris, and the drain area looks normal.
Annual HVAC maintenance is also worth considering. A technician can inspect electrical parts, test performance, and catch worn components before they fail during a heat wave.
Simple habits that can help prevent future problems
- Change the air filter regularly
- Keep debris and plants away from the outdoor unit
- Watch for early warning signs like odd noises or weak cooling
- Check the system before peak summer weather
- Schedule professional maintenance if the system is older or has had recent issues
Conclusion
If your outside AC unit is not turning on, start with the safest and simplest checks first.
Look at the thermostat, breaker, disconnect, filter, and visible debris. If nothing obvious stands out, check for signs of a condensate drain problem near the indoor unit.
Those steps can rule out a few common causes without taking the system apart.
But once the problem involves repeated breaker trips, buzzing, damaged wiring, failed electrical parts, or anything that feels outside your comfort level, it is time to call an HVAC professional.
The goal is not to guess your way through an AC repair. It is to rule out the easy things, stay safe, and know when expert help is the smarter next step.