
Paint Not Sticking to Caulk: Why It Happens
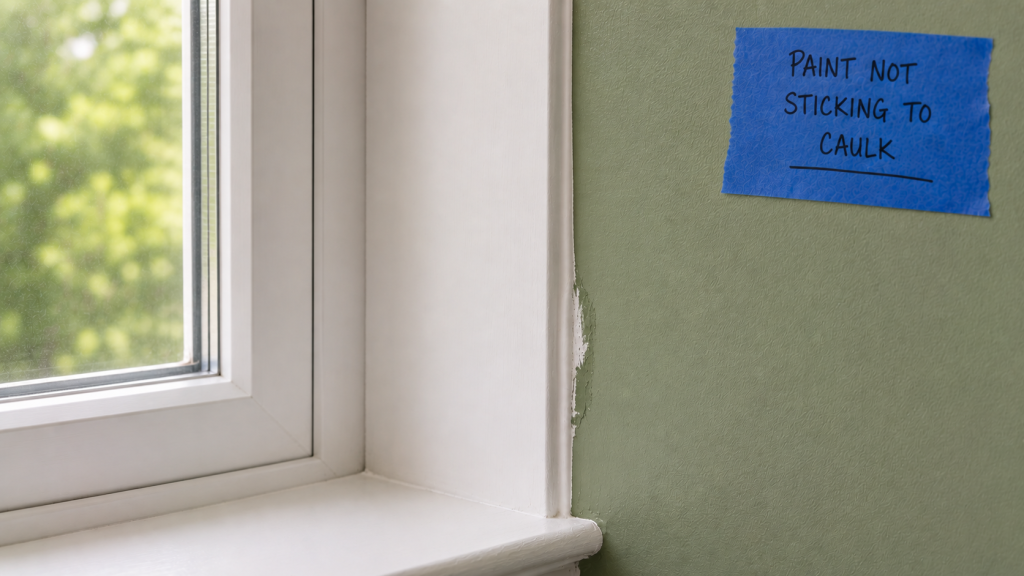
Paint not sticking to caulk usually means the paint is trying to bond to a surface that is non-paintable, not fully dry, dirty, slick, or deteriorated. Standard silicone caulk is a common culprit because many formulas repel ordinary paint.
The right fix depends on the condition of the caulk. Sound, paintable caulk may only need cleaning, light preparation, or primer. Non-paintable, loose, gummy, or damaged caulk usually needs to be removed and replaced.
| Likely cause | What you may notice | Best next step |
|---|---|---|
| Non-paintable caulk | Paint beads, separates, or peels | Remove and replace |
| Caulk not dry enough | Paint smears, cracks, or stays tacky | Allow more drying time |
| Dirty or contaminated surface | Patchy adhesion or fisheyes | Clean and dry thoroughly |
| Slick paintable caulk | Paint pulls away or covers unevenly | Lightly scuff and consider primer |
| Old or failed caulk | Cracks, gaps, or loose edges | Remove and replace |
| Moisture | Bubbling, repeated peeling, or soft material | Correct the moisture source first |
Why Is Paint Not Sticking to Caulk?
Paint needs a clean, dry, stable, compatible surface. Caulk can interfere with adhesion when its formulation is not designed to accept paint or when its surface condition prevents a good bond.
The most common causes are:
- Non-paintable or standard silicone caulk
- Caulk that has not dried enough for painting
- Dust, grease, soap film, or other contamination
- A slick or glossy surface
- Old, cracked, or poorly bonded caulk
- Moisture around or behind the seam
If paint fails along the caulk line but sticks normally to the surrounding wall or trim, focus your diagnosis on the caulk rather than adding another coat of paint.
Paintable vs. Non-Paintable Caulk
The first question is whether the caulk was designed to be painted.
Paintable caulk is commonly used where baseboards, window and door casing, crown molding, and other painted trim meet a wall. Acrylic latex caulk is one common choice for these applications.
Non-paintable caulk may reject paint even when it is clean and dry. The paint can bead on contact, separate as you brush it, or dry and then peel away easily.
Do not assume white caulk is paintable. Check the product label whenever possible. For more detail on choosing a compatible product for painted trim, see best paintable caulk for trim and baseboards.
Standard Silicone Is a Common Problem
Many standard silicone caulks are not intended to be painted. Their water-resistant, flexible surface can also make it difficult for ordinary paint to establish a durable bond.
This does not make silicone a poor sealant. It means the product must match the application. Silicone can be appropriate around tubs, showers, sinks, and other locations where moisture resistance is important, while a paintable product is generally needed when the finished seam will receive paint.
Some silicone-containing and hybrid sealants are specifically labeled paintable, so identify the actual product rather than relying on appearance alone.
If standard non-paintable silicone was installed along painted trim, repeatedly coating it with paint or primer is unlikely to provide the cleanest lasting repair. Replacement with an appropriate paintable caulk is usually more dependable.
The Caulk Was Painted Too Soon
Even paintable caulk can cause trouble if paint is applied before the product is ready.
A bead may feel dry on the surface while remaining soft underneath. Painting too soon can lead to smearing, cracking, tackiness, or poor adhesion as the caulk continues to dry.
Drying time varies by product and conditions, so follow the caulk manufacturer’s instructions rather than using one universal waiting period. Thick beads, cool temperatures, high humidity, and limited airflow can slow drying.
If timing may be the problem, check how long caulk should dry before painting before recoating.
The Surface Is Dirty, Slick, or Contaminated
Paintable caulk still needs a clean surface. Dust is especially common along baseboards and horizontal trim, while kitchen and bathroom seams may collect grease, soap residue, or cleaner residue.
Old silicone residue can be particularly troublesome after a previous caulk removal. If that residue remains on the surface, new coatings may continue to pull away or fisheye.
A glossy or unusually slick caulk surface can also reduce adhesion. If the caulk is confirmed paintable, fully dry, and sound, gentle scuffing may improve the surface for primer or paint. Remove all sanding dust afterward.
Do not sand caulk merely to make an unidentified product accept paint. If you cannot establish that the existing material is suitable for painting, replacement may be the more reliable option.
The Caulk Is Old or Failing
Paint cannot stabilize caulk that has already failed.
Replace the bead if it is:
- Cracked through or separating
- Pulling away from the wall or trim
- Brittle, loose, or deteriorated
- Persistently soft or gummy
- Badly contaminated
- Covered with paint that repeatedly peels
Also investigate repeated failure around windows, bathrooms, exterior doors, or other moisture-prone areas. Bubbling paint, damp drywall, swollen trim, staining, or a musty odor can indicate a moisture problem that needs to be corrected before repainting.
How to Identify the Likely Cause
Start with the simplest evidence.
If you still have the caulk tube, read the label and confirm that the product is paintable. If the material is unknown, consider where it was used and how the paint behaves.
Paint that immediately beads or separates on an otherwise clean caulk line points toward incompatibility or contamination. Paint that initially covers but later cracks may indicate premature painting, movement, or failing caulk. Peeling accompanied by cracks or loose edges points toward replacement rather than another finish coat.
When the caulk appears sound and paintable, check for dust, grease, cleaner residue, or a slick surface before assuming the material itself is defective.
If you cannot identify the caulk, a small test in an inconspicuous area can prevent a larger failed paint job. Clean and dry the area, apply the coating system you plan to use, and confirm satisfactory adhesion after it has dried according to the product instructions.
What Can Be Fixed Without Replacing the Caulk?
Existing caulk can often stay when it is paintable, firmly attached, fully dry, and free of cracks or deterioration.
Clean off dust and contamination using a method appropriate for the surrounding wall, trim, and finish. Let the surface dry completely.
If the paintable caulk is unusually slick, a very light scuff may help. Avoid aggressive sanding that damages the bead or surrounding finish.
Primer can be useful when the compatible caulk is difficult to cover, when surrounding bare wood or drywall also needs priming, or when the coating manufacturer recommends a suitable adhesion primer. A bonding primer may help with some challenging but paint-compatible surfaces.
Primer is not a universal workaround for non-paintable silicone. It also cannot correct wet, dirty, loose, gummy, or deteriorated caulk.
When the Caulk Should Be Removed and Replaced
Replacement is usually the better repair when the underlying bead itself is the problem.
Remove and replace caulk when:
- It is confirmed non-paintable
- Standard silicone was used where a painted finish is required
- Paint continues to bead or peel after appropriate cleaning
- The caulk is cracked, loose, brittle, or separating
- The bead remains abnormally soft or gummy
- Significant old silicone residue or contamination prevents adhesion
- Moisture has damaged the caulk or adjoining material
Before removing caulk from an older painted surface, consider the age and condition of the surrounding paint. Sanding, scraping, or cutting painted surfaces in homes built before 1978 can create lead-paint hazards. If lead paint may be present, avoid disturbing the surface until you have determined the appropriate lead-safe approach.
If there is substantial mold, hidden water damage, soft or swollen building material, or an active leak, correct that underlying problem rather than treating the caulk line as a cosmetic repair.
How to Repaint Caulk Successfully
Once you know the existing caulk can remain, the repainting process should be straightforward.
Step 1: Remove loose paint
Gently remove paint that is already flaking away without damaging the caulk, trim, or wall surface.
If the caulk itself lifts, cracks, or pulls away during this inspection, stop and replace it instead of trying to preserve it.
Step 2: Clean the caulk line
Remove dust and surface contamination. Use a cleaning method that is compatible with the caulk and surrounding finish, and avoid leaving cleaner residue behind.
Allow the area to dry completely.
Step 3: Lightly prepare a slick surface if needed
If the caulk is confirmed paintable but has a slick finish, lightly scuffing it may improve adhesion.
Remove all dust before continuing.
Step 4: Prime when appropriate
Apply a compatible primer when the coating system calls for one or when you need additional adhesion on a difficult but paintable surface.
Let the primer dry according to its instructions. If primer beads up or refuses to bond, stop rather than covering the problem with more material.
Step 5: Apply the finish paint
Apply a controlled, even coat over the prepared caulk and adjoining surface. Avoid trying to hide an adhesion problem with a heavy layer of paint.
Allow the coat to dry properly before deciding whether another coat is necessary.
Step 6: Check the repaired seam
After the coating has dried, inspect the caulk line. The finish should cover evenly without beading, separating, peeling, or remaining unusually tacky.
If the same adhesion problem returns, reconsider whether the caulk is truly paintable and whether contamination or moisture remains.
Common Mistakes to Avoid
Most repeated failures come from trying to paint around the underlying problem instead of correcting it.
Avoid:
- Assuming every white caulk is paintable
- Painting standard non-paintable silicone
- Applying paint before the caulk is ready
- Painting over dust, grease, or cleaner residue
- Using primer as a substitute for removing failed caulk
- Applying heavy coats to force coverage
- Caulking over old silicone residue without proper preparation
- Ignoring cracks, loose edges, or recurring moisture
- Repeatedly touching up a seam that continues to reject paint
When a clean, dry, paintable caulk bead still will not accept the coating, stop adding paint and reassess the surface. Finding the cause is usually faster than building up more failed layers.
Final Thoughts
Paint not sticking to caulk is usually an adhesion or compatibility problem, not something that another heavy coat of paint will solve. First determine whether the caulk is paintable, fully dry, clean, firmly bonded, and free of moisture problems.
Sound, paintable caulk can often be cleaned, lightly prepared, primed when appropriate, and repainted. If the bead is non-paintable silicone, deteriorated, contaminated, loose, or repeatedly rejecting paint, removing it and replacing it with compatible paintable caulk is usually the more durable repair.