
rope caulk for windows: uses, limits, and removal
Rope caulk for windows is a removable, putty-like sealing material that can help reduce airflow through small, dry, clearly identified gaps. It works best as a temporary or seasonal solution rather than a permanent repair. Rope caulk should never block drainage paths or moving window parts, and it cannot repair rot, water intrusion, failed glass, severe misalignment, or broken hardware.
| Window condition | Is rope caulk appropriate? | Main caution |
|---|---|---|
| Small dry interior stationary gap | Often | Confirm the gap is unwanted and the surface is sound |
| Minor seasonal gap at a closed sash edge | Sometimes | Remove before operating the sash |
| Large or irregular opening | Usually not | May indicate a larger repair problem |
| Active leak or moisture damage | No | Diagnose and repair the moisture source first |
| Weep hole, track, or drainage channel | No | Must remain open |
| Rotten frame, cracked glass, or failed hardware | No | Requires repair rather than temporary sealing |
What Rope Caulk Is
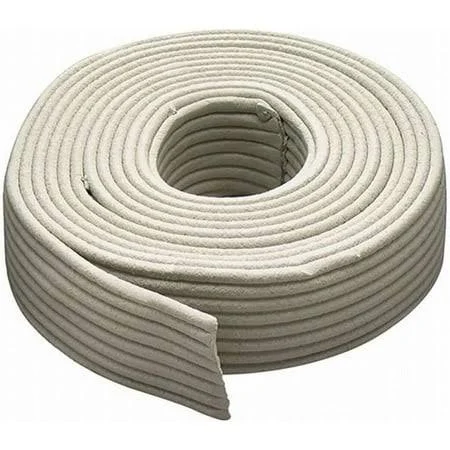
Rope caulk is a flexible sealing cord with a soft, putty-like texture.
Unlike permanent caulk, it does not cure into a hard or rubbery bead. It is designed to remain removable, making it useful for limited seasonal sealing or situations where a permanent alteration is not desirable.
Window rope caulk is typically pressed over a small surface gap rather than injected deeply into a joint.
It is different from:
- weatherstripping, which is designed for suitable movable contact points
- window film, which creates a temporary interior barrier over a larger window area
- expanding foam, which fills deeper cavities and is not intended to function as a removable surface seal
- permanent caulk or sealant, which is used on appropriate fixed joints where a longer-lasting repair is needed
Rope caulk should generally bridge only a small, visible gap whose purpose is already understood.
If the opening is large, deep, wet, damaged, or difficult to identify, it should not automatically be treated as a rope-caulk problem.
Where and When Rope Caulk May Be Used
Rope caulk can be useful in specific situations where a temporary removable seal is appropriate.
Examples include:
- small stationary interior gaps
- older windows that are opened infrequently
- minor seasonal draft control
- rental situations where permanent alteration is not desired
- small gaps awaiting a later repair
- windows that will remain closed during a heating or cooling season
The joint should be dry, accessible, and clearly identified before material is applied.
Rope caulk is most useful when the homeowner knows where the unwanted airflow is occurring and the gap does not involve drainage, water intrusion, mechanical movement, or deteriorated materials.
It should not be used simply because an area near the window feels cold.
Cold glass can create a draft-like sensation even when there is little or no actual air leakage.
Areas That Must Remain Clear
Do not use rope caulk to block:
- weep holes
- drainage slots
- sill drainage channels
- sliding tracks
- locks
- latches
- hinges
- balances
- crank mechanisms
- moving sash contact points
- unidentified openings
- damp or deteriorated areas
If you are not sure where the airflow is entering, review how to stop drafty windows before applying a temporary seal.
The goal is to seal only a confirmed unwanted gap.
Window components are often designed with small openings that allow movement or drainage. Covering those areas can create new problems.
Choosing the Right Amount and Size
Rope caulk is usually sold as strands or cords that can be separated and shaped by hand.
Choose a strand size that is appropriate for the visible gap.
Consider:
- width of the gap
- depth of the visible surface joint
- total joint length
- type of surface
- condition of the finish
- whether the window needs to remain operable
- whether the material will be removed later
A strand that is too small may not contact both sides of the gap and may fail to reduce airflow.
A strand that is too large can become bulky, interfere with nearby components, or make removal more difficult.
Do not pack multiple strands deep into a large cavity to compensate for an opening that is too large for the product.
A large or irregular gap may indicate:
- missing material
- poor window fit
- installation problems
- damaged trim
- concealed leakage
- structural movement
Those conditions deserve a different repair approach.
On delicate, painted, stained, or finished surfaces, a short compatibility test can be useful before covering a larger area.
Some finishes may mark, discolor, or pull away when temporary sealing materials are removed.
How to Prepare and Apply Rope Caulk
Preparing the Window
Before applying rope caulk, inspect the area carefully.
Confirm that:
- the gap is dry
- the opening is understood
- the surrounding surface is sound
- no drainage feature is being covered
- no moving hardware is involved
- the window does not have active water intrusion
- the window will not need to move while the material is in place
Remove loose dust and surface debris.
Use only a cleaning method that is compatible with the surrounding finish, and allow the area to dry completely before applying the material.
If the surface is delicate or has an uncertain finish, test a small inconspicuous area first.
Do not apply rope caulk over:
- standing moisture
- active mold
- rotten wood
- loose paint
- crumbling material
- damaged glazing
- deteriorated surfaces
Do not remove trim, glazing, sash components, locks, or hardware simply to make room for rope caulk.
If major disassembly is required, the condition is outside the normal scope of this temporary product.
Applying the Material
Use a simple surface application.
- Separate or cut a manageable length of rope caulk.
- Shape it gently to match the small gap.
- Place it over the surface joint.
- Press it lightly so it contacts both sides of the gap.
- Join adjacent sections neatly when a longer run is needed.
- Keep the material away from tracks, locks, hinges, cranks, and drainage openings.
- Inspect the finished joint to make sure the material is secure and not interfering with the window.
Use light pressure.
The material should bridge the gap rather than disappear deeply into the assembly.
Do not force rope caulk into hidden cavities or pack it behind trim.
Do not stretch a strand excessively to make it cover more distance. Stretching can make it too thin to seal properly and may make removal more difficult later.
If you are placing rope caulk along a sash edge for a temporary seasonal seal, make sure the window will remain closed while the material is installed.
Do not force the sash shut against an excessive amount of material.
The window should not be placed under abnormal pressure simply to compress the rope caulk.
Checking Window Operation and the Seal
After applying rope caulk, inspect the entire window.
Verify that:
- locks and latches remain usable
- nearby hardware still operates normally
- drainage openings remain clear
- the material has not moved into a track
- the window remains safe and secure
If rope caulk is installed along an area where the sash normally moves, remove it before opening or closing the window.
Do not drag the sash across the material.
Recheck the original draft using a safe method such as a hand or tissue check.
Do not use:
- candles
- matches
- incense
- open flame
- homemade smoke tests
A reduction in airflow suggests that the temporary seal is helping.
However, the area may still feel cold because the glass itself remains cold.
Rope caulk reduces certain surface air leaks. It does not improve the insulating value of the glass or repair failed insulated-glass units.
How to Remove Rope Caulk Cleanly
One advantage of rope caulk is that it is intended to remain removable.
Removal should be gentle to avoid damaging paint, stain, trim, or other finishes.
Removal Steps
- Find an accessible end of the rope caulk.
- Lift it gently with your fingers or a smooth plastic tool.
- Pull slowly along the length of the joint.
- Gather the removed material as you work.
- Inspect the surface for remaining residue.
- Clean any residue using a method that is compatible with the finish.
Normal room temperature may make the material easier to handle than very cold conditions.
Avoid aggressive scraping.
Do not use:
- knives
- metal scrapers
- screwdrivers
- chisels
- heat guns
- open flame
Sharp tools can scratch glass, cut seals, damage wood, or remove finishes.
Heat can also damage nearby materials or create unnecessary safety risks.
If the rope caulk resists removal, work slowly in small sections instead of pulling forcefully.
Common Mistakes and Limits
Mistakes to Avoid
Rope caulk is simple to use, but several mistakes can reduce its effectiveness or create other problems.
Avoid:
- applying it over wet surfaces
- sealing damaged or rotten materials
- blocking drainage paths
- pressing material into sliding tracks
- covering locks or hardware
- sealing a window that must remain operable
- substituting rope caulk for proper weatherstripping
- packing it into large cavities
- covering loose or failing paint
- leaving it in place indefinitely without inspection
- assuming cold glass proves that air is leaking
Temporary window caulk should remain a temporary solution.
Inspect it periodically if it stays in place for an extended season.
Material can collect dust, shift, harden slightly, or begin to affect nearby finishes over time.
Rope caulk also cannot repair:
- rotten framing
- rainwater intrusion
- cracked glass
- fogging between panes
- warped sash
- severe sash misalignment
- failed exterior sealant
- broken locks or hardware
- structural movement
- large rough-opening gaps
If the leak is occurring at a normal movable sash edge and the existing seal is worn or missing, window weatherstripping may be the appropriate repair rather than rope caulk.
Do not use temporary material to compensate for a seal that should function every time the window opens and closes.
Similarly, if rainwater is entering the window assembly, do not cover the symptom with rope caulk. Water intrusion needs to be traced and corrected.
Safety and When to Call a Professional
Professional help is appropriate when:
- the window is above safe ground-level reach
- exterior work requires ladder or roof access
- glass is cracked, loose, or unstable
- the sill or frame is rotten or structurally damaged
- water enters during rain
- mold or hidden moisture appears widespread
- the window cannot open, close, lock, or remain secure
- the purpose of an opening cannot be identified
- lead-painted surfaces may need to be disturbed
- major trim or sash removal is required
- electrical components or concealed wiring may be nearby
Do not continue with a temporary sealing product when the condition involves structural damage, unsafe access, unstable glass, or unresolved moisture.
Final Thoughts
Rope caulk for windows works best on small, dry, clearly identified gaps where a removable seasonal seal is appropriate.
Apply it lightly at the surface, keep drainage paths and moving parts clear, and remove it before operating a sash that has been temporarily sealed.
Use rope caulk as a temporary tool rather than a substitute for needed repairs. Rotten materials, water intrusion, failed glass, major alignment problems, and broken hardware should be corrected rather than covered with removable window seal material.