Should You Caulk Trim Before Painting?
If you are asking “should you caulk trim before painting,” the answer is usually yes when there are small gaps between the trim and the wall, but no when the trim is already tight, clean, and smooth.
Caulk is meant to fill narrow seams, not repair broken trim or hide poor prep. Used correctly, paintable caulk can make baseboards, door trim, window trim, and crown molding look cleaner after painting.
The key is using the right caulk, applying a thin bead, letting it dry properly, and painting over it in the right order.
Should You Caulk Trim Before Painting? Quick Answer
| Situation | Caulk Before Painting? | Best Approach |
|---|---|---|
| Small gap between trim and wall | Yes | Use paintable caulk |
| Hairline crack along baseboard | Yes | Apply a thin bead |
| Tight, clean trim joint | No | Clean, prime, and paint |
| Rotten, loose, or damaged trim | No | Repair or replace first |
For most interior trim projects, caulking comes before the final paint coats. It helps close small shadow lines and makes painted trim look more finished.
Where Caulk Belongs on Trim
Caulk belongs in small gaps where trim meets another surface.
These are usually narrow seams, not deep holes. A neat bead of acrylic latex caulk or paintable caulk can bridge these small spaces and create a smoother paint line.
Caulk is useful for these trim areas:
- The top edge of baseboards where they meet the wall
- Door casing where it meets the wall
- Window casing where it meets the wall
- Crown molding seams along the wall or ceiling
- Small inside corner gaps
- Narrow trim joints that will be painted
- Small cracks where painted trim meets drywall
Caulk is especially helpful when the gap creates a dark line after painting. Even a freshly painted room can look unfinished if the trim has open seams.
Where Caulk Is Not Needed
Not every trim line needs caulk.
If the trim already sits tight against the wall and there is no visible gap, adding caulk may create extra work without improving the result. Too much caulk can also leave a rounded, messy edge that looks worse after painting.
You can usually skip caulk when:
- The trim is already tight to the wall
- There is no visible crack or shadow line
- The joint is crisp and clean
- The trim will not be painted
- The gap is so small that paint alone will cover the edge
- The surface is dirty and has not been cleaned yet
Caulk should make the trim look cleaner. If it creates a thick raised line, it was probably not needed or was applied too heavily.
Use Paintable Caulk If You Plan to Paint It
Always use paintable caulk on trim that will be painted.
Paintable caulk is designed so primer or paint can bond to it after it dries. Acrylic latex caulk is a common choice for interior painted trim because it is easy to apply, easy to smooth, and usually cleans up with water before it dries.
Do not use non-paintable caulk on paintable trim areas. Paint may not stick correctly, and the finished line can look uneven or peel later.
For painted interior trim, look for:
- Paintable caulk
- Acrylic latex caulk
- Interior trim caulk
- Flexible caulk for small gaps
- A product labeled for doors, windows, trim, or molding
Read the label before buying. Some caulks are made for bathrooms, masonry, exterior joints, or specialty surfaces. For basic interior trim painting, a paintable acrylic latex caulk is usually the practical homeowner choice.
If you are still choosing a product, this guide to the best caulk for trim before painting explains what to look for.
Which Trim Gaps Should Be Caulked Before Painting?
Caulk works best on small, narrow gaps.
The goal is to seal the seam, not pack a large opening full of caulk. If the gap is too wide, the caulk may shrink, crack, or look sloppy after painting.
Good trim gaps for caulk include:
- Thin gaps between baseboard and wall
- Small cracks along door casing
- Small cracks along window casing
- Narrow crown molding seams
- Tiny inside corner gaps
- Slight separation at painted trim joints
A thin bead is enough for most trim seams. If you need a large amount of caulk to hide the problem, the trim may need repair instead.
Which Gaps or Damage Should Not Be Filled With Caulk?
Caulk is not a structural repair.
It should not be used to fix loose trim, rotten wood, large holes, major movement, or damaged drywall. Caulk can hide small gaps, but it cannot make broken trim solid again.
Do not simply caulk over:
- Loose baseboards
- Rotten or soft wood
- Large gaps behind trim
- Water-damaged trim
- Moldy seams
- Cracked drywall that keeps moving
- Nail pops or broken corners
- Trim that is pulling away from the wall
- Large holes or missing wood
If the trim moves when you press on it, secure it before caulking. If the wood is soft or water-stained, find and fix the moisture problem before painting.
Should You Caulk Before or After Primer?
The best order depends on the surface, but a practical approach is to clean, sand, prime bare spots, caulk, then paint.
Caulk usually sticks best to clean, sound surfaces. If you are dealing with bare wood, raw drywall, patched areas, or sanded spots, primer may help create a better surface before caulking.
For already painted trim that is in good condition, you can usually clean, lightly sand, caulk, let it dry, and then paint.
A simple order for most trim projects is:
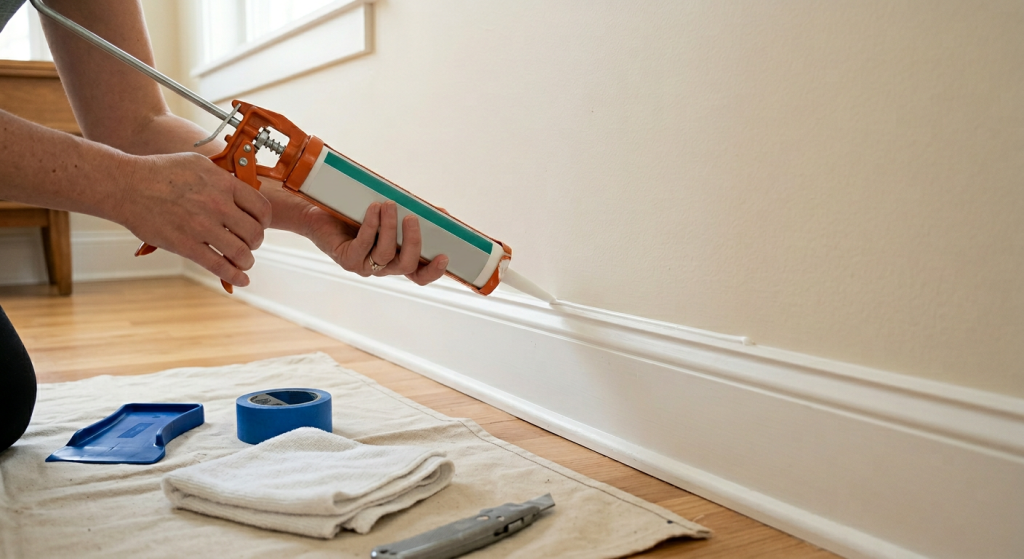
- Protect the floor with a drop cloth
- Clean the trim and wall edge
- Sand rough spots with a sanding sponge
- Prime bare wood, raw drywall, or patched areas
- Apply paintable caulk to small gaps
- Let the caulk dry according to the label
- Paint the trim and wall edge as needed
If the caulk label gives a specific order or dry time, follow the product instructions.
Should You Caulk Before or After Painting Walls and Trim?
For the cleanest result, caulk before the final coats of paint.
If you are painting both the walls and trim, caulk after the surfaces are prepped and primed, but before the final paint coats. That way, the caulk gets covered by paint and blends into the finished surface.
If the walls are already painted and you are only repainting trim, caulk the trim gap first, let it dry, then paint the trim carefully with an angled brush.
Common painting order for trim work:
- Prep the room
- Clean and sand the trim
- Prime bare or repaired areas
- Caulk small trim gaps
- Let the caulk dry
- Paint the trim
- Touch up the wall edge if needed
Painter’s tape can help protect the wall or floor, but it is not a substitute for careful caulking and brushing. A steady angled brush often gives better control than relying on tape alone.
Step-by-Step: How to Caulk Trim Before Painting
Caulking trim is simple, but it rewards patience.
Work in small sections and keep the bead thin. Heavy caulk buildup is harder to smooth, takes longer to dry, and can look bulky after painting.
Tools and materials you may need:
- Paintable caulk
- Acrylic latex caulk
- Caulk gun
- Caulk smoothing tool
- Utility knife
- Painter’s tape
- Microfiber cloth
- Sanding sponge
- Primer
- Angled brush
- Drop cloth
Set up before opening the caulk tube. Once you start applying caulk, it is easier to keep moving than to stop and search for tools.
Follow these steps:
- Lay down a drop cloth to protect the floor
- Clean the trim and wall edge with a microfiber cloth
- Sand rough paint ridges or bumps with a sanding sponge
- Wipe away sanding dust
- Prime bare wood, patched drywall, or exposed areas if needed
- Cut the caulk tube tip small with a utility knife
- Load the tube into the caulk gun
- Apply a thin bead along the gap
- Smooth the bead with a caulk smoothing tool or a clean finger
- Remove excess caulk before it dries
- Let the caulk dry according to the product label
- Paint over the caulk with an angled brush
Do not cut the caulk tube opening too large. A small opening gives you more control and helps prevent a messy bead.
How Long Should Caulk Dry Before Painting?
Caulk should dry before you paint it, and the safest dry time is the one listed on the product label.
Some paintable caulks can be painted fairly soon. Others need more time, especially if the bead is thicker, the room is humid, or the temperature is cool.
Do not rush this step. Painting over caulk too early can cause cracking, smearing, poor paint bonding, or a rough-looking line.
Caulk may need more drying time when:
- The bead is too thick
- The room is humid
- The room is cool
- Air movement is poor
- The gap is deeper than expected
- The caulk was applied over a damp surface
A thin bead dries more predictably than a heavy bead. That is another reason to avoid using caulk as filler for large gaps.
For a deeper timing guide, read how long caulk should dry before painting before adding primer or paint over the bead.
How Painter’s Tape Can Help When Caulking Trim
Painter’s tape can help create a cleaner caulk line, especially for beginners.
Tape is most useful when you are caulking a visible seam and want to keep the bead narrow. It can also protect the wall or trim from smears while you learn.
To use painter’s tape with caulk:
- Apply tape along one or both sides of the gap
- Leave only the seam exposed
- Apply a thin bead of paintable caulk
- Smooth the bead before it skins over
- Remove the tape while the caulk is still workable
- Let the caulk dry before painting
Do not leave painter’s tape buried under dried caulk. Remove it while the caulk is still soft enough to release cleanly.
Common Mistakes When Caulking Trim
Most caulking problems come from using too much caulk or skipping prep.
Caulk should create a clean transition between surfaces. It should not look like a thick rope sitting on top of the trim.
Common homeowner mistakes include:
- Using non-paintable caulk on painted trim
- Applying too much caulk
- Cutting the tube tip too large
- Caulking over dust
- Caulking over loose paint
- Skipping primer on bare or repaired areas
- Painting before the caulk is dry
- Trying to fill large gaps with caulk
- Leaving ridges instead of smoothing the bead
- Waiting too long to remove painter’s tape
- Caulking rotten or loose trim instead of repairing it
If the caulk line looks messy while it is wet, fix it right away. It is much easier to smooth wet caulk than to sand or scrape dried caulk later.
When to Repair the Trim Instead of Caulking
Some trim problems need repair before paint.
Caulk can make a small seam disappear, but it cannot fix trim that is damaged, loose, or moving. Painting over these problems usually makes them stand out more.
Repair the trim instead of caulking when:
- The trim is pulling away from the wall
- The wood is rotten or soft
- The gap is wide and uneven
- Pieces of trim are cracked or missing
- Nails are loose
- Water damage is present
- The wall behind the trim is damaged
- The same crack keeps reopening
A small trim repair before painting can save you from repainting the same area later. If the trim is loose, secure it. If it is damaged, patch or replace it. Then caulk the remaining small seams before painting.
When to Call a Professional
Most basic trim caulking is a beginner-friendly project, but not every trim problem is simple.
Call a professional or consider a more complete repair when the issue points to movement, moisture, or larger damage.
Get professional help when:
- You see signs of water damage
- The trim is soft, swollen, or moldy
- Large sections of trim are loose
- The wall is cracked behind the trim
- Gaps keep coming back after caulking
- Crown molding is separating from the ceiling
- You are unsure whether the problem is cosmetic or structural
This is especially important around windows, exterior doors, bathrooms, and basements. A visible gap may be only the surface symptom of a moisture or movement problem.
Final Thoughts
Caulking trim before painting is usually the right move when you have small gaps, hairline cracks, or shadow lines between trim and the wall.
Use paintable caulk, keep the bead thin, smooth it neatly, and let it dry according to the label before painting. Acrylic latex caulk is a practical choice for many interior painted trim projects.
Do not use caulk to hide loose trim, rot, water damage, or large gaps. Fix those problems first.
When the prep is done well, caulk helps the final paint job look cleaner, sharper, and more finished without needing heavy buildup or complicated tools.