Why Does Caulk Crack After Painting?
Why does caulk crack after painting usually comes down to painting too soon, using the wrong caulk, applying the bead too thick, poor surface prep, or movement in the joint.
Caulk is supposed to create a flexible, paintable seam between trim, walls, corners, and small gaps. When it cracks after painting, the problem is usually not just the paint. It is often the caulk, the surface, the drying time, or the gap underneath.
The good news is that cracked caulk can often be fixed. The right repair depends on whether the crack is only in the paint film or the caulk bead itself has failed.
why does caulk crack after painting? Quick Cause and Fix Table
| Cause | What It Looks Like | Best Fix |
|---|---|---|
| Painted too soon | Fine cracks or wrinkled paint over caulk | Let caulk dry fully before repainting |
| Wrong caulk type | Paint peeling, splitting, or not sticking | Remove and use paintable caulk |
| Thick caulk bead | Shrinking, cracking, or soft spots | Remove excess and apply a thinner bead |
| Joint movement | Crack keeps coming back | Repair movement or use flexible caulk |
| Poor prep | Caulk pulls away or cracks at edges | Clean, sand, prime, and redo the seam |
If the caulk is still soft, gummy, loose, or peeling, do not paint over it again. Let it dry fully or remove it and redo the seam properly.
The Caulk Was Painted Too Soon
Painting too soon is one of the most common reasons caulk cracks after painting.
Caulk can feel dry on the surface before it is ready for paint. If paint goes on while the caulk is still soft underneath, the caulk may continue to shrink, move, or release moisture after the paint dries. That can crack the paint film or make the caulk line look wrinkled.
Dry-to-the-touch is not always the same as ready-to-paint.
Caulk may have been painted too soon if:
- The paint cracked shortly after drying
- The caulk line looks wrinkled
- The bead still feels soft underneath
- The paint smeared while brushing
- The caulk dented when touched
- The crack appeared along the full caulk line
Always follow the product label for paint time. If the bead is thick, the room is humid, or the temperature is cool, give the caulk more time before painting.
Before repainting the seam, check this guide on how long caulk should dry before painting so you do not trap moisture under the finish.
The Wrong Type of Caulk Was Used
Not all caulk is meant to be painted.
For trim, wall seams, baseboards, door casing, window casing, and crown molding, you usually need paintable caulk. Acrylic latex caulk is a common choice for interior painted areas because it is made for paint to bond after the caulk dries.
Some caulks are designed for bathrooms, kitchens, exterior sealing, masonry, glass, or waterproof joints. Those products may not behave well under paint unless the label clearly says they are paintable.
The wrong caulk may be the problem if:
- Paint peels off the caulk
- Paint beads up instead of covering smoothly
- The caulk feels rubbery or slick
- The crack follows the caulk line exactly
- The caulk was not labeled paintable
- The seam was filled with silicone caulk
If the caulk is not paintable, touch-up paint will not solve the problem for long. The failed caulk usually needs to be removed and replaced with paintable caulk.
If paint will cover the seam, choosing the best caulk for trim before painting can prevent peeling, cracking, and poor adhesion.
Non-Paintable Caulk Can Make Paint Fail
Non-paintable caulk should not be used where the final surface will be painted.
This is especially important around trim. A bead of non-paintable caulk may look fine before painting, but paint may not bond to it correctly. The result can be cracking, peeling, fisheyes, or a shiny line that stands out from the surrounding finish.
Silicone caulk is a common source of this problem. Some silicone products are paintable, but many are not. Do not assume the caulk is paintable just because it is white.
Use paintable caulk for painted areas like:
- Baseboards
- Door trim
- Window trim
- Crown molding
- Wall-to-trim seams
- Painted built-ins
- Small drywall and trim gaps
If the label does not say paintable, do not use it under paint.
The Caulk Bead Was Too Thick
A thick caulk bead may seem like a faster way to fill a gap, but it often creates more problems.
Thick caulk takes longer to dry. It can shrink as it cures, and that shrinkage can crack the paint on top. A heavy bead can also stay soft inside while the outside looks dry.
Caulk works best as a neat, controlled bead in a small seam. It should not be used as a bulky filler for large gaps.
A caulk bead may be too thick if:
- The line looks rounded or raised
- The caulk cracked down the center
- The bead stayed soft for a long time
- The paint wrinkled over the seam
- The caulk pulled away from one side
- The gap was filled with several heavy passes
Use a caulk gun with steady pressure and cut the tube tip small. A caulk smoothing tool can help shape the bead before it dries.
The Surface Was Not Clean or Prepared
Caulk needs a clean, dry, sound surface to stick well.
Dust, sanding residue, loose paint, old caulk, grease, and dampness can stop caulk from bonding. When the caulk does not bond well, it may crack at the edge, pull away from the trim, or split after painting.
This is common around baseboards because they collect dust. It is also common around repaired drywall because sanding dust is easy to miss.
Poor prep can include:
- Caulking over dust
- Caulking over loose paint
- Caulking over old failed caulk
- Skipping primer on bare wood or raw drywall
- Caulking over a damp surface
- Not sanding rough paint ridges
- Not wiping the surface before caulking
A microfiber cloth, sanding sponge, and primer can make a big difference. Clean first, smooth rough areas, prime bare spots if needed, then caulk.
The Joint Is Moving
Caulk can flex, but it cannot fix every moving joint.
If trim shifts, a wall corner moves, or a baseboard is loose, the caulk may crack even when the right product was used. Paint on top of the caulk can crack too because paint is usually less flexible than the caulk underneath.
This is why some cracks come back again and again after touch-up.
Movement may be the issue if:
- The same crack keeps returning
- The trim moves when pressed
- The gap opens and closes seasonally
- The crack is near a door or window
- Crown molding separates from the ceiling
- The wall or ceiling joint shows repeated cracking
In these cases, flexible caulk may help with minor movement, but loose trim or larger movement should be repaired first. Caulk should finish a seam, not hold the trim in place.
The Gap Is Too Large for Caulk Alone
Caulk is made for small gaps and seams.
If the gap is too wide or deep, a simple bead of caulk may shrink, sag, crack, or pull loose. The paint on top may crack because the caulk underneath is not stable.
Large gaps need proper repair before caulking. That may mean securing trim, patching drywall, adding backer material where appropriate, or replacing damaged pieces.
Caulk alone is usually not enough for:
- Wide gaps behind baseboards
- Missing trim pieces
- Loose casing
- Deep cracks in drywall
- Large openings at corners
- Damaged wood
- Trim that is pulling away from the wall
Do not keep adding more caulk to hide a large gap. Heavy caulk buildup dries poorly and usually looks messy after paint.
Old Caulk Has Failed
Old caulk can dry out, shrink, crack, or lose its bond.
Painting over old cracked caulk may hide the problem for a little while, but it usually does not fix the seam. If the caulk underneath has already failed, the new paint can crack with it.
Before repainting trim, inspect the existing caulk line closely.
Old caulk may need removal if:
- It is cracked through the bead
- It is pulling away from the wall or trim
- It feels brittle
- It has gaps along the edge
- It is dirty or stained
- It was applied too thick
- It is peeling under the paint
If only the paint film has a tiny crack, a light touch-up may work. If the caulk itself is split or loose, remove and redo it.
Humidity and Temperature Changes Can Affect Caulk
Humidity and temperature affect how caulk dries and how seams move.
Cool, damp rooms slow drying. Hot, dry conditions can affect how quickly the surface skins over. Seasonal changes can also cause trim, framing, and drywall seams to expand and contract slightly.
This is especially noticeable near exterior walls, windows, bathrooms, basements, and rooms with poor ventilation.
Conditions that can contribute to cracking include:
- High humidity
- Cool room temperatures
- Poor airflow
- Damp surfaces
- Big seasonal temperature swings
- Exterior wall movement
- Moisture near windows or doors
Keep the room comfortable and reasonably ventilated while caulk dries. Avoid high heat, heat guns, or forced drying shortcuts. The goal is proper curing, not rushing the surface.
Why Paintable Caulk Matters
Paintable caulk matters because paint needs a surface it can bond to.
For painted trim and wall seams, paintable caulk helps the finished paint layer cover evenly. It also reduces the chance of peeling, cracking, or poor adhesion caused by incompatible caulk.
Acrylic latex caulk is often a practical choice for interior painted trim. Flexible paintable caulk may be better where slight movement is expected, as long as the product is appropriate for the surface and clearly labeled paintable.
For painted seams, look for caulk labeled for:
- Interior trim
- Doors and windows
- Baseboards
- Molding
- Paintable use
- Acrylic latex
- Flexible painted joints
Do not rely on color alone. A white caulk is not automatically paintable.
When Cracked Caulk Can Be Touched Up
Some cracked caulk problems are minor.
If the caulk is firmly bonded, fully dry, and only the paint film has a small surface crack, you may be able to touch it up. This is most likely when the crack is light and the bead is otherwise smooth.
Use a small amount of touch-up paint and an angled brush. Do not load the brush heavily.
A touch-up may be enough when:
- The caulk is firmly attached
- The bead is smooth
- The crack is only in the paint film
- The caulk is fully dry
- There is no peeling
- The seam does not move
- The crack is very small
Before touching up, lightly clean the area with a microfiber cloth. If the paint edge is rough, use a sanding sponge gently and wipe away dust before painting.
When Cracked Caulk Should Be Removed and Redone
If the caulk itself has failed, touch-up paint is only a temporary cover.
Cracked, loose, gummy, non-paintable, or poorly bonded caulk should be removed and replaced. This gives the new caulk a clean surface and prevents the same crack from showing through again.
Remove and redo the caulk when:
- The caulk bead is split
- The caulk is pulling away
- The caulk is still soft or gummy
- Paint will not stick to it
- The wrong caulk was used
- The bead is too thick or lumpy
- The crack keeps returning
- The seam was dirty when caulked
- There is old failed caulk underneath
Redoing the seam takes more time than painting over it, but it usually gives a much better result.
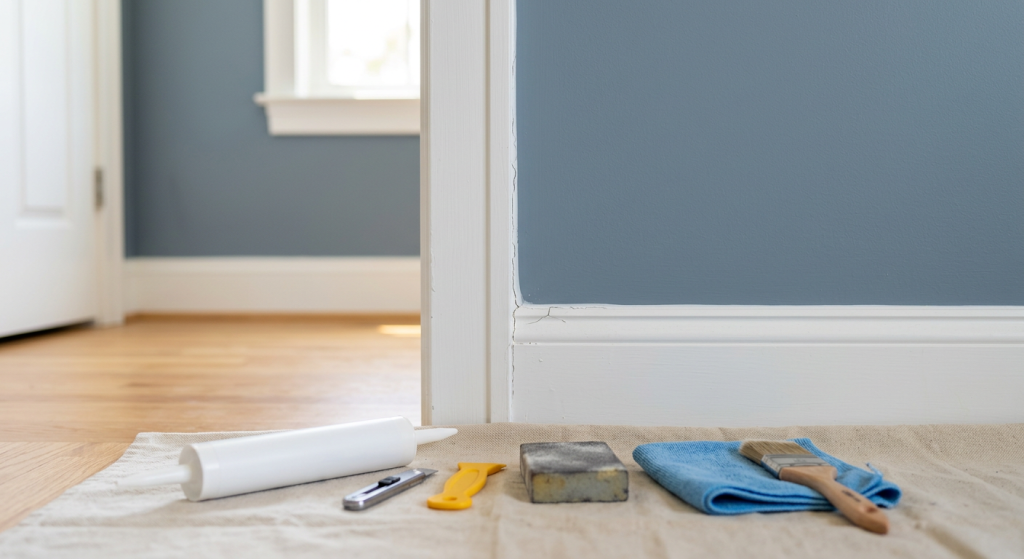
How to Remove Failed Caulk Safely
Removing failed caulk is careful work.
The goal is to take out the bad caulk without gouging the wall, cutting into the trim, or damaging the surrounding paint more than necessary.
Tools that can help include:
- Utility knife
- Caulk remover
- Putty knife or scraper
- Sanding sponge
- Microfiber cloth
- Painter’s tape
- Drop cloth
Use light pressure. A utility knife can cut along the caulk line, but do not dig deeply into drywall or wood. If the caulk is stubborn, a caulk remover may help soften or loosen it according to the product instructions.
After removal, clean the seam. New caulk should not go over dust, residue, loose paint, or pieces of old caulk.
Step-by-Step Fix for Caulk That Cracked After Painting
The right fix depends on how badly the caulk failed. This process works for many painted trim and wall seams where the caulk needs to be redone.
Follow these steps to repair cracked caulk:
- Protect the floor or nearby surface with a drop cloth
- Inspect the crack to see whether the paint or caulk failed
- Use a utility knife to carefully cut along failed caulk
- Remove loose, cracked, gummy, or non-paintable caulk
- Use caulk remover if needed and safe for the surface
- Lightly sand rough paint edges with a sanding sponge
- Wipe the area clean with a microfiber cloth
- Prime bare wood, raw drywall, or exposed patches if needed
- Let primer dry according to the label
- Apply a thin bead of paintable caulk with a caulk gun
- Smooth the bead with a caulk smoothing tool
- Remove excess caulk before it dries
- Let the caulk dry according to the product label
- Paint with an angled brush once the caulk is ready
- Use touch-up paint only after the seam is dry and clean
Keep the new bead thin and even. If the gap is too large for a neat bead, fix the gap first instead of packing it with caulk.
Using Painter’s Tape for a Cleaner Repair
Painter’s tape can help beginners keep the caulk line neat.
It is useful around baseboards, trim edges, and highly visible seams. The tape should be removed while the caulk is still workable, not after it has fully hardened.
To use painter’s tape with caulk:
- Apply painter’s tape along one or both sides of the seam
- Leave only a narrow gap exposed
- Apply a thin bead of paintable caulk
- Smooth the bead before it skins over
- Pull the tape while the caulk is still soft
- Let the caulk dry fully before painting
Painter’s tape can help shape the line, but it will not fix a dirty surface, moving trim, or the wrong caulk type.
Common Mistakes When Fixing Cracked Caulk
Cracked caulk is frustrating, so it is easy to rush the repair.
The best fix is usually slower and cleaner: remove what failed, prep the surface, use the right caulk, and let it dry before painting.
Common homeowner mistakes include:
- Painting over wet or gummy caulk
- Using non-paintable caulk under paint
- Adding new caulk over old failed caulk
- Applying a thick bead to hide the crack
- Skipping surface cleaning
- Caulking over dust from sanding
- Ignoring loose trim
- Not priming bare wood or drywall
- Using touch-up paint when the caulk bead has failed
- Removing painter’s tape after the caulk has dried hard
- Rushing the dry time before painting
Do not try to bury the problem under more paint. If the caulk line is failing, more paint will usually crack too.
How to Prevent Caulk From Cracking After Painting
Preventing cracked caulk is mostly about choosing the right product and giving it the right conditions.
A clean surface, thin bead, proper dry time, and paintable caulk solve many common problems before they start.
Use this prevention checklist:
- Choose paintable caulk for painted seams
- Use acrylic latex caulk for many interior trim projects
- Consider flexible caulk where slight movement is expected
- Clean dust and residue before caulking
- Remove old failed caulk instead of covering it
- Prime bare wood, raw drywall, or patched areas
- Cut the caulk tube tip small
- Apply a thin, even bead
- Smooth the bead before it skins over
- Let caulk dry according to the label
- Wait longer in cool or humid rooms
- Paint with light, controlled coats
- Avoid heavy paint buildup over the seam
Good caulking should look clean before paint goes on. Paint should finish the seam, not hide a lumpy caulk line.
When the Problem Is Movement, Moisture, or Trim Damage
Sometimes cracked caulk is a symptom of a larger issue.
If the same seam keeps cracking, the trim may be moving, the wall may be shifting slightly, or moisture may be affecting the materials. Recaulking without fixing the cause may only buy a little time.
Look for signs of a bigger problem:
- Trim moves when pressed
- Gaps keep reopening
- Wood feels soft or swollen
- Paint is bubbling near the seam
- Stains appear around the crack
- The area smells musty
- Cracks are widening over time
- The wall or ceiling has repeated cracking
Moisture, rot, loose trim, and structural movement should be addressed before caulking and painting again. In those cases, the caulk is not the real repair.
Final Thoughts
Caulk cracks after painting when the caulk, surface, timing, or joint movement is not right. Common causes include painting too soon, using non-paintable caulk, applying the bead too thick, skipping prep, or trying to caulk a gap that needs repair.
Small paint-film cracks over solid caulk may be touched up. Failed caulk that is split, loose, gummy, too thick, or not paintable should be removed and redone.
For the best result, use paintable caulk, keep the bead thin, smooth it neatly, let it dry according to the label, and paint with a steady angled brush. A clean seam before painting is the best path to a finished trim line that stays looking good.