Why Does My Wall Paint Look Blotchy?
Why does my wall paint look blotchy? Most of the time, blotchy wall paint happens because the paint did not cover evenly, the wall was not prepared evenly, or the surface underneath absorbed paint at different rates.
Sometimes the fix is simple. If the wall is smooth and the first coat was just too thin, a second coat may solve the problem. But if the blotchy areas are caused by stains, dust, skipped primer, repaired spots, old paint, or uneven texture, you may need to sand, clean, prime, and repaint.
The important thing is not to keep adding heavy paint over the blotchy areas. Thick paint can create roller marks, shiny spots, raised texture, and new problems that are harder to hide.
Quick Cause and Fix Guide
| Blotchy Paint Problem | What It Looks Like | Likely Cause | Best Fix |
|---|---|---|---|
| Thin coverage | Old color shows through | Not enough paint or uneven coat | Apply a second even coat |
| Dull or shiny patches | Uneven sheen | Skipped primer or surface differences | Prime problem spots, repaint |
| Stains showing | Yellow, brown, or dark marks | Stain bleeding through | Use stain-blocking primer |
| Patch outlines | Repaired spots are visible | Spackle or drywall patch absorbed paint | Sand, wipe, prime, repaint |
Why Wall Paint Looks Blotchy After Drying
Wall paint can look blotchy after drying because the paint film is not even across the surface. Some areas may have more paint. Some may have less. Some areas may have absorbed paint faster than others.
A wall can also look blotchy when the surface underneath is different from one spot to another. Bare drywall, spackle, old paint, stains, dust, grease, and sanded patches all affect how paint dries.
This is why blotchy paint is not always a paint quality problem. It is often a surface problem, a prep problem, or an application problem.
Why Does My Wall Paint Look Blotchy Even With the Right Color?
If the color is correct but the wall still looks uneven, the issue may be sheen, texture, or absorption. Paint color is only one part of the finished look.
Sheen is how much light the paint reflects. Flat paint reflects less light. Satin and semi-gloss reflect more. If one area of the wall dries dull and another dries shiny, the wall can look blotchy even when the color is the same.
Texture also matters. A smooth patched area beside a lightly rolled wall can reflect light differently. A brush mark on a wall that was painted with a roller can stand out after the paint dries.
Coverage Problems vs. Surface Problems
Before fixing blotchy paint, decide whether the problem is poor coverage or a surface problem. This helps you avoid doing more work than necessary.
Coverage problems usually mean the paint layer is too thin or uneven. Surface problems mean something underneath the paint is causing the uneven look.
Signs the problem is poor coverage:
- The old color is showing through evenly
- The wall feels smooth
- There are no raised patches or rough spots
- The blotchiness is spread across the wall
- The paint color looks weak or uneven
- The first coat looks thin
- There are no stains bleeding through
Poor coverage is usually fixed with another even coat of paint.
Signs the problem is a surface issue:
- Blotches appear only over patched areas
- Some spots look dull or shiny
- Stains are showing through
- The wall feels rough, dusty, or gritty
- Roller marks or brush marks are visible
- The paint looks different near repairs
- The wall looks worse from an angle
Surface problems usually need prep before repainting. That may mean sanding, wiping, priming, or repainting a larger area.
Cause 1: Uneven Paint Coverage
Uneven coverage is one of the most common reasons wall paint looks blotchy. This happens when the paint coat is too thin in some areas or the roller did not spread paint evenly.
It is especially common when painting over a darker color, using a deep new color, or trying to cover a wall with only one coat.
A second coat often fixes this if the wall surface is clean, smooth, and already properly primed.
Uneven coverage can happen when:
- The roller was too dry
- The paint was spread too thin
- The wall color changed dramatically
- The paint was not stirred well
- The roller pressure was uneven
- The paint was applied in random sections
- The first coat did not fully hide the old color
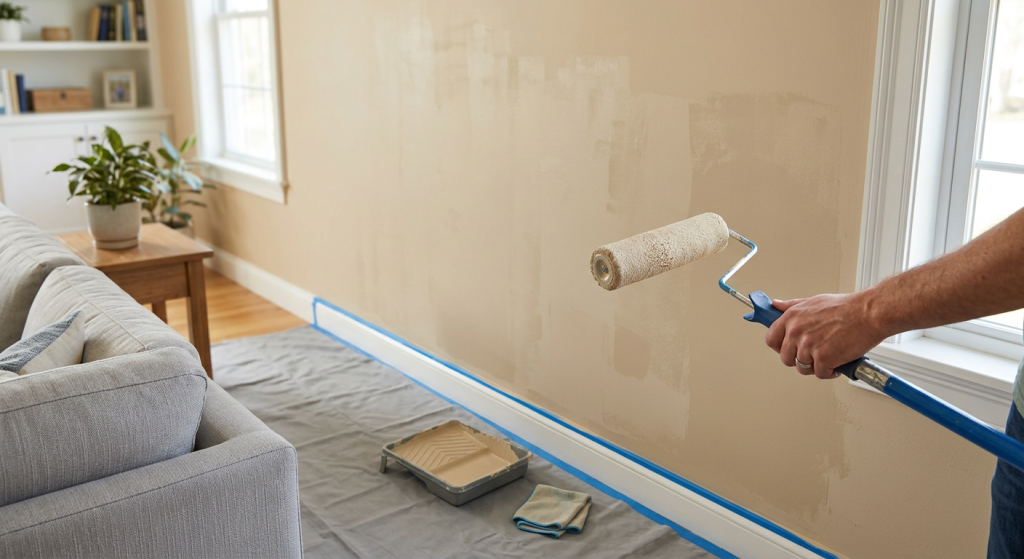
Use a paint tray to load the roller evenly. Roll with steady pressure and overlap each pass slightly. Thin, even coats are better than one heavy coat.
Cause 2: Skipped Primer
Skipped primer can cause blotchy paint when the wall has bare drywall, spackle, joint compound, stains, or patched areas. These surfaces absorb paint differently than a previously painted wall.
If one part of the wall absorbs paint faster than another, the final finish may look uneven. The patch may look dull, shiny, lighter, darker, or outlined.
Primer helps seal the surface before paint goes on. For ordinary wall repairs, a basic drywall primer or interior primer is usually enough. For stains, a stain-blocking primer may be needed.
Primer is usually needed over:
- Bare drywall
- New joint compound
- Spackle
- Sanded patch areas
- Large color changes
- Stained wall sections
- Porous or chalky surfaces
- Repaired drywall patches
Do not use primer as a thick filler. Apply a thin, even coat and let it dry fully before painting.
If the blotchy spots are over spackle or drywall patches, this guide on how many coats of primer over spackle can help you decide whether one coat is enough.
Cause 3: Poor Wall Prep
Poor wall prep is another common reason paint dries blotchy. Paint needs a clean, smooth, dry surface.
Dust, grease, sanding residue, loose paint, and rough patches can all affect the final finish. Even if the paint covers the wall, it may not dry evenly.
This is common around light switches, doorways, kitchens, bathrooms, baseboards, and patched areas.
Wall prep problems include:
- Dust left on the wall
- Grease or grime near kitchens
- Hand oils around switches and doors
- Sanding dust over repairs
- Loose or flaking paint
- Rough spackle edges
- Damp areas that were painted too soon
A microfiber cloth is useful for removing sanding dust. A sanding sponge can smooth rough patch edges. Painter’s tape and drop cloths help protect trim, floors, and nearby surfaces while you work.
Cause 4: Stains Showing Through
Sometimes blotchy paint is caused by stains bleeding through the new paint. Regular wall paint may not block water stains, smoke stains, grease, marker, rust, or yellow discoloration.
If a stain is causing the blotchiness, adding more wall paint may not solve it. The stain can continue to show through.
Use a stain-blocking primer on stained areas before repainting. Make sure any moisture problem is fixed first if the stain came from a leak.
Use stain-blocking primer for:
- Water stains
- Brown or yellow marks
- Smoke discoloration
- Grease spots
- Marker or ink
- Rust stains
- Old mystery stains
- Stains that return after painting
Let the primer dry according to the label before applying the finish paint.
Cause 5: Old Paint on the Wall
Old paint can make touch-ups and new coats look blotchy. Over time, wall paint can fade, collect dust, absorb grime, or lose some of its original sheen.
Fresh paint may not blend perfectly into an older painted wall, even if it came from the same color formula. The new paint is clean and fresh. The old wall surface has aged.
This is one reason small touch-ups sometimes stand out.
Old paint can look blotchy because of:
- Sun fading
- Dust buildup
- Cleaning marks
- Moisture exposure
- Grease or cooking residue
- Hand oils
- General wear over time
If the wall is older or heavily worn, repainting the full wall often looks better than touching up one spot.
Cause 6: Wrong Roller Nap
The roller nap is the thickness of the roller cover. The right nap depends on the wall surface.
A smooth wall usually needs a shorter nap. A lightly textured wall may need a medium nap. A rougher texture needs a thicker nap so the paint reaches the low spots.
Using the wrong roller cover can leave uneven paint, heavy texture, or thin areas. It can also make one part of the wall look different from another.
A better roller cover can make a big difference, so review this guide to the best paint roller for smooth walls before repainting a blotchy wall.
Wrong roller nap can cause:
- Roller streaks
- Heavy texture
- Thin coverage
- Uneven stipple
- Missed low spots
- Shiny or dull roller marks
- A finish that looks different from nearby walls
A good roller cover is a small product choice that can make a big difference. Match the roller cover to the wall texture and the paint you are using.
Cause 7: Uneven Roller Pressure
Uneven roller pressure can make paint dry blotchy. Pressing too hard can leave edges and lines. Letting the roller get too dry can leave thin spots. Overloading the roller can leave heavy patches.
Good roller technique is steady and controlled. The roller should be loaded with paint, but not dripping. It should glide across the wall without needing heavy pressure.
Uneven pressure may leave:
- Roller lines
- Lap marks
- Thin spots
- Thick edges
- Shiny streaks
- Dull streaks
- Uneven wall texture
If the paint dried with mild roller marks, a second thin coat may help. If the marks are raised or rough, light sanding may be needed first.
Cause 8: Poor Paint Mixing
Paint can separate while sitting in the can. If it is not mixed well, the color and sheen may not be consistent.
This is especially common with leftover paint. It may look fine at first, but the wall can dry blotchy if the paint was not stirred thoroughly from the bottom.
Before using stored paint, check that it still looks and smells normal. Do not use paint that is lumpy, stringy, sour-smelling, or dried out.
Before using paint, make sure to:
- Stir it thoroughly
- Scrape the bottom of the can while stirring
- Check for lumps or dried pieces
- Pour paint into a clean tray
- Test a small area if the paint is old
- Let the test area dry before judging the match
Poor mixing can affect both color and sheen, so do not skip this step.
Cause 9: Paint Sheen Issues
Blotchy paint is sometimes a sheen problem. The color may be right, but the finish reflects light differently in different areas.
This can happen when the wall was touched up with the wrong sheen, when paint was applied too thick, or when patched areas were not primed.
Satin, semi-gloss, and gloss finishes show these problems more than flat paint. Strong lighting can make them even more obvious.
Sheen problems may look like:
- Shiny patches
- Dull patches
- Touch-up spots
- Roller marks visible from an angle
- Repaired areas catching light
- Areas that look different during the day than at night
Paint sheen samples can help when you are not sure whether the existing wall is flat, matte, eggshell, satin, or semi-gloss.
Cause 10: Repaired Spots Showing Through
Repaired spots often show through paint when the patch was not prepared correctly. Spackle, joint compound, and bare drywall are more porous than painted wall surfaces.
If you paint directly over those repairs, they may absorb paint differently and create blotchy areas.
Repaired spots can also show if they were not sanded smooth. Paint will not hide ridges, raised edges, or rough compound.
Repaired areas may show through because:
- Spackle was not dry before painting
- The patch was not sanded smooth
- Dust was left after sanding
- Primer was skipped
- The patch edges were not feathered
- The wrong tool was used for touch-up
- The repair texture does not match the wall
A simple repair kit can help: patching supplies, a putty knife, sanding sponge, microfiber cloth, primer, mini roller, touch-up brush, small paint tray, and painter’s tape.
Cause 11: Lighting Angle
Lighting can make blotchy paint easier to see. Side lighting from windows, lamps, ceiling fixtures, or hallway lights can reveal small differences in texture, sheen, and coverage.
A wall may look fine from straight on but blotchy from the side. This is common on long walls, stairways, hallways, and rooms with large windows.
Lighting does not create the problem by itself, but it can reveal it.
Check the wall this way:
- Look straight at the wall
- Look from the side
- Check it in daylight
- Check it at night with lights on
- Stand at normal walking distance
- Wait until the paint is fully dry
Do not judge wet paint too early. Paint often looks uneven while drying.
When a Second Coat Is Enough
A second coat is enough when the blotchiness is caused by thin or uneven coverage, and the surface underneath is already in good shape.
This is common after a first coat, especially over a strong color change. If the wall is smooth, clean, and stain-free, a second coat may even out the finish.
A second coat may be enough when:
- The wall feels smooth
- The blotchiness looks like thin paint
- The old color is showing through
- There are no stains
- There are no rough patches
- Primer was already used where needed
- The paint sheen is correct
- The first coat was applied too lightly
Apply the second coat evenly across the wall or wall section. Random dabs over blotchy spots can create touch-up marks.
When Sanding, Priming, or Repainting Is Needed
Sanding, priming, or repainting is needed when the blotchiness comes from surface problems. More paint alone usually does not fix rough patches, stains, dust, or skipped primer.
If the wall has raised areas, sand them lightly. If there are stains, use stain-blocking primer. If there are spackle or drywall repairs, use drywall primer before repainting.
More prep is needed when:
- The wall feels rough
- Raised roller marks are visible
- Repaired spots are showing
- The surface is dusty or gritty
- Stains are bleeding through
- The patch looks dull or shiny
- The paint sheen does not match
- Touch-ups keep standing out
Use light sanding, not aggressive sanding. The goal is to smooth the surface, not damage the wall.
Step-by-Step Fix for Blotchy Wall Paint
The best fix is to correct the cause before adding more paint. This process works for most beginner-level wall paint problems.
Follow these steps:
- Let the paint dry fully.
- Check the wall in normal light and from an angle.
- Decide whether the issue is coverage or surface prep.
- Lightly sand rough spots, raised paint, or patch edges.
- Wipe the wall with a microfiber cloth to remove dust.
- Apply drywall primer over bare patches or spackle.
- Apply stain-blocking primer over stains.
- Let the primer dry fully.
- Stir the paint well before using it.
- Pour paint into a clean paint tray.
- Use the correct roller cover for the wall texture.
- Apply a thin, even coat with steady pressure.
- Let the paint dry before deciding if another coat is needed.
Use painter’s tape to protect trim and edges. Use drop cloths to protect floors and furniture. For tight corners, use a touch-up brush, but use a mini roller or standard roller for larger wall areas so the texture blends better.
When to Touch Up One Spot
Touching up one spot can work when the blotchy area is small, the wall paint is flat or matte, and the paint is still a good match.
Small touch-ups are less reliable on shiny paint, dark colors, older walls, or areas with strong light.
A small touch-up may work when:
- The spot is very small
- The wall paint is flat or matte
- The wall was painted recently
- The paint has been mixed well
- The surface is smooth and clean
- The area is not in strong side lighting
- The patch was primed if needed
Use a light hand. Do not overload the brush or roller. Thin paint blends better than a thick spot.
When Repainting the Full Wall Is Better
Repainting the full wall is better when the blotchiness covers a large area or when touch-ups keep showing. This is often the cleanest solution for older paint, shiny finishes, dark colors, or walls with several repairs.
A full wall repaint gives your eye natural stopping points at corners, trim, and ceiling lines. That makes slight color or sheen differences much less noticeable.
Repaint the full wall when:
- There are several blotchy spots
- Touch-ups look obvious
- The wall paint is old or faded
- The wall has satin or semi-gloss paint
- The paint color is dark or bold
- The wall gets strong natural light
- Repaired areas keep showing through
- Roller marks cover a wide area
Repainting the whole wall may feel like more work, but it often gives a cleaner result than chasing individual spots.
Common Mistakes When Fixing Blotchy Paint
Blotchy paint is frustrating, but rushing the fix can make the wall look worse. The goal is to create an even surface and then apply even paint.
Avoid these mistakes:
- Adding thick paint over blotchy spots
- Repainting before the first coat is fully dry
- Skipping sanding on raised areas
- Leaving dust on the wall
- Painting over stains without primer
- Skipping primer over spackle or drywall patches
- Using the wrong roller nap
- Pressing too hard with the roller
- Touching up large areas with only a brush
- Using old paint without mixing it well
- Judging paint before it has dried
Heavy paint buildup is one of the biggest mistakes. It can leave raised spots, roller ridges, shiny areas, and uneven texture.
Helpful Tools for Fixing Blotchy Paint
The right tools make it easier to get an even finish. You do not need a complicated setup, but basic prep and painting tools help a lot.
Useful tools and supplies include:
- Primer for bare patches and repaired areas
- Stain-blocking primer for stains
- Roller covers matched to the wall texture
- Mini rollers for small wall sections
- Paint trays for even roller loading
- Sanding sponges for smoothing rough spots
- Microfiber cloths for removing dust
- Painter’s tape for trim and edges
- Touch-up brushes for corners and tiny spots
- Drop cloths for floor and furniture protection
- Wall-prep tools for cleaning and patching
For most small wall fixes, a mini roller blends better than a brush because it can match the rolled texture of the surrounding paint.
How to Prevent Blotchy Paint Next Time
Preventing blotchy paint starts with prep. A clean, smooth, sealed wall is much easier to paint evenly than a dusty or patched wall.
Take time to fix surface problems before opening the paint can. That usually saves time in the end.
To prevent blotchy wall paint:
- Clean dirty or greasy walls before painting
- Let the wall dry fully after cleaning
- Sand rough patches smooth
- Wipe away all sanding dust
- Prime spackle, joint compound, and bare drywall
- Use stain-blocking primer over stains
- Stir paint thoroughly before use
- Use the right roller cover for the wall texture
- Keep the roller evenly loaded
- Use steady roller pressure
- Apply thin, even coats
- Repaint the full wall when touch-ups are unlikely to blend
Good prep does not have to be complicated. Clean the wall, smooth the rough spots, prime the problem areas, and paint with consistent technique.
Final Thoughts
If you are asking, “why does my wall paint look blotchy,” the answer is usually uneven coverage, poor prep, skipped primer, stains, roller problems, sheen differences, repaired spots, or lighting angle.
If the wall is smooth and the first coat is simply thin, a second even coat may fix it. If the blotchiness comes from stains, dust, rough patches, skipped primer, or drywall repairs, prep work is needed before repainting.
Do not try to hide blotchy paint with heavy paint buildup. Sand rough areas, wipe away dust, prime where needed, and repaint with thin, even coats. For large blotchy areas or touch-ups that keep showing, repainting the full wall is often the cleanest and most reliable fix.