
caulk before or after painting? the correct order
For most interior projects, the answer to caulk before or after painting is to caulk before the final paint coats. Repair and prepare the surfaces first, prime bare or repaired areas where needed, then apply paintable caulk to appropriate seams. Let the caulk dry or cure according to its product instructions before painting over it.
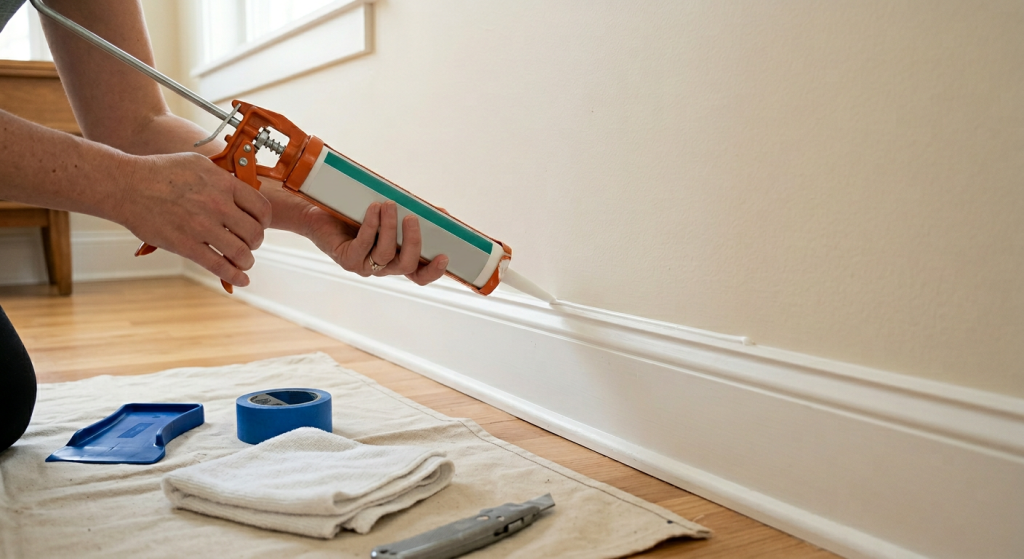
| Situation | What to do | Typical order |
|---|---|---|
| Small trim-to-wall gap | Caulk if the joint is narrow and stable | Prep → prime if needed → caulk → paint |
| Hairline seam along baseboard | Use a thin bead of paintable caulk | Prep → caulk → paint |
| Tight, clean trim joint | Caulk may not be necessary | Prep → paint |
| Loose, rotten, or damaged trim | Repair the underlying problem first | Repair → prep → caulk if appropriate → paint |
| Bare or repaired surface needing primer | Prime before caulking when appropriate | Repair → sand → prime → caulk → paint |
| Previously painted trim receiving a new finish coat | Clean and prep before caulking visible seams | Prep → caulk → paint |
Caulk is a finishing material, not a substitute for repair. Large moving gaps, loose trim, rot, water damage, or signs of structural movement should be corrected before cosmetic caulking begins.
The Correct Order for Caulking and Painting
For baseboards, door and window trim, crown molding, and similar painted interior trim, a reliable workflow is:
Step 1: Inspect and repair the trim
Check for loose pieces, damaged wood or composite material, moisture damage, and unusually large gaps. Secure or repair the trim before trying to hide a problem with caulk.
If a gap changes noticeably when you press on the trim, the joint needs attention before caulking.
Step 2: Clean and prepare the surfaces
Remove dirt, dust, grease, loose paint, and other material that could interfere with the repair, primer, or caulk.
Follow the caulk and coating manufacturers’ surface-preparation requirements, especially when working over glossy or previously coated surfaces.
Step 3: Fill nail holes and repair surface defects
Caulk is intended for joints and seams. It is generally not the right material for filling nail holes, dents, or other surface defects in trim.
Complete those repairs with a material appropriate for the surface and allow it to dry as directed.
Step 4: Sand and remove dust where appropriate
Smooth repaired areas and rough paint edges as needed. Remove sanding dust before applying primer or caulk.
Use appropriate dust control and avoid disturbing coatings that could contain lead or other hazardous materials. If the age or composition of an existing coating creates a concern, stop before sanding or scraping until you know how it can be handled safely.
Step 5: Prime bare or repaired surfaces when needed
Primer belongs before caulk in many trim-painting projects because it seals bare or repaired surfaces and gives the caulk a prepared surface to contact.
You do not necessarily need to prime every inch of previously painted trim. Follow the requirements of the primer, caulk, paint, and substrate you are using.
Step 6: Apply paintable caulk to appropriate seams
Apply a narrow, controlled bead rather than filling the joint with more caulk than necessary. Common locations include wall-to-trim seams and small gaps where installed trim pieces meet.
Use a caulk specifically labeled as paintable if the finished bead will receive paint.
For more help choosing the appropriate type, see Best Caulk for Trim Before Painting.
Step 7: Let the caulk dry or cure as directed
Do not assume a bead is ready for paint because its surface looks dry. Products differ in how soon they can be painted and how long they require to dry or cure under specific conditions.
Follow the label for the caulk you actually used. For a closer look at this part of the process, see How Long Should Caulk Dry Before Painting.
Step 8: Apply the final paint coats
Once the caulk is ready for coating, apply the finish paint according to the paint manufacturer’s instructions.
Painting the caulk and adjoining surfaces together helps create a continuous finished appearance across trim-to-wall seams.
Where Caulk Belongs Before Painting
Caulk works best on narrow, stable joints that need a flexible cosmetic seal. Interior trim commonly develops these seams because separate materials and pieces meet along an edge.
Typical locations include:
- The top edge of baseboards where they meet a painted wall
- Door casing-to-wall seams
- Window trim-to-wall seams
- Crown molding-to-wall or crown molding-to-ceiling seams
- Small joints between painted trim components when the joint is intended to be sealed
The goal is not to erase every visible line. Caulk should improve a legitimate joint, not become a general-purpose filler.
When You May Not Need Caulk
A tight, clean trim joint may look better without an unnecessary bead. Caulking every edge can add work and create a heavier-looking finish.
You should also avoid using cosmetic caulk to conceal a problem that requires repair. Loose trim should be secured. Rotten material should be evaluated and replaced as appropriate. Water damage requires finding and correcting the moisture source.
Large gaps or joints that continue moving can exceed what an ordinary cosmetic bead can handle. If a gap suggests substantial movement or a structural problem, determine the cause rather than repeatedly filling it.
How to Apply Caulk for a Clean Painted Finish
Good results depend as much on bead size and preparation as on the order of operations.
Cut the nozzle to produce a bead appropriate for the joint rather than making an unnecessarily large opening. Apply steady pressure and move along the seam at a controlled pace.
Use only enough material to bridge and seal the joint. An oversized bead takes longer to dry, is harder to finish neatly, and may be more prone to visible shrinkage or other problems.
Smooth the bead while the product remains workable, following its instructions. The finished caulk should form a neat transition between the two surfaces rather than a thick ridge spread far across the trim and wall.
Clean excess material using the method specified for that particular caulk. Do not assume every caulk can be cleaned or tooled with the same solvent or technique.
Ventilate the work area as directed on the product label, avoid unnecessary skin contact, and follow its cleanup and disposal instructions.
Should You Prime Before or After Caulking?
For a typical interior trim project involving bare wood, exposed substrate, filler repairs, or sanded-through areas, prime the areas that need primer before applying the final caulk bead. Then caulk the appropriate seams, allow the caulk to become paint-ready, and apply the finish coats.
That sequence has an important practical advantage: repairs and porous surfaces are stabilized before you create the finished seam.
There are exceptions. Some coating systems or specialty caulks specify a different sequence or have particular substrate requirements. The instructions for the products in your project control when they differ from a general workflow.
Previously painted trim in sound condition may need cleaning, scuffing, spot priming, or other preparation rather than a complete new primer coat. The condition of the existing finish matters.
Why Caulk Can Crack After Painting
Correct sequencing reduces problems, but it cannot prevent every crack. A painted caulk joint still has to tolerate drying, shrinkage, and movement between adjoining materials.
Several common problems can produce cracks or separation.
| What happened | What you may see | What it can mean |
|---|---|---|
| Caulk was painted too soon | Cracking or distortion in the coating | Caulk was not sufficiently ready for paint |
| Wrong caulk was used | Poor or unreliable finished surface | Product was unsuitable for the application |
| Bead was excessively thick | Shrinkage or cracking | Too much material was applied |
| Surface was dirty or poorly prepared | Edges pull away | Caulk did not maintain a good bond |
| Caulk shrank as it dried | Recessed or cracked seam | Bead changed dimensions during drying |
| Trim or joint moved | Recurring split | Movement exceeded what the bead could accommodate |
| Caulk lost adhesion | Separation along an edge | Bead has pulled away from one of the surfaces |
Paint Cracking Is Not Always Caulk Failure
Look closely before deciding how to repair the seam.
Sometimes the paint film over the caulk cracks while the caulk bead underneath remains intact and attached. That points to a coating or timing problem rather than automatically proving that the entire bead has failed.
In other cases, the caulk itself has split, shrunk substantially, or pulled away from the wall or trim. You may be able to see a gap along an edge or movement in the bead.
That distinction matters because another coat of paint will not repair a failed caulk joint.
What to Do When the Caulk Itself Has Failed
Do not keep painting over a bead that has separated, split, or become loose. Paint may temporarily disguise the line, but it does not restore the caulk’s bond to the surfaces.
Where the bead itself has failed, loose or defective caulk may need to be carefully removed. Correct any preparation problem or underlying movement that caused the failure, then recaulk the appropriate joint with a compatible paintable product.
If the trim repeatedly moves enough to break a properly prepared bead, investigate why. Recurrent cracking can indicate loose trim or movement that cosmetic recaulk alone will not solve.
Common Caulking and Painting Mistakes
Many disappointing trim finishes come from a few avoidable errors:
- Caulking before repairing the joint. A bead cannot stabilize loose trim or repair rot.
- Using caulk as filler everywhere. Nail holes and surface damage usually require an appropriate filler or repair material.
- Skipping preparation. Dust, loose paint, and contaminated surfaces can interfere with adhesion.
- Applying too much caulk. A large bead is not automatically stronger or more durable.
- Painting too soon. Follow the product’s paint-ready or cure instructions instead of relying on appearance alone.
- Using a non-paintable product where paint is required. Confirm paintability before application.
- Ignoring recurring movement. Repeated cracking deserves investigation rather than another layer of caulk and paint.
Product compatibility also matters. A caulk can be appropriate for one substrate or coating system and unsuitable for another, so check the labels for both the caulk and paint before starting.
If paint is peeling, beading, or refusing to bond over the caulk, see our guide to why paint may not stick to caulk.
Caulk Before or After Painting: When Can the Order Change?
Although caulking before the final paint coats is the normal approach for painted interior trim, it is not an absolute rule for every material or product.
You may encounter already-finished surfaces, specialty sealants, factory-coated trim, or coating systems with specific preparation and application requirements. In those cases, follow the instructions for the actual products and surfaces rather than forcing them into a generic sequence.
For an ordinary painted baseboard, door casing, window casing, crown molding, or wall-to-trim seam, however, the practical order remains straightforward: repair, prepare, prime where needed, caulk appropriate seams, let the caulk become ready for paint, and then apply the final paint coats.
Final Thoughts
For most interior trim work, caulk belongs near the end of surface preparation but before the final paint. Repair damage first, prepare the surfaces, prime bare or repaired areas where necessary, apply a thin bead of paintable caulk to narrow stable seams, and give it the required drying or curing time before painting.
If a joint is loose, damaged, unusually large, or repeatedly cracking, do not treat more caulk and paint as the automatic solution. Correct the underlying problem first so the finished seam has a stable surface to seal.