
Drywall Tape Bubbles: causes and repair
Drywall tape bubbles form when tape loses its bond to joint compound, often because too little compound was applied beneath it, air was trapped, or the surface was dusty. They can appear during installation, after compound dries, or after painting. For a small bubble on a dry, stable wall, remove the loose section and rebuild the repair. Long, poorly bonded seams usually need replacement tape.
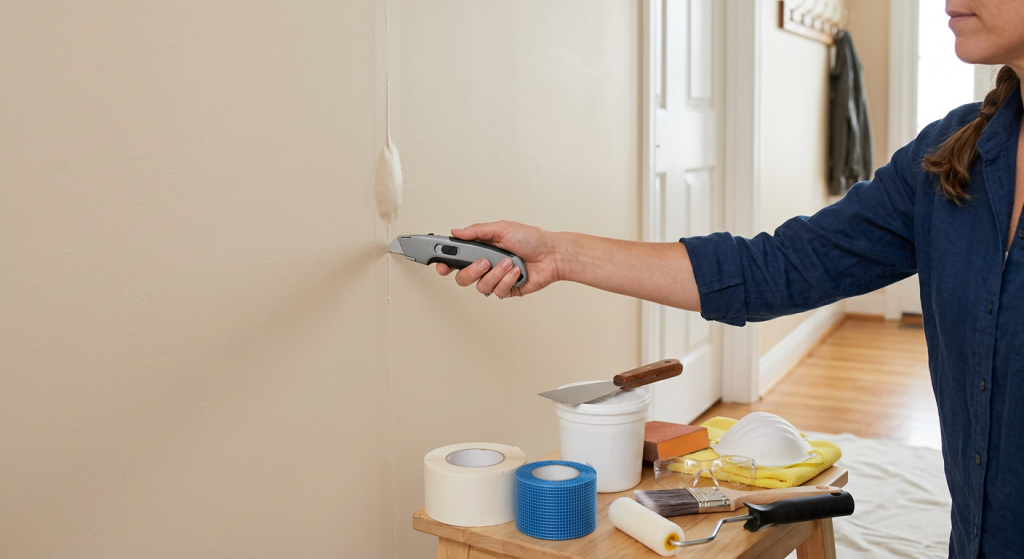
Drywall Tape Bubbles: Quick Cause and Fix Guide
The location, timing, and size of a bubble help identify the next step. Check whether the surrounding tape is still firmly attached before cutting anything.
| What You Notice | Likely Cause | Appropriate Response |
|---|---|---|
| Bubble in freshly embedded tape | Trapped air or too little compound | Lift and re-embed while wet |
| Raised spot after compound dries | Poor adhesion beneath tape | Remove the loose area and repair |
| Bubble visible after painting | Previously weak tape or damp compound | Check adhesion and repair before repainting |
| Long, hollow, peeling seam | Extensive tape failure | Remove and replace loose tape |
| Recurring bubble with stains or cracks | Moisture or seam movement | Investigate the cause before repairing |
Safety: Do not sand, scrape, or cut through potentially lead-containing paint in a home built before 1978. If its lead status is unknown, arrange assessment or repair by a lead-safe certified contractor. Stop if drywall is wet, sagging, visibly moldy, or repeatedly failing. Those conditions require investigation before cosmetic repair.
A tape bubble follows a drywall seam and may feel hollow or show a raised tape edge. Bubbles confined to the paint film are a different problem and do not necessarily mean the drywall tape has failed.
When Drywall Tape Bubbles Appear
Immediately After Embedding the Tape
Fresh paper tape should lie flat in a continuous bed of wet joint compound. If a bubble appears while you are working, gently lift the affected section, add enough compound beneath it, and press it back into place with a taping knife.
Work from the center toward the ends to push out trapped air and excess compound. Avoid pressing so hard that you squeeze nearly all the compound from beneath the tape.
After the Compound Dries or During Another Coat
A raised oval spot or hollow section that becomes visible after drying often means the tape never bonded properly. More compound spread over the bubble will not restore its bond.
Additional coats can also expose a poorly embedded section. If the underlying tape moves or lifts while you apply another coat, stop and correct that area before continuing.
After Priming or Painting
Painting may reveal an existing weak seam as moisture and roller pressure reach the repair. Applying primer too early or painting over incompletely dried compound can contribute to finish problems.
Skipping primer does not usually create a tape bubble by itself. Primer seals porous compound and helps paint finish evenly, but it cannot glue detached tape back down.
In Older Finished Seams
Older tape may loosen because of a poorly executed previous repair, moisture, or repeated movement.
A raised line, peeling edge, or bubble returning in the same location deserves closer attention than a single fresh installation bubble.
Why Drywall Tape Loses Adhesion
Insufficient compound or trapped air. Paper tape needs joint compound behind it, not only on top. Dry spots, wrinkled tape, or uneven pressure from the taping knife can leave pockets that later rise.
Dust or weak previous repairs. Drywall dust, flaky old compound, and other debris interfere with bonding. Coating over previously loose tape creates another weak layer instead of a sound repair.
Moisture and humidity. Humid conditions can delay drying. Leaks or condensation can soften finished drywall and cause tape to lift. Stains, musty odors, dampness, or recurring bubbles are reasons to stop and address the underlying problem.
Seam movement. Repeated movement near corners, ceilings, doors, or windows can loosen a repaired seam. If the same section repeatedly fails or cracks spread, have the cause evaluated rather than rebuilding the finish again.
Should You Patch the Bubble or Replace the Tape?
Small, Isolated Bubble
A localized repair may be reasonable when the wall is dry and firm, the bubble is short, and the tape on either side remains securely bonded.
On confirmed lead-safe surfaces, remove the detached material and check that the surrounding tape does not lift.
Rebuild the damaged section with joint compound and replacement tape where the seam has been exposed. Merely filling the hollow space from above is not a dependable repair.
Long Section of Loose Tape
If a long seam sounds hollow, tape edges peel, or several nearby bubbles connect, remove the unsound length back to firmly bonded material.
Retape the affected seam rather than covering it with another thick coat.
For an extensive seam, difficult ceiling access, or an inside corner that has repeatedly failed, a drywall finishing professional may be the practical choice.
Recurring Bubble or Signs of Damage
Do not start a cosmetic repair if the drywall is damp, soft, stained by an active leak, or showing suspected mold.
A qualified water-damage or mold professional should assess significant or hidden damage. Repeated seam movement, spreading cracks, or sagging calls for a qualified drywall contractor and, when structural movement is suspected, an appropriate structural professional.
Choose Compatible Tape, Compound, and Tools
For a small accessible repair, gather a utility knife, taping knife, replacement tape, appropriate joint compound, a sanding sponge, microfiber cloth, primer, and matching wall paint.
Use eye protection and suitable respiratory protection for sanding, contain dust, and ventilate the work area.
Paper tape is widely used for seams and inside corners. Embed it into a continuous layer of wet joint compound so there are no dry pockets beneath it.
Self-adhesive fiberglass mesh tape can suit certain repairs, but use the compound specified for that tape. Conventional mesh tape commonly calls for setting-type joint compound rather than ordinary premixed drying-type compound.
Setting-type compound hardens through a chemical reaction and offers a limited working time after mixing. Follow its mixing and finishing instructions, and remember that setting is not necessarily the same as being dry enough for primer or paint.
Premixed joint compound gives beginners more working time when compatible with the chosen tape.
For why tape repairs normally require joint compound rather than ordinary hole filler, see Spackle vs Joint Compound.
How to Repair a Small, Dry Drywall Tape Bubble
Use this procedure only for a small, accessible seam on sound, dry drywall where existing painted surfaces can safely be disturbed. A long, loose section requires more extensive retaping.
Step 1: Check How Far the Tape Is Loose
Look at the bubble in good light. Gently press around its edges to find where the tape stops moving.
If looseness continues well beyond the visible bubble, plan to replace that longer section instead of making a tiny patch.
Step 2: Remove Unsound Tape
On a confirmed lead-safe surface, carefully cut away the detached section with a utility knife.
Keep the blade shallow so you do not damage the drywall beneath it. Remove only loose tape and compound; leave firmly bonded material in place.
Step 3: Prepare the Repair Area
Clear loose debris and dust with a clean microfiber cloth.
Check that the drywall surface is solid and that the edges of the remaining tape are secure. Do not apply compound over dusty, crumbling, or damp material.
Step 4: Embed Replacement Tape Where Needed
Spread a continuous, even bed of compatible joint compound across the exposed seam.
Fit the replacement tape according to its product instructions, connecting the repair to sound material.
For paper tape, press it into the wet compound with a taping knife, pushing out trapped air while retaining enough compound beneath it for a secure bond.
Step 5: Apply Thin Finishing Coats
Cover and feather the repair with joint compound as directed.
Let each coat dry or become ready for recoating according to its label before applying another. Several thin finishing coats are easier to blend than one thick buildup.
Step 6: Sand the Dry Repair Lightly
When the final coat is completely dry, use a fine sanding sponge to smooth ridges and blend the edges.
Do not sand aggressively over the tape or expose its paper surface. If the repair is low, add another thin coat instead of sanding deeper.
For grit selection and technique, see Best Sanding Sponge for Drywall Patches.
Step 7: Remove Dust and Prime
Wipe away sanding dust and clean the surrounding area. If you use a slightly damp cloth, let the surface dry again.
Apply compatible primer to seal the repaired compound, following its application and drying instructions.
Step 8: Repaint and Check the Seam
Once the primer is ready, apply matching paint with a suitable brush or mini roller.
Allow the coating to dry before inspecting the seam from different angles. If the tape lifts again, investigate the underlying cause instead of applying additional paint.
Common Mistakes and How to Prevent More Bubbles
The most consequential mistake is covering detached tape with more compound or paint. Neither restores the missing bond.
Other avoidable errors include:
- Embedding paper tape without a continuous bed of wet compound.
- Pressing out so much compound that dry pockets remain.
- Leaving drywall dust or loose old material beneath a new repair.
- Adding coats or paint before the previous material is ready.
- Sanding too aggressively and exposing the repaired tape.
- Ignoring moisture, repeated cracking, or movement along the seam.
On new repairs, clean the surface, use a compatible tape-and-compound combination, and press the tape flat while the bedding coat is workable.
Let each layer dry as required, then clean, prime, and paint. Correcting a bubble while the tape is still wet is usually easier than repairing it after the wall is finished.
Final Thoughts
Most drywall tape bubbles start with insufficient compound, trapped air, or a weak bond, although moisture and seam movement can cause repeated failures. The time a bubble first appears helps narrow down the cause, but the condition of the surrounding tape determines the repair.
For a small, dry, isolated bubble, remove loose material and rebuild the affected section. Replace longer failed lengths of tape, and resolve dampness or recurring movement before attempting another cosmetic repair.