Spackle vs Joint Compound for Wall Repairs
Spackle vs joint compound is a common choice for homeowners fixing nail holes, dents, gouges, seams, and drywall patches before painting.
The short answer: spackle is usually easier for small homeowner repairs, while joint compound is better for larger drywall work, seams, tape repairs, and wide feathering.
If you are filling a few nail holes before repainting a room, lightweight spackle is usually the simpler product. If you are repairing a larger patch, covering drywall tape, or blending a repair over a wider area, joint compound is usually the better choice.
Spackle vs Joint Compound: Quick Comparison
| Product | Best For | Ease of Use | Main Caution |
|---|---|---|---|
| Lightweight spackle | Nail holes, small dents, tiny wall dings | Easiest for beginners | Not for large repairs |
| Vinyl spackle | Deeper small holes and gouges | Still beginner-friendly | May need more sanding |
| Pre-mixed joint compound | Seams, patches, feathering | Good for drywall work | Dries slower |
| Setting-type compound | Faster, stronger drywall repairs | Less beginner-friendly | Hardens on a schedule |
For most small wall repairs, spackle is the practical starting point. For drywall seams, tape repairs, and larger patches, joint compound gives you more working time and a better surface for feathering.
What Is Spackle?
Spackle is a patching product made for small wall repairs.
It is commonly used to fill nail holes, small dents, picture hanger holes, tiny screw holes, and minor gouges. Many lightweight spackles are easy to apply, dry fairly quickly, and sand smoothly before primer and paint.
Spackle is popular with homeowners because it is simple. You can use a small putty knife, apply a thin amount, let it dry, sand lightly, prime, and paint.
Spackle is usually used for:
- Nail holes
- Picture hanger holes
- Small screw holes
- Tiny dents
- Minor wall dings
- Small shallow gouges
- Quick cosmetic repairs before painting
Spackle is not the best choice for large drywall repairs, seams, or areas that need drywall tape. It works best when the repair is small and the wall surface around it is solid.
What Is Joint Compound?
Joint compound is a drywall finishing material used for seams, tape, patches, and larger repairs.
It is often called drywall mud. It can be used to cover drywall tape, feather patch edges, skim small areas, and blend repairs into the surrounding wall.
Joint compound is softer and easier to spread over a wide area than many patching fillers. That makes it useful when the repair needs to disappear gradually into the wall surface.
Joint compound is usually used for:
- Drywall seams
- Drywall tape repairs
- Larger patches
- Feathered wall repairs
- Skim coating small areas
- Corner repairs
- Multiple-coat drywall repairs
- Blending patched areas before primer
Joint compound usually takes more patience than spackle. It may need more than one coat, and each coat needs to dry or harden before sanding and priming.
The Main Difference Between Spackle and Joint Compound
The main difference is the size and type of repair each product is meant to handle.
Spackle is best for small, quick, isolated repairs. Joint compound is better for drywall finishing, wider blending, seams, and larger repair areas.
Think of spackle as the small-hole product and joint compound as the drywall-blending product.
The difference comes down to:
- Repair size
- Drying time
- Shrinkage
- Sanding
- Strength
- Ease of use
- Whether drywall tape is needed
- How wide the repair needs to be feathered
- How smooth the final paint surface needs to look
If the repair is only a nail hole, spackle is usually enough. If the repair involves a seam, patch, tape, or a wide uneven area, joint compound is usually the better fit.
When Spackle Is Better
Spackle is better when the repair is small and shallow.
It is the easier choice for most beginner homeowner repairs because it comes ready to use, applies quickly, and does not require a wide taping knife or drywall finishing technique.
Choose spackle for:
- Small nail holes
- Picture hanger holes
- Tiny screw holes
- Small dents
- Minor gouges
- Quick wall touch-ups
- Small repairs before repainting
- Simple cosmetic fixes
Lightweight spackle is usually the easiest option for small holes. Vinyl spackle may be better when the hole is a little deeper or the repair needs a firmer patch.
For small picture holes and screw holes, this guide to the best spackle for nail holes explains which spackle types are easiest to use before painting.
When Joint Compound Is Better
Joint compound is better when the repair is larger, wider, or needs to be blended into the wall.
It is especially useful when drywall tape is involved. Spackle is not the right product for finishing drywall seams or taping repairs.
Choose joint compound for:
- Drywall seams
- Tape repairs
- Larger drywall patches
- Corner repairs
- Wide gouges
- Skimmed areas
- Repairs that need feathering
- Multi-coat wall repairs
Joint compound is better for feathering because it spreads smoothly over a wider area. That helps the repair fade into the wall instead of leaving a hard raised edge.
Nail Holes: Spackle Is Usually Easier
For nail holes, spackle is usually the better choice.
A small amount of lightweight spackle can fill the hole without requiring a large repair area. Use a small putty knife, press the spackle into the hole, scrape away extra material, and let it dry.
For nail holes, use:
- Lightweight spackle
- Small putty knife
- Fine-grit sanding sponge
- Microfiber cloth
- Primer
- Touch-up paint
Do not leave a large mound of spackle over the hole. A flat, thin repair is easier to sand and less likely to show after painting.
Small Dents and Dings: Spackle Usually Works
For shallow dents and small wall dings, spackle is usually a good fit.
These repairs are common behind doors, near furniture, in hallways, and around picture frames. If the drywall paper is not badly torn and the damage is shallow, spackle can usually handle it.
For small dents, use:
- Lightweight spackle for shallow dents
- Vinyl spackle for slightly deeper dents
- Small or medium putty knife
- Fine-grit sanding sponge
- Primer before paint
If the dent is deep, cracked, or soft, the repair may need joint compound or a drywall repair kit instead.
Gouges: It Depends on the Size
Small gouges can often be fixed with spackle. Larger gouges usually need joint compound.
The deciding factor is depth and width. If the gouge is shallow and narrow, spackle is usually fine. If the gouge is wide, torn, or uneven, joint compound may feather better.
Use spackle for:
- Small shallow gouges
- Minor surface scratches
- Small chips in painted drywall
- Tight areas where only a small fill is needed
Use joint compound for:
- Wider gouges
- Torn drywall paper repairs
- Larger damaged areas
- Repairs that need feathering
- Areas where more than one coat is needed
If the drywall paper is torn, seal or prime the damaged area as needed before applying patching material. Loose paper can cause bubbling or rough texture under the repair.
Seams and Tape Repairs: Use Joint Compound
Joint compound is the right choice for drywall seams and tape repairs.
Drywall tape needs compound to bond, cover, and feather the seam. Spackle is not designed for that kind of repair. It may crack, shrink, or leave a visible ridge.
Use joint compound for seam repairs involving:
- Loose drywall tape
- Cracked seams
- Inside corner tape
- Ceiling seams
- Wall-to-wall corners
- Drywall patch seams
- Wide feathering around tape
For these repairs, pre-mixed joint compound is easier for many homeowners than setting-type compound. Setting-type compound can be useful, but it is less forgiving because it hardens on a schedule.
Larger Drywall Patches: Use Joint Compound
Larger drywall patches usually need joint compound.
A patch has edges that need to be blended into the wall. Joint compound can be applied in thin coats and feathered outward with a taping knife. That helps hide the repair after primer and paint.
Use joint compound for larger patches when:
- A drywall patch was installed
- Drywall tape is needed
- The repair area is wider than a small gouge
- The wall needs feathering
- Several coats are needed
- The repair must blend into a smooth wall
A drywall patch kit may be useful if the hole is too large for filler alone. The kit may include a patch, compound, knife, and sanding material.
Drying Time Differences
Spackle often dries faster than joint compound, especially when used in small amounts.
That is one reason it is convenient for nail holes and small dents. However, drying time depends on the product, repair depth, humidity, temperature, and how much material you apply.
Joint compound often takes longer to dry, especially pre-mixed compound applied over a larger area. Setting-type compound hardens chemically in a listed time, but that does not always mean it is ready for every next step immediately.
Drying time depends on:
- Product type
- Patch thickness
- Repair depth
- Room humidity
- Room temperature
- Airflow
- Surface condition
- Product label instructions
Always follow the label. Do not sand, prime, or paint over wet, soft, or gummy patching material.
Sanding Differences
Spackle is usually easy to sand when used for small repairs.
Lightweight spackle is especially beginner-friendly because it sands smoothly with a fine-grit sanding sponge. Vinyl spackle may take a little more effort depending on the product and thickness.
Joint compound also sands well, but larger repairs create more dust and need more care. The goal is to feather the edges without sanding too deep into the center.
For sanding small repairs, use:
- Fine-grit sanding sponge
- Light pressure
- Microfiber cloth for dust cleanup
- Primer after sanding
For sanding larger drywall repairs, use:
- Medium-grit sanding sponge only for high ridges
- Fine-grit sanding sponge for final smoothing
- Sanding block for flat raised areas
- Dust mask and safety glasses
- Microfiber cloth or tack cloth before primer
Do not sand aggressively. Heavy sanding can expose drywall paper, create low spots, and make the repair harder to hide.
Shrinkage Differences
Both spackle and joint compound can shrink as they dry, but the amount depends on the product and how thickly it is applied.
Spackle used in a tiny nail hole usually has less visible shrinkage. But if you use too much or try to fill a larger hole, it may shrink, crack, or leave a dip.
Joint compound is often applied in multiple thin coats because it can shrink as it dries. Thin coats are easier to control and sand than one heavy coat.
Shrinkage is more likely when:
- The product is applied too thick
- The gap or hole is deep
- The repair is large
- The room is humid
- The product has not dried fully
- One heavy coat is used instead of thin coats
If the repair dries with a dip, do not keep sanding. Add another thin coat, let it dry, and sand lightly.
Strength Differences
Spackle is strong enough for small cosmetic repairs, but it is not meant to replace drywall repair materials for larger damage.
Joint compound is better for drywall finishing, especially when used with drywall tape or patch materials. It can create a smoother blended repair over a larger area.
Setting-type compound can be stronger and faster for certain repairs, but it is less beginner-friendly than pre-mixed joint compound because it hardens within a set working time.
For strength, think this way:
- Lightweight spackle is for small cosmetic holes
- Vinyl spackle is for slightly tougher small repairs
- Pre-mixed joint compound is for drywall finishing and feathering
- Setting-type compound is for faster or stronger drywall repair work
- Drywall tape or patch kits are needed when the surface needs reinforcement
Do not rely on spackle alone for a hole that needs a patch.
Ease of Use Differences
Spackle is easier for beginners on small repairs.
It usually comes in a small tub or tube, does not require mixing, and can be applied with a small putty knife. That makes it ideal for quick wall prep before painting.
Joint compound is easy once you understand the process, but it is less forgiving on larger repairs. You need to apply thin coats, feather the edges, let each coat dry, sand carefully, and prime before painting.
Spackle is easier when:
- The repair is small
- You only need one or two thin applications
- You are filling nail holes
- You want minimal tools
- You are doing a quick paint-prep repair
Joint compound is easier when:
- The repair is wide
- The patch needs feathering
- Drywall tape is involved
- You need to blend a surface gradually
- You are repairing a seam or larger patch
Using the right product makes the job easier. Using spackle on a large repair usually creates extra work.
Paint Prep Differences
Both spackle and joint compound need proper paint prep.
After sanding, the repair should be cleaned and primed before paint. This matters because spackle and joint compound can absorb paint differently than the surrounding wall.
Skipping primer can leave a dull, shiny, or patchy spot after painting.
Before painting a repair:
- Let the patch dry fully
- Sand lightly until smooth
- Wipe away dust with a microfiber cloth
- Use a tack cloth if appropriate
- Prime the repair
- Let primer dry according to the label
- Paint with a touch-up brush or mini roller
A mini roller can help match the texture of the surrounding wall better than a brush on larger repairs.
Buying Guidance for Beginner Homeowners
You do not need every patching product on the shelf.
A small homeowner repair kit should match the kind of wall damage you actually have. For nail holes and tiny dents, spackle is enough. For drywall seams and patches, joint compound and drywall tape are usually needed.
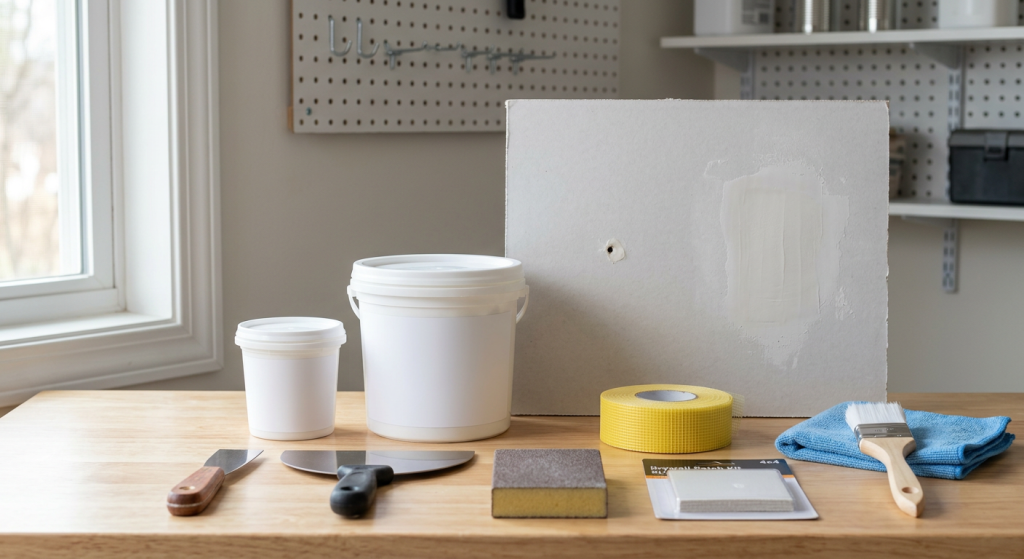
For small wall repairs, consider:
- Lightweight spackle
- Vinyl spackle
- Small putty knives
- Fine-grit sanding sponge
- Microfiber cloths
- Primer
- Touch-up brush
- Mini roller
For larger drywall repairs, consider:
- Pre-mixed joint compound
- Setting-type compound if you are comfortable with timed products
- Taping knives
- Drywall tape
- Drywall patch kit
- Sanding sponges
- Primer
- Microfiber cloths
Common example brands homeowners may see include DAP, 3M, USG, Sheetrock, Red Devil, DryDex, Westpac, and CertainTeed. Treat these as examples to compare, not final ranked recommendations. Product formulas and labels can change, so final product choices should be verified before adding affiliate links.
Pre-Mixed Joint Compound vs Setting-Type Compound
Pre-mixed joint compound is usually easier for beginners.
It comes ready to use and gives you more working time. This is helpful when you are learning to feather a patch or cover drywall tape.
Setting-type compound comes as a powder and hardens through a chemical setting process after mixing. It can be useful for faster repairs, deeper fills, or stronger work, but it is less forgiving because it has a limited working time.
Pre-mixed joint compound is better when:
- You are new to drywall repair
- You want more working time
- You are feathering a patch
- You are repairing seams slowly
- You want a ready-to-use product
Setting-type compound may be useful when:
- You need a faster set
- The repair is deeper
- You are comfortable mixing product
- You understand the working time
- You are doing a more involved drywall repair
For beginner homeowners, pre-mixed joint compound is usually the easier product to learn with.
Putty Knives vs Taping Knives
The tool size should match the repair size.
A small putty knife is best for spackle and small repairs. A wider taping knife is better for joint compound because it helps feather the repair into the wall.
Use a putty knife for:
- Nail holes
- Small dents
- Tiny gouges
- Lightweight spackle
- Vinyl spackle
- Small touch-ups
Use a taping knife for:
- Drywall seams
- Tape repairs
- Larger patches
- Feathered joint compound
- Wider wall repairs
- Skimmed areas
A common beginner mistake is trying to feather a larger repair with a tiny putty knife. That often leaves ridges and hard edges.
When a Drywall Repair Kit Is Better Than Either Product Alone
Sometimes filler is not enough.
If the wall has a hole, torn drywall, or damage that needs reinforcement, a drywall repair kit may be better than using spackle or joint compound by itself.
A drywall repair kit may be better for:
- Holes larger than a small nail or screw hole
- Drywall anchor blowouts
- Broken drywall paper
- Small holes through the wall surface
- Repairs that need mesh or patch material
- Damage that feels soft around the edges
- Areas where filler keeps cracking
A kit may include patch material, compound, a knife, and sanding supplies. For many homeowners, that is easier than buying each piece separately.
For holes that need reinforcement, compare drywall patch kit vs spackle before trying to fill the damage with patching material alone.
Common Mistakes When Choosing Between Spackle and Joint Compound
Many wall repair problems start with choosing the wrong product.
Spackle and joint compound overlap in some small repairs, but they are not the same tool for every job.
Common choosing mistakes include:
- Using spackle on drywall seams
- Using spackle for large holes
- Using joint compound for tiny nail holes when spackle would be simpler
- Buying setting-type compound without understanding working time
- Skipping drywall tape on seam repairs
- Choosing a product without checking dry time
- Using heavy filler instead of a drywall patch
- Assuming one product works for every wall repair
If the repair needs tape or a patch, spackle alone is usually not enough.
Common Mistakes When Applying Spackle or Joint Compound
Even the right product can fail if it is applied poorly.
Thin coats are usually better than heavy buildup. Heavy patching material takes longer to dry, shrinks more, sands poorly, and may crack.
Common application mistakes include:
- Applying too much product
- Leaving a raised mound over the repair
- Painting before the patch is dry
- Sanding before the material is ready
- Skipping primer
- Painting over sanding dust
- Using a knife that is too small for the repair
- Not feathering the edges
- Trying to sand a low spot flat
- Rushing multiple coats
- Ignoring the product label
If a repair is low after drying, add another thin coat. Do not keep sanding a dip.
Safety and Cleanup Notes
Drywall sanding creates fine dust.
Even small repairs can leave dust on the wall, floor, trim, and nearby furniture. That dust can also interfere with primer and paint if it is not removed.
Use these basic safety and cleanup habits:
- Wear a dust mask when sanding
- Wear safety glasses
- Sand lightly instead of aggressively
- Use a drop cloth when needed
- Keep children and pets away from sanding dust
- Wipe the wall with a microfiber cloth
- Use a tack cloth lightly if appropriate
- Vacuum nearby dust when needed
- Prime the repair before painting
- Wash your hands after sanding and cleanup
Be more cautious with older homes, peeling paint of unknown age, moisture damage, or mold. Those situations may need a different repair approach before sanding.
Final Thoughts
Spackle vs joint compound comes down to repair size and purpose.
Use spackle for small nail holes, tiny dents, picture hanger holes, and quick cosmetic repairs before painting. Lightweight spackle is usually the easiest choice for beginner homeowners, while vinyl spackle can help with slightly deeper small repairs.
Use joint compound for drywall seams, tape repairs, larger patches, and repairs that need wide feathering. Pre-mixed joint compound is usually easier for beginners, while setting-type compound is better for certain faster or stronger repairs if you understand how it works.
No matter which product you choose, avoid heavy buildup, let the repair dry fully, sand lightly, clean the dust, prime the patch, and then paint. A smooth wall repair is usually the result of the right product, thin layers, and patient prep.