
Wall paint bubbling: causes and how to fix it
Wall paint bubbling happens when the paint film lifts away from the layer beneath it, often because of moisture, poor adhesion, contamination, excessive heat, or painting before the surface or previous coat was ready. The repair is not simply to pop the bubbles and add more paint. First identify and correct the cause, then remove loose paint, prepare the surface, prime where needed, and repaint only after the wall is dry and stable.
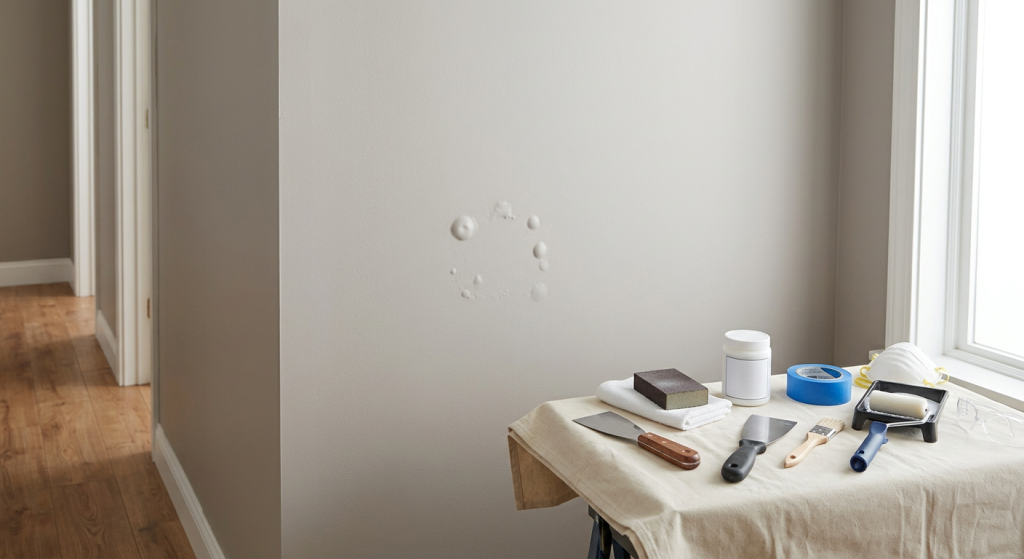
Wall Paint Bubbling: Quick Cause and Fix Guide
The size, location, and condition of the wall beneath the bubbles help determine whether a small repair is reasonable or whether the problem needs further investigation.
| What You See | Likely Cause | Best First Step |
|---|---|---|
| A few bubbles on an otherwise dry wall | Poor adhesion, contamination, or application problem | Check the substrate, then repair locally |
| Widespread bubbling after recent painting | Poor prep, incompatible coating, humidity, heat, or insufficient drying | Identify the application problem |
| Bubbles with stains or dampness | Moisture behind or within the wall | Find and correct the moisture source |
| Soft, swollen, or crumbling drywall | Water-damaged gypsum | Do not paint; assess the damaged drywall |
| Loose edges and sheets of paint | Bubbling has progressed to peeling | Remove failed paint and evaluate the cause |
Safety: Do not sand, scrape, or otherwise disturb potentially lead-containing paint in a home built before 1978 without appropriate lead-safe procedures. Sanding and scraping create dust, so use suitable eye and respiratory protection and contain the work area. Stop if you find active moisture, soft drywall, suspected mold, or extensive hidden damage.
What Causes Wall Paint Bubbling?
Paint bubbles, sometimes called blisters, form when adhesion fails and the coating lifts from the layer underneath. The separation may occur between paint coats or all the way down to drywall, joint compound, primer, or another substrate.
Moisture Behind or Within the Wall
A plumbing leak, roof leak, exterior water intrusion, condensation, or another source can move moisture into drywall and weaken the bond between the coating and the wall.
Look for water stains, recurring discoloration, a musty odor, soft drywall, dampness, or bubbles that return after previous repairs. Do not repaint until the moisture source has been found and corrected.
Damp Surfaces, Humidity, and Slow Drying
Paint applied to a damp wall can lose adhesion. Fresh joint compound, recently washed walls, condensation, or high humidity can leave more moisture in the surface than expected.
High humidity can also slow drying between coats. Follow the paint and primer labels for acceptable temperature, humidity, drying, and recoat conditions rather than relying on touch alone.
Poor Preparation or Weak Underlying Paint
Dust, grease, soap residue, chalky material, and sanding debris can prevent paint from bonding properly. A fresh coat also cannot create a dependable bond if the old paint beneath it is already loose.
Heat, Incompatible Coatings, and Heavy Application
Painting a surface that is too warm can encourage blistering because the coating may begin forming a film before it has settled properly. Direct sun is mostly an exterior concern, but unusually hot interior surfaces can also create difficult drying conditions.
Some glossy or hard coatings need cleaning, dulling, or a suitable bonding primer before repainting. Heavy paint coats or recoating too soon can also dry unevenly and interfere with film formation.
More paint is not always the cure. If adhesion has failed, another coat only covers an unstable layer.
How to Diagnose the Bubbling Before You Repair It
A Few Isolated Bubbles on a Dry, Stable Wall
A small DIY repair may be reasonable when the area is limited, the wall feels dry and firm, there are no stains or odors, and the surrounding paint is well bonded.
A bubble near a recently patched or painted area may point to poor preparation, trapped dust, an unsealed porous repair, or coating applied before the underlying material was ready.
Widespread Bubbling After Recent Painting
If bubbles appear across a large part of a newly painted wall, do not start popping individual spots. Review how the wall was cleaned and prepared, whether glossy paint was handled correctly, whether primer was required, how long each coat dried, and whether humidity or temperature was within the product’s stated range.
Widespread failure usually needs a broader repair than a spot touch-up.
Bubbling With Stains or Moisture
Bubbles accompanied by stains, dampness, condensation, or recurring marks should be treated as a moisture problem first.
Do not seal an active leak behind primer and paint. Correct the water source and determine whether the drywall remains sound before refinishing it.
Soft or Damaged Drywall Beneath the Paint
Drywall that feels soft, swollen, crumbly, or deformed may have lost integrity from moisture. Painting over damaged gypsum is not a durable repair.
Significant water damage, suspected mold, sagging material, or hidden wet areas warrant professional assessment.
Bubbling That Has Turned Into Peeling
Once bubbles split and develop loose edges, the coating has progressed from blistering to peeling. The failed paint must be removed back to a sound edge before refinishing.
For a fuller explanation of that failure pattern, see Paint Peeling Off My Wall.
A raised line that follows a drywall seam may instead be loose drywall tape rather than a paint-film bubble and requires a different repair.
Tools and Materials for a Small Repair
For a small, dry, stable area that is safe to disturb, you may need:
- Putty knife or paint scraper
- Fine sanding sponge or sandpaper
- Eye protection and suitable respiratory protection
- Clean microfiber cloth
- Compatible patching compound and putty knife
- Appropriate primer
- Matching wall paint
- Small brush or mini roller
- Drop cloth or plastic for dust and debris
Use adequate ventilation and follow the safety, application, drying, and cleanup instructions for each product.
How to Fix Wall Paint Bubbling on a Small Dry Area
Use this sequence only after confirming that the wall is dry, firm, and free of active moisture. If the bubbles return or the affected area is extensive, stop treating it as a simple cosmetic repair.
Step 1: Confirm the Wall Is Dry and Stable
Inspect the area for stains, dampness, softness, suspected mold, or signs of an active leak. Do not proceed until any moisture problem has been corrected and the wall is fully dry.
Step 2: Remove Loose or Bubbled Paint
On a surface that can be safely disturbed, use a putty knife or scraper to remove paint that has lifted or lost adhesion. Do not gouge sound drywall. Continue only until you reach firmly bonded paint.
Step 3: Inspect the Exposed Surface
Check what is underneath the failed coating. Sound drywall should be dry and firm. Look for loose joint compound, damaged paper, staining, or an old paint layer that is also peeling.
If the substrate itself is failing, correct that before continuing.
Step 4: Sand the Repair Edges Where Safe
Feather the transition between remaining paint and the exposed area with light sanding. The goal is to remove sharp ridges, not grind deeply into the wall.
Do not sand painted surfaces in a pre-1978 home unless lead hazards have been addressed with appropriate lead-safe methods.
Step 5: Clean and Patch Minor Defects
Remove dust and debris with a clean cloth. If scraping leaves a shallow depression or damaged skim coat, use compatible patching material to restore a smooth surface.
Let the patch dry completely and sand it only as needed before removing the new dust.
Step 6: Prime the Repaired Area
Use a primer suited to the exposed substrate and the problem you corrected. A clean porous drywall patch may need drywall or general-purpose interior primer, while a corrected stain may require a stain-blocking product.
For primer-selection guidance, see Best Primer for Patched Drywall Before Painting.
Do not use primer as a substitute for fixing moisture or removing loose paint.
Step 7: Repaint in Thin, Even Coats
Apply matching paint with a suitable brush or roller. Avoid heavy buildup and follow the labeled recoat time before adding another coat.
A mini roller can help match surrounding wall texture on larger repaired spots.
Step 8: Let the Repair Dry Before Judging It
Allow the paint to dry according to its instructions, then inspect the repair from normal viewing distance and at an angle.
If bubbling returns, stop repainting. Recurrence suggests that moisture, adhesion, or substrate failure has not been fully corrected.
Common Mistakes That Make Paint Bubbling Return
The biggest mistake is treating the bubble itself as the cause. Popping, flattening, or painting over a blister does not restore adhesion underneath it.
Avoid these common errors:
- Repainting before finding the moisture source.
- Painting over damp drywall or fresh patching material.
- Leaving dust, grease, or loose old paint on the surface.
- Skipping required primer on porous or difficult surfaces.
- Applying paint too heavily.
- Recoating before the previous coat is ready.
- Ignoring high humidity or unsuitable temperature conditions.
- Patching soft or deteriorated drywall instead of addressing the damage.
- Assuming another coat will fix widespread adhesion failure.
For future projects, clean and prepare the wall thoroughly, let washed or patched areas dry completely, use compatible primer when required, and keep paint within the manufacturer’s stated application conditions.
Professional help is appropriate when wall paint bubbling is widespread, keeps returning, or is accompanied by active leaks, significant stains, suspected mold, soft drywall, sagging, or hidden water damage. In pre-1978 homes where scraping or sanding may disturb lead-based paint, use a lead-safe certified contractor unless the surface has been properly evaluated and the work can be completed with appropriate lead-safe practices.
Final Thoughts
Wall paint bubbling is a symptom of lost adhesion, not a problem that can reliably be fixed by adding another coat. Moisture, damp surfaces, poor preparation, weak underlying paint, incompatible coatings, heat, humidity, heavy application, and insufficient drying can all contribute.
A few bubbles on a dry, stable wall may be repairable with careful scraping, surface preparation, primer, and repainting. Widespread bubbling, recurring moisture, or damaged drywall needs investigation first. Correct the cause before repairing the finish, or the bubbles are likely to return.