
Best Primer for Drywall: new and patched surfaces
The best primer for drywall depends on what is on the wall now. New drywall and fresh joint compound usually need a drywall or PVA-style primer-sealer. Small repairs often need a compatible interior primer that seals the porous patch. Stained drywall needs a stain-blocking primer after the source is fixed, while slick or glossy painted surfaces may call for a bonding primer. Always confirm the surface, topcoat, application, and drying requirements on the product label.
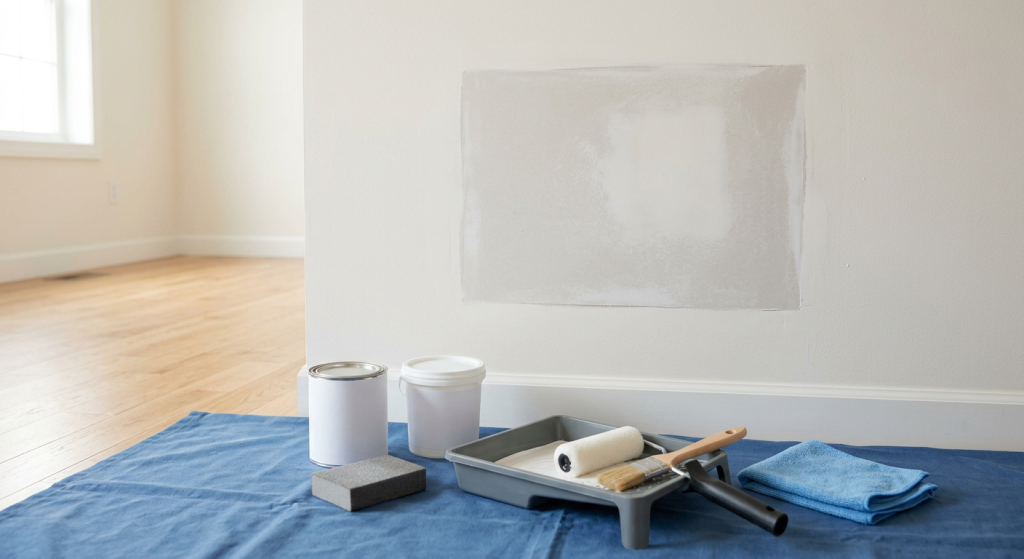
| Drywall Condition | Primer Type to Consider | Why It Fits | Main Limitation |
|---|---|---|---|
| New, unpainted drywall | PVA or drywall primer-sealer | Seals porous paper and joint compound | Not intended for every painted or stained surface |
| Fresh joint compound or skim coat | Drywall primer or compatible interior primer-sealer | Evens absorption before paint | Does not hide poor finishing |
| Small spackle repair | Compatible interior or drywall primer | Seals the porous patch | Spot priming may still show under some finishes |
| Previously painted wall | General-purpose interior primer, if needed | Helps create a uniform base | Sound, dull paint may not need full priming |
| Corrected water, smoke, or other stain | Stain-blocking primer | Reduces bleed-through | Moisture source must be fixed first |
| Slick or glossy coating | Bonding primer | Improves adhesion to hard-to-stick surfaces | Usually unnecessary on ordinary bare drywall |
How to Choose the Best Primer for Drywall
There is no single primer type that is right for every drywall project. The correct choice depends on whether your main problem is porosity, staining, or adhesion.
For clean new drywall, porosity is the issue. Bare drywall paper and dried joint compound absorb coatings differently, so a drywall primer-sealer helps create a more uniform surface before finish paint.
For a repaired wall, the primer must seal new spackle or joint compound while remaining compatible with the surrounding paint. A general-purpose interior primer may be more versatile than a basic PVA product when a repair includes both bare patching material and existing paint.
Stains require a different approach. Once the cause has been corrected and the wall is fully dry, choose a primer specifically labeled to block that type of stain. If the wall is already painted with a hard or glossy coating, adhesion becomes the priority, and a bonding primer may be more appropriate.
Which Type of Drywall Primer Fits Your Project?
PVA Drywall Primer for New Drywall
PVA-style primer is designed primarily to seal new, uncoated drywall. It is a practical choice after drywall has been hung, taped, finished, sanded, and cleaned because it helps equalize absorption between the drywall paper and joint compound.
That makes PVA primer a strong choice for newly installed drywall and large areas of fresh joint compound. It is commonly water-based and provides an economical base for interior wall paint.
PVA primer is not automatically the best primer for drywall that has already been painted, stained, or coated with a glossy finish. Some products also restrict which paint sheens can be applied over them. Check the label before buying, especially if you plan to use satin, semi-gloss, or gloss paint.
General-Purpose Interior Primer for Repairs
A general-purpose interior primer can be a better fit when a wall contains a mixture of repaired and previously painted surfaces. Many products in this category are formulated to seal porous areas while also adhering to properly prepared existing coatings.
This makes them useful for small spackle repairs, larger patched sections, or walls with multiple repairs. The goal is to keep fresh compound from absorbing finish paint differently than the surrounding wall.
For a small patch, spot priming may be enough. For a larger skim coat or many repaired areas, priming more of the wall can help create a more uniform base.
If your question is whether a particular spackle repair can be painted without primer, see Can You Paint Over Spackle Without Primer.
Stain-Blocking Primer for Corrected Stains
Choose a stain-blocking primer when discoloration could bleed through the finish paint. Examples include old water marks, smoke residue, tannin, ink, marker, rust staining, or other persistent discoloration.
The stain must be inactive before you prime. Do not coat over ongoing leaks, damp drywall, soft gypsum, or suspected mold. Fix the moisture source first and let the area dry completely. Widespread water damage, hidden moisture, or significant mold growth calls for professional assessment rather than cosmetic priming.
Stain-blocking primers come in water-based, oil-based, and shellac-based formulas. Their capabilities vary, so read the label for the specific stain, allowable surfaces, ventilation requirements, and compatible topcoats.
A stain blocker addresses bleed-through. It does not repair damaged drywall or make an active moisture problem safe to paint.
Bonding Primer for Slick or Glossy Surfaces
Bonding primer is intended for surfaces where adhesion is the main concern. On drywall projects, that usually means a previously painted wall with a slick, glossy, or otherwise difficult coating.
It can also help on mixed repairs where the surrounding surface is unusually hard or smooth. It is generally unnecessary for ordinary new drywall or a clean porous patch, where a drywall primer or compatible interior primer is usually sufficient.
Before selecting a bonding primer, confirm that the label approves both the existing surface and your planned topcoat. Some glossy surfaces may also require cleaning, deglossing, or other preparation specified by the manufacturer.
Primer cannot compensate for loose paint. If the existing coating is peeling, flaking, or poorly bonded, correct that problem before priming.
What to Compare Before Buying Drywall Primer
The best primer for drywall is the product whose label matches the wall condition and the finish you plan to apply. Brand name alone is not enough.
Compare these characteristics:
- Intended surface: Look for new drywall, joint compound, patched drywall, or previously painted surfaces as appropriate.
- Sealing ability: New compound and bare drywall need a product that controls uneven absorption.
- Stain blocking: Do not assume an ordinary drywall primer will stop water, smoke, ink, or other difficult stains.
- Adhesion: Glossy or hard coatings may require a bonding formulation.
- Topcoat compatibility: Confirm the primer works under the paint type and sheen you plan to use.
- Application method: Check whether the product is intended for brush, roller, spray, or all three.
- Dry and recoat times: Follow the label rather than a generic timetable.
- Ventilation and cleanup: Water-, oil-, and shellac-based products can have different ventilation, solvent, and cleanup requirements.
Coverage also varies with product, wall texture, porosity, and application method. Use the labeled coverage rate to estimate quantity rather than assuming every gallon covers the same area.
For a few patches, a smaller container may reduce waste. For new drywall throughout a room, a larger container can be more practical if the primer is appropriate for the entire surface.
Preparing and Applying Primer to Drywall
A good primer cannot hide ridges, sanding scratches, loose compound, or heavy dust. Surface preparation still controls much of the final appearance.
Safety: Sanding painted surfaces can create hazardous dust. In homes built before 1978, do not sand, scrape, or otherwise disturb painted surfaces unless lead hazards have been addressed with appropriate lead-safe procedures. Wear appropriate eye and respiratory protection when sanding drywall compound, contain dust, and follow all primer ventilation and safety instructions.
Step 1: Let Repairs Dry Fully
Wait until spackle or joint compound is fully dry according to its instructions. Do not prime a patch simply because its surface feels dry.
Step 2: Smooth and Clean the Surface
Sand only as much as needed to make the repair level with the surrounding wall. Remove all sanding dust with a clean cloth or another method compatible with the surface.
Step 3: Apply the Primer Evenly
Use a brush for tight edges and a roller for broader areas. On rolled walls, a mini roller can help preserve a texture closer to the existing finish. Apply the product within its stated spread rate rather than building a heavy ridge around a patch.
Step 4: Let the Primer Dry as Directed
Observe the labeled drying and recoat requirements. If the primer reveals a ridge, pinhole, or other defect, correct the surface before applying finish paint.
For the separate question of whether a repaired spot needs another primer coat, see How Many Coats of Primer Over Spackle Do You Need?.
Should You Prime the Patch or the Whole Wall?
Spot priming is usually appropriate when one small, clean repair is surrounded by sound paint. Extend the primer enough to seal the complete porous repair without creating a thick edge.
Prime a larger area when you have extensive skim coating, numerous patches, or a mixture of bare and previously painted surfaces that would otherwise absorb paint inconsistently.
Priming the whole wall is not automatically necessary just because one patch was made. Likewise, whole-wall primer does not guarantee an invisible touch-up. Old paint can fade or change sheen over time, and finish paint applied only around a repair may still look different.
Make the primer decision based on surface condition. Make the final repainting decision based on how uniform the finished wall needs to look.
Common Primer Selection Mistakes
Most drywall primer problems start with choosing a product for the wrong job or expecting primer to correct poor surface preparation.
Avoid these mistakes:
- Using basic PVA primer automatically on every previously painted wall.
- Applying ordinary drywall primer over a stain that requires a stain blocker.
- Using bonding primer on new porous drywall when a simpler drywall primer is sufficient.
- Priming before joint compound or spackle has dried fully.
- Leaving sanding dust on the repair.
- Ignoring active moisture, soft drywall, or suspected mold.
- Applying primer so heavily that it leaves a visible ridge.
- Recoating before the labeled time.
- Assuming primer will hide a poorly sanded patch.
Primer is a problem-solving coating, not a substitute for a sound surface. Choose the type that addresses the wall’s actual problem.
Final Thoughts
For new unpainted drywall, a PVA or dedicated drywall primer-sealer is often the practical starting point. For patched or mixed painted surfaces, a compatible general-purpose interior primer may offer better versatility. Use a stain-blocking primer for corrected stains and a bonding primer when a hard or glossy existing coating creates an adhesion problem.
The best primer for drywall is not necessarily the strongest or most expensive option. It is the one specifically labeled for your surface, topcoat, and problem. Prepare the wall carefully, follow the product’s coverage and drying instructions, and never use primer to cover unresolved moisture or surface damage.