
how to adjust a storm door closer
To learn how to adjust storm door closer speed safely, inspect the door and closer first, then make only tiny changes to the adjustment screw and test after every change. Do not make large turns, use a power driver, or remove the adjustment screw. A storm door that slams or closes too slowly may also have sweep drag, loose hardware, misalignment, or a damaged closer rather than an adjustment probl
| Door behavior | Possible cause | First step |
|---|---|---|
| Slams shut | Faster setting, wind, loose hardware, or closer failure | Inspect hardware, then make one tiny slower adjustment if sound |
| Closes too slowly | Slower setting, cold weather, rubbing, or sweep drag | Check for resistance before adjusting |
| Stops before latching | Resistance, misalignment, weak final movement | Inspect last few inches of travel |
| Moves poorly near frame | Sweep drag, weatherstripping, rubbing, or bracket geometry | Find the source of resistance |
| Will not stay open | Hold-open washer or hardware issue | Check the hold-open mechanism |
| Leaks oil or fluid | Internal closer failure | Do not adjust; replace or repair |
What a Storm-Door Closer Does
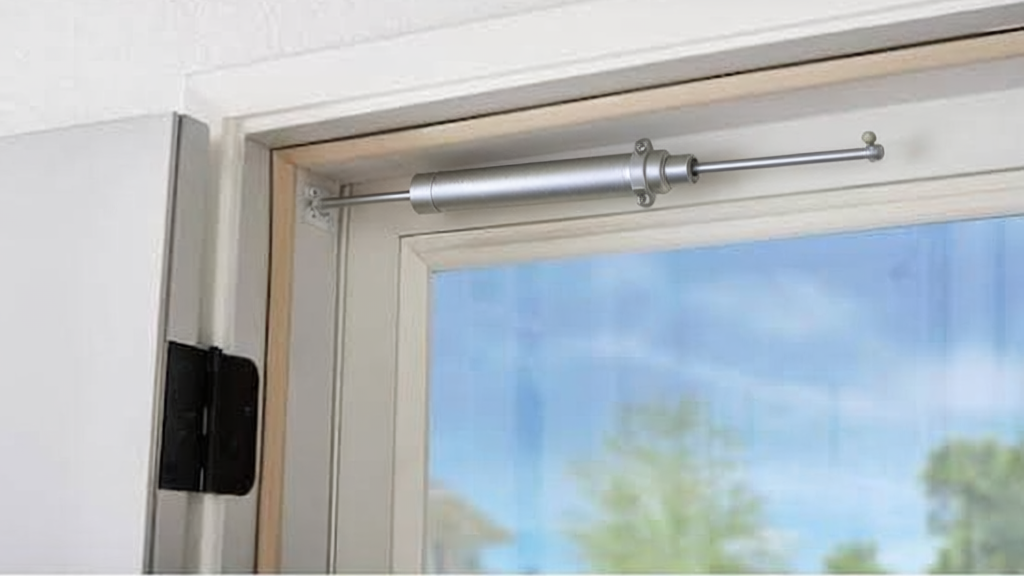
A typical storm-door closer uses a cylinder and piston rod to control how the door moves after it is released. Brackets connect the closer to the door and frame, while pins secure the rod or cylinder at the attachment points.
The adjustment screw controls internal damping and changes how quickly the door closes. It is intended for small adjustments only. The screw should never be removed completely because doing so may damage the closer or release internal fluid.
Many closers also have a hold-open washer on the piston rod. This is a convenience feature for temporarily holding the door open. It is not a lock, a security device, or an emergency-exit control.
Inspect Before Adjusting
Before turning the adjustment screw, operate the storm door several times and watch what happens through the full swing.
Check for rubbing at the threshold, frame, or trim. Look for sweep drag, overly thick weatherstripping, loose brackets, loose connecting pins, a bent piston rod, loose hinge fasteners, sagging, or visible frame movement.
Also inspect the cylinder itself. A damaged or bent closer should not be treated as a simple speed-adjustment issue.
Visible oil or fluid is especially important. A leaking closer has likely suffered internal failure and should not be adjusted in an attempt to restore normal operation.
Glass and screen panels should be stable, and the door should remain firmly attached to the frame. If the lower sweep is dragging or damaged, deal with that separately. See storm door sweep replacement when bottom-seal resistance appears to be part of the problem.
How to Adjust Storm-Door Closer Speed
The safest method is to make a very small change, test the door, and repeat only if necessary.
Start by photographing or recording the existing adjustment-screw position. This gives you a reference if the change makes the door operate worse.
Use a correctly fitting hand screwdriver. Check any markings or manufacturer instructions on the closer when available because adjustment direction is not universal.
Make only a tiny change, such as about one-eighth turn or less. A smaller fraction of a turn may be enough. Never make a large adjustment all at once.
After the adjustment, open the door through its normal range and let it close without pushing or guiding it. Observe the entire movement and the final latching action.
If another change is needed, make another tiny adjustment and test again. Several small changes are easier to control and reverse than one large turn.
Do not use a power driver, do not remove the adjustment screw, and do not force a seized or damaged screw.
When the Door Closes Too Fast
A storm door that slams may have the closer set too fast, but the adjustment screw is not the only possible cause.
Wind can accelerate the door, while loose brackets or connecting pins can change how the closer controls movement. A damaged or leaking closer may also lose its ability to slow the door consistently.
Inspect the hardware first. If the cylinder, rod, brackets, pins, and door are sound, make one tiny adjustment toward slower closing according to the manufacturer’s instructions or the observed response of the closer.
Test after every change. Do not keep turning the screw farther simply because the first adjustment produces only a small difference.
If the closer still cannot control the door after reasonable small adjustments, it may be worn or internally damaged. At that point, replacement is more appropriate than continued adjustment.
When the Door Closes Too Slowly
Slow closing can come from the closer setting, but resistance elsewhere is common.
Cold weather can change closer performance. The sweep may drag against the sill, thick weatherstripping may be compressed heavily, or the door may rub the frame. A bent piston rod, loose hinges, or poor bracket alignment can also slow movement.
Do not increase the storm door closer speed simply to overpower resistance. If the door is binding through part of its swing, a faster setting can cause it to break free from the tight area and then slam through the remainder of its travel.
That extra force can also place unnecessary stress on the closer, brackets, hinges, and frame.
If the door is sagging, warped, badly misaligned, or binding, correct that condition rather than trying to compensate with the closer screw.
When the Door Will Not Latch
A closer that provides too little final movement can sometimes contribute to a door that stops just before latching. However, resistance or alignment problems are also common.
Watch the final few inches of travel closely. A dragging sweep may slow the door near the sill. Weatherstripping may be compressed too tightly, the latch may be misaligned, or the closer brackets may not be positioned correctly.
Wind can also affect storm-door behavior, so test in relatively calm conditions when possible.
If the door moves freely, the hardware is secure, and the closer is otherwise sound, make only the smallest permitted speed adjustment and retest.
Do not speed the door up until it slams simply to force the latch into place. A storm door should reach and engage the latch without excessive impact.
Seasonal Position and Hold-Open Washer
Some storm-door closers have alternate mounting positions intended for different seasonal configurations, such as changing between a glass panel and a screen panel.
Use alternate mounting positions only when the manufacturer’s instructions specifically identify them. Do not experiment with bracket holes or connecting-pin positions in an attempt to change closing speed.
A typical hold-open washer is simpler. The door is opened, and the washer is moved into its holding position on the piston rod according to the normal design. Releasing it allows the door to close again.
The hold-open washer is not a lock and should not be relied upon to restrain the door in strong wind. It also should never be positioned in a way that interferes with prompt emergency exit.
Test After Adjustment
Use the same normal opening distance for each test so you can compare results consistently. Release the door and allow the closer to control it without pushing or pulling.
A successful adjustment should leave the door able to:
- Open normally.
- Close smoothly.
- Avoid slamming.
- Reach the frame completely.
- Latch normally.
- Move without scraping, rubbing, or binding.
- Keep glass or screen panels stable.
- Remain usable as a safe exit.
Do not leave the closer adjusted so slowly that routine use becomes inconvenient or the door routinely fails to latch.
If the door operates correctly through most of its travel but still hangs up at one specific location, look for mechanical resistance rather than continuing to change the closer speed.
When Adjustment Is Not the Repair
The adjustment screw cannot repair a leaking closer, bent piston rod, damaged cylinder, broken bracket, broken pin, or damaged hinge.
It also cannot correct a sagging or warped door, severe misalignment, a loose or distorted frame, a misaligned latch, or heavy sweep drag.
Unstable glass, rot, water damage, and structural movement are also outside the scope of closer adjustment.
If the main concern turns out to be airflow or sealing rather than door speed, review door sweep vs weatherstripping rather than continuing to change the closer.
A properly adjusted closer should control an otherwise sound and freely moving door. It should not be used to overpower another defect.
Common Mistakes
Making large screw turns is one of the most common closer-adjustment mistakes. The mechanism usually responds best to very small changes, and a large turn can make the door suddenly operate much too fast or too slowly.
A power driver should not be used because it reduces control and increases the chance of stripping or damaging the adjustment screw.
Never remove the adjustment screw. Likewise, do not force a seized screw or continue turning damaged hardware.
Another mistake is increasing closing speed until the door slams simply because the latch is difficult to engage. That approach hides the real source of resistance and adds stress to the entire assembly.
Loose brackets and connecting pins should not be ignored, and mounting holes or seasonal pin locations should not be changed unless the manufacturer’s instructions specifically direct it.
Safety and When to Call a Professional
Stop using the door and arrange appropriate repair when:
- The door swings uncontrollably.
- The door cannot be controlled normally.
- Glass or screen components are unstable.
- The closer leaks oil or fluid.
- The piston rod, cylinder, or brackets are damaged.
- Fasteners will not remain secure.
- The door cannot close or latch reliably.
- The frame is badly misaligned.
- Hinges or the door structure are damaged.
- Safe entry or exit is affected.
Do not disassemble the closer cylinder, remove internal valve components, remove large glass panels, alter structural framing, or force damaged hardware as part of a routine closer adjustment.
Final Thoughts
The safest approach to storm door closer adjustment is to inspect the entire door first, record the starting position, use the correct hand screwdriver, and make only tiny changes.
Test after every adjustment. The storm door should close smoothly, reach the frame, and latch without slamming or binding.
If the closer is leaking, bent, broken, or attached to loose components, additional adjustment is not the solution. Repair or replacement is needed.