
Garage Door Top Seal: Fixing Drafts at the Header
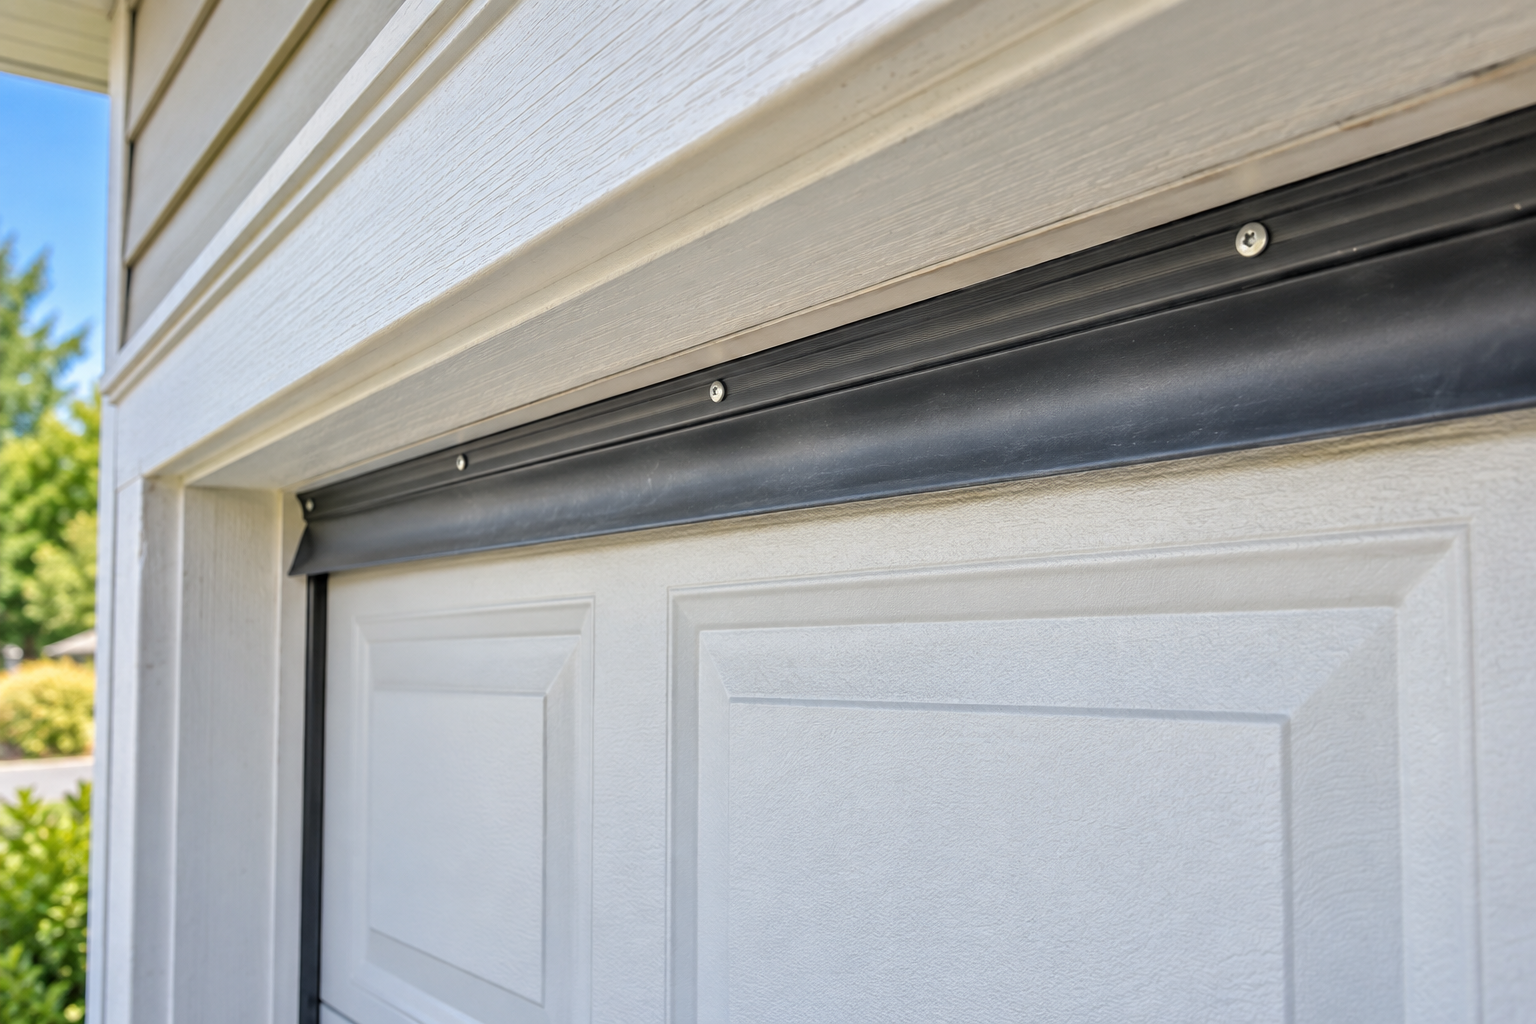
A garage door top seal is the flexible weather seal installed along the header at the top of the opening. When the garage door is closed, the seal should make light, reasonably even contact with the outside face of the door. Daylight or moving air along the top can indicate a curled, hardened, missing, or poorly positioned seal, but first confirm that the door itself closes normally and consistently.
| Top-edge condition | Likely cause | First step |
|---|---|---|
| Small, even gap across the top | Worn or poorly positioned seal | Inspect seal contact and condition |
| Gap wider near one corner | Door position or mechanical problem | Check normal door operation before sealing |
| Vinyl flap curled away from door | Aged or deformed seal | Consider replacement |
| Seal cracked, hardened, or missing | Weather-seal deterioration | Match a compatible replacement |
| Seal presses tightly against door | Excessive compression | Reposition if mounting allows |
| Loose, rotten, or moving header trim | Mounting or structural problem | Repair trim before installing a seal |
What a Garage Door Top Seal Does
The top weather seal is usually attached to the header or exterior trim above the garage-door opening. A flexible flap extends from the mounting base and contacts the outside surface of the closed door.
Proper contact can reduce drafts, visible light, dust, leaves, insects, and small amounts of wind-driven weather entering at the header. The seal works by closing the narrow gap that would otherwise remain between the stationary opening and the moving garage door.
It is not designed to make the garage airtight or waterproof, provide complete pest protection, or guarantee substantial energy savings. Its job is more limited: maintain flexible contact across a normally operating garage door without interfering with door movement.
Confirm the Draft Is at the Header
Before replacing anything, close the garage door normally and identify exactly where the opening is located. From a safe position, look along the top edge for daylight, curled vinyl, missing sections, or places where the flexible flap no longer touches the door.
Air movement may also leave dust patterns near a poorly sealed section. If safely accessible without approaching moving components, visually inspect the header from inside and outside while the door is fully closed.
Make sure the gap is actually along the top. Daylight running down a vertical jamb belongs to a different sealing area. If that is where the problem appears, review the garage door gap on sides rather than trying to correct it with a header seal.
Likewise, an opening beneath the closed door involves the bottom gasket or floor area, not the top weather seal. Correctly locating the leak prevents unnecessary replacement and helps keep each repair focused on the right component.
Inspect Door Position Before Replacing the Seal
A new seal cannot correct a garage door that is crooked, unstable, damaged, or stopping in different positions from one cycle to the next.
Operate the garage door normally and observe it from a safe location. It should travel without obvious binding or jerking and should reach a consistent closed position. One top corner should not sit substantially higher or farther from the header than the other.
If the top gap changes dramatically because the door itself is closing unevenly, the seal is not the underlying problem. Installing a longer or more tightly compressed flap may temporarily hide part of the opening but can create excessive friction without correcting the door.
Homeowner work in this project should remain limited to the accessible weather seal and sound mounting trim. Do not adjust garage-door mechanical components in an attempt to correct a header gap.
Inspect the Existing Top Seal
With the door fully closed and stable, examine the accessible weather seal. Vinyl and similar flexible materials can harden, crack, curl, or fold after years of exposure to sunlight and temperature changes.
Look for missing sections and for areas where paint, dirt, or debris interferes with the flap. A seal can also be mounted too high, leaving little contact, or too low, causing the material to fold tightly against the door.
Check the mounting base and accessible fasteners. A loose fastener that clearly belongs only to the weather seal may allow one section to pull away from the header. The trim supporting the seal should also be firm, dry, and sound.
If the material is still flexible and undamaged, ordinary cleaning or minor repositioning may restore contact. Replacement makes more sense when the flap is brittle, permanently curled, cracked, missing, or otherwise unable to maintain normal contact.
Do not install a new seal over rotten, loose, cracked, or moving header trim. The mounting surface must be sound enough to hold the weather seal securely.
Choose a Compatible Replacement
Measure the garage-door opening and compare the new seal with the existing product before removing the old one completely.
Useful factors include the width of the opening, the dimensions of the mounting base, the length and flexibility of the flap, and the way the existing seal attaches to the trim. Some products use screws or nails through a rigid or semi-rigid base, while others have different mounting arrangements.
Exposure also matters. A top seal faces sunlight, wind, moisture, and large temperature changes, so the replacement should be intended for exterior garage-door use.
Products labeled universal can still vary significantly in mounting-base shape, flap length, flexibility, and fastener requirements. Whenever practical, match the original seal style and mounting method rather than assuming any top seal for garage door use will fit correctly.
The goal is not to select the longest or stiffest flap. The replacement needs enough reach to contact the door lightly without being forced sharply inward.
Basic Replacement Expectations
Replacement is appropriate only when the seal is accessible, the mounting trim is sound, and the garage door is stable and operating normally.
Before removing the existing weather seal, photograph its position and note the direction of the flexible flap. This makes it easier to reproduce the original orientation.
Remove only fasteners that clearly belong to the weather-seal mounting strip. Do not disturb garage-door tracks, brackets, springs, cables, rollers, or other mechanical components.
Once the old seal is removed, clean ordinary dirt and loose debris from the accessible mounting surface. If you find wet, rotten, cracked, or unstable trim, stop instead of covering the problem with a new seal.
Position the compatible replacement along the header using the original arrangement as a guide. Use fasteners appropriate for the seal and sound mounting material, following the product manufacturer’s instructions where available.
Work gradually across the opening so the seal remains straight. Do not stretch flexible vinyl while installing it because stretched material can later contract and leave gaps.
Before considering the installation finished, close the door carefully and check how the flap contacts the exterior face.
Set the Correct Seal Contact
The flexible flap should touch the closed garage door lightly and relatively evenly across the header.
Too little contact leaves daylight and airflow. If the flap barely reaches the door or misses it entirely, the seal may be positioned too far outward, the replacement profile may be too short, or the garage door may not be reaching its normal closed position.
Excessive contact creates different problems. A flap pressed firmly into the door may fold sharply, drag against moving door sections, or place unnecessary pressure on the mounting strip.
Do not stretch the vinyl or force the seal farther inward to compensate for a crooked door. A sharply uneven top gap points toward a door-position problem rather than a need for increasingly aggressive weather sealing.
The correct result is light contact that closes the ordinary gap while allowing the garage door to move freely.
Test After Replacement
Clear people, pets, tools, and stored objects from the opening before testing the garage door.
Operate the door through a complete opening and closing cycle while observing from a safe position. The door should move normally and reach the same closed position it did before the weather-seal work.
When closed, inspect the top edge again. The flap should maintain reasonably even contact without catching, folding sharply, or being pulled from its mounting strip.
Also confirm that the mounting remains secure and that the garage door does not bind, hesitate, reverse unexpectedly, or behave differently because of the new seal.
If the repair interferes with normal door operation, stop using automatic operation as necessary and correct the seal installation rather than changing opener settings or other garage-door components.
When a New Top Seal Is Not Enough
A garage door weather seal can close an ordinary weather gap, but it cannot repair mechanical or structural problems.
If the garage door closes crooked, reaches inconsistent positions, binds, or behaves unpredictably, the door system needs evaluation before additional weather sealing is attempted.
The same applies when header trim is rotten, loose, cracked, or moving. A new seal needs a stable surface for secure mounting.
Significant or recurring water entry may also involve drainage, exterior construction, flashing, or other building conditions rather than the header seal alone.
If the opening is actually beneath the closed door rather than at the header, inspect the garage door bottom seal instead of extending the top seal beyond its intended role.
Common Mistakes
One common mistake is replacing the seal before confirming where the gap actually exists. Top, side, and bottom seals perform different jobs, and changing the wrong one wastes effort without addressing the leak.
Installation orientation matters as well. A flexible flap mounted backward or in the wrong position may not contact the door correctly.
Do not stretch the material during installation. Avoid positioning it so high that it misses the closed door or so low that it is crushed tightly against the door face.
Another mistake is installing a new seal over wet, rotten, loose, or damaged trim. Weatherstripping does not repair the mounting surface beneath it.
Finally, always test the complete garage-door movement after the work. A repair is not successful merely because daylight disappears if the door now catches, binds, hesitates, or behaves unpredictably.
Safety and When to Call a Professional
Professional garage-door service is appropriate when:
- Springs or lift cables appear damaged.
- Rollers, tracks, or brackets are damaged.
- Garage-door panels are damaged or unstable.
- The door is crooked, unstable, or difficult to control.
- The door closes inconsistently.
- The opener reverses unexpectedly or operation is abnormal.
- Header trim is loose, rotten, cracked, or moving.
- Structural movement is visible.
- Water intrusion is substantial or recurring.
- The top weather seal cannot be reached safely.
Do not adjust garage-door springs, loosen or remove spring hardware, touch or adjust lift cables, adjust tracks or rollers, alter brackets, repair damaged panels, change opener force or travel settings, bypass safety sensors, or work beneath an unsupported or unstable garage door.
If the problem involves the garage-door system rather than the accessible weather seal, use an appropriate qualified professional.
Final Thoughts
Start a garage door top seal repair by confirming that the opening is actually along the header and that the garage door itself closes normally.
Inspect the existing seal and mounting trim before buying a replacement. If replacement is needed, match the original style and mounting method when practical and position the flexible flap for light, even contact rather than heavy compression.
Afterward, test the garage door through a complete cycle. If the real problem involves inconsistent door movement, damaged hardware, deteriorated header material, structural movement, or significant water intrusion, the repair goes beyond replacing the top weather seal.