
How to Apply Concrete Sealer
Learning how to apply concrete sealer correctly starts with preparation. The concrete should be sound, clean, compatible with the selected sealer, and within the product’s moisture and weather requirements. Use only a manufacturer-approved applicator, apply thin and even coats, and protect the surface while it cures. More sealer is not automatically better, and sealer cannot repair active structural or movement problems.
| Step | What to Do | Why It Matters |
|---|---|---|
| Inspect concrete | Check for damage, movement, old coatings, and contamination | Sealer needs a suitable surface |
| Clean surface | Remove dirt, oil, grease, and residue | Contamination can interfere with performance |
| Allow required drying | Meet the product’s moisture requirements | Concrete that looks dry may still contain too much moisture |
| Check weather | Verify suitable temperature, rain, humidity, sun, and wind conditions | Weather affects application and curing |
| Select approved applicator | Use a roller, sprayer, brush, or other method approved by the manufacturer | Not every sealer works with every applicator |
| Apply thin, even coat | Maintain consistent coverage and avoid puddles | Excess material can cause curing and appearance problems |
| Apply another coat only if required | Follow the specified recoat window | Not every sealer needs two coats |
| Protect during cure | Keep people, pets, water, and traffic off as required | Dry-to-touch does not mean ready for use |
| Wait for permitted return to traffic | Follow product instructions | Premature traffic can damage the finish |
Before You Apply Concrete Sealer
Before opening the container, confirm that the sealer is intended for the concrete surface you plan to treat. Existing sealers or coatings can affect compatibility, so identify what is already on the surface when possible.
Also verify that the concrete is sound enough to seal, the planned applicator is approved for the product, and weather conditions meet the manufacturer’s requirements. Review ventilation, personal protective equipment, recoat instructions, and curing requirements before starting.
If you are still choosing a product, review the best concrete driveway sealer before moving into application.
Step 1: Inspect the Concrete
Sealer protects suitable concrete. It does not stabilize moving slabs, settlement, heaving, active cracks, or deeply deteriorated concrete.
Inspect the surface for cracks, scaling, spalling, pitting, loose material, vertical displacement, old coatings, and peeling or whitening sealer. Substantial damage should be repaired or evaluated before sealing.
If the concrete has broader deterioration or movement, review the appropriate concrete driveway repair approach before proceeding.
Keep the purpose of the sealer clear: it protects an appropriate surface. It is not a substitute for correcting structural or movement problems.
Step 2: Clean the Surface
The concrete needs to be clean enough for the selected sealer to perform properly. Remove loose debris, dirt, oil, grease, contaminants, and cleaning residue.
The cleaning method depends on the condition of the concrete and the sealer being used. Follow the product manufacturer’s preparation requirements rather than assuming every surface needs the same treatment.
Avoid improvising aggressive acid etching or chemical stripping. Pressure washing may be appropriate in some situations, but excessive pressure can damage concrete.
After cleaning, make sure no residue remains that could interfere with the sealer.
Step 3: Let the Concrete Meet the Product’s Moisture Requirements
Concrete that looks dry is not necessarily ready for sealing.
Recent rain, washing, shade, humidity, and moisture moving through the slab can all affect surface and internal moisture conditions. Some sealers are particularly sensitive to excess moisture during application.
Do not rely on a universal drying period. The manufacturer’s instructions should determine how dry the concrete must be before application.
New concrete also has product-specific cure-before-sealing requirements. Do not assume that recently placed concrete is ready merely because the surface feels hard or dry.
Step 4: Check Weather and Application Conditions
Weather can affect both application and curing. Check the product requirements for air temperature, surface temperature, rain, dew, humidity, direct sunlight, and wind.
The concrete surface can become considerably hotter than the surrounding air when exposed to direct sun. Wind can accelerate drying and increase overspray risk when spraying is permitted.
Postpone the project when conditions fall outside the manufacturer’s specified range or when rain or dew may affect the application.
There is no single temperature range that applies to every concrete sealer.
Step 5: Choose the Approved Application Method
The manufacturer should specify which application tools are acceptable for the product.
Roller
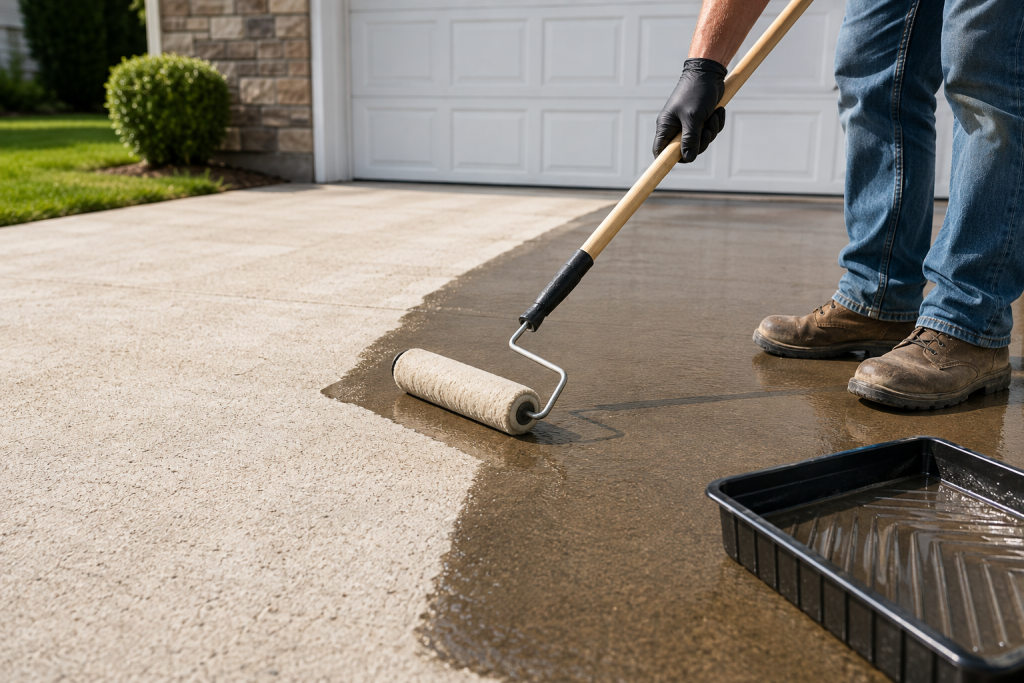
A roller may be suitable for many film-forming and other roll-approved sealers. Work methodically and maintain even coverage rather than repeatedly loading one area with additional material.
Choose the roller type recommended for the specific product and surface texture.
Sprayer
Only spray a sealer if the product is specifically approved for spraying.
Control overspray carefully and protect nearby siding, garage doors, windows, vehicles, landscaping, and other surfaces. Wind can carry mist farther than expected.
Solvent-containing products may create significant vapor exposure and can present ignition hazards. Follow all ventilation, respiratory-protection, and ignition-source precautions provided by the manufacturer.
Brush or Small Roller
A brush or small roller can be useful around edges, corners, joints, and areas that are difficult to reach with a larger applicator.
The application method should fit the product rather than personal preference alone.
Step 6: Apply the First Coat
Plan where you will start and how you will leave the area without walking over freshly applied sealer.
Work in manageable sections and apply a thin, even layer using the approved applicator. Maintain consistent coverage and avoid puddles, heavy overlaps, and thick spots.
Keep people and pets away from wet sealer. Wet surfaces may be slippery, and some products can expose people or animals to vapors or uncured chemicals.
Do not assume that a thicker coat provides better protection. Excess material can contribute to slow curing, tackiness, bubbles, cloudiness, uneven sheen, or poor coating performance.
Follow the manufacturer’s stated coverage guidance rather than using a universal spread rate.
Step 7: Apply Another Coat Only if Required
Not every concrete sealer needs two coats.
If the manufacturer specifies another coat, follow the stated recoat window and any instructions about changing application direction or technique. Do not apply an additional coat simply because material remains in the container.
If the first coat appears cloudy, sticky, unusually uneven, or otherwise abnormal, stop and check the product instructions before continuing.
Adding more material over a problem can make the condition worse rather than correct it.
Step 8: Protect the Surface While It Cures
Dry-to-touch does not mean the sealed concrete is fully ready for use.
Follow the manufacturer’s instructions for foot traffic, vehicle traffic, water exposure, additional coats, and replacing furniture or other objects.
Keep people and pets off the surface during the required curing period and block access when necessary.
Do not rely on one universal cure time. Different sealers, weather conditions, and application methods can produce different requirements.
Common Concrete Sealer Application Mistakes
Many sealing problems come from preparation or application rather than the sealer itself.
Common mistakes include sealing dirty concrete, ignoring unresolved damage, applying over incompatible old coatings, sealing when moisture conditions are unsuitable, or working outside the required weather conditions.
Applying sealer shortly before rain or dew can also cause problems. Other mistakes include using an unapproved applicator, leaving puddles, applying excessively heavy coats, adding unnecessary coats, allowing traffic too soon, and combining incompatible products.
Carefully following the manufacturer’s instructions helps avoid most of these problems.
When Concrete Sealer Should Wait
Delay sealing when the concrete has active slab movement, significant cracking, deep spalling, major scaling, settlement, heaving, persistent moisture, unresolved contamination, or a peeling old coating that interferes with the new product.
These conditions should be evaluated or corrected before another layer is applied.
Sealer is not a substitute for repair. Applying it over unstable or badly deteriorated concrete may improve appearance temporarily without addressing the underlying condition.
When to Call a Professional
Professional help may be appropriate when preparation requires extensive old-coating removal, aggressive grinding, significant mechanical preparation, or chemical stripping beyond normal homeowner comfort.
Badly deteriorated concrete, persistent moisture, major settlement, or slab movement may also require professional evaluation before sealing.
Grinding, cutting, and other mechanical preparation can generate respirable silica dust. Proper dust controls, eye protection, gloves, hearing protection, respiratory protection when required, and suitable equipment are important.
Solvent-containing sealers can also involve vapor exposure and flammable-vapor hazards. If ventilation or application conditions cannot be managed safely, professional application may be the better option.
Final Thoughts
Successful concrete sealing depends on preparation, compatibility, weather, controlled application, and proper curing.
The correct process is to inspect the concrete, clean it thoroughly, meet the product’s moisture requirements, verify suitable weather, use an approved applicator, apply thin and even coats, add another coat only when required, and protect the surface while it cures.
Manufacturer instructions control the details, including preparation, application tools, coverage, recoat timing, ventilation, PPE, curing, and return to traffic.