
How to Adjust Door Threshold Height on Exterior Doors
To learn how to adjust door threshold height safely, first confirm that the threshold is actually designed to move. Many adjustable exterior-door thresholds have a raised center section with dedicated adjustment screws, but not every visible screw controls height. Make only small changes, test the door after each adjustment, and stop if the threshold, sweep, door, or frame appears damaged.
Raising the threshold too far can create drag and make the door difficult to close or lock. Lowering it too far can leave an air gap. Threshold adjustment also cannot repair a damaged sweep, severe misalignment, rot, water intrusion, or structural movement.
| Observed condition | Likely interpretation | Appropriate next step |
|---|---|---|
| Small, even gap beneath door | Threshold may be slightly low | Consider a small adjustment if threshold is adjustable |
| Sweep drags heavily across full width | Threshold may be too high | Lower slightly and retest |
| Tight at one corner and open at the other | Alignment or geometry problem may be present | Inspect door, sweep, hinges, and frame |
| No adjustment screws or movable cap | Threshold may be fixed | Do not force or pry it |
| Threshold loose, cracked, or corroded | Damage rather than adjustment issue | Repair or professional evaluation |
| Water enters during rain | Possible water-management problem | Do not rely on threshold adjustment alone |
What an Exterior-Door Threshold Does
The threshold forms the lower portion of an exterior doorway and often provides the contact surface for the door sweep or bottom seal. When the relationship between the two is correct, the sweep makes light contact with the threshold and helps reduce airflow and visible light beneath the door.
The threshold must still allow the door to open, close, latch, and lock normally. It may also be part of the doorway’s water-management or drainage system, so changing its position excessively can cause problems beyond simple air sealing.
A threshold is different from perimeter weatherstripping, which seals the top and sides of the door. It is also different from the sweep attached to or beneath the door, from fixed-joint caulk, and from a removable draft stopper.
Determine Whether the Threshold Is Adjustable
Many adjustable thresholds have a raised center cap or contact section with several screws spaced along its length. Depending on the design, the adjustable portion may be made from wood, composite, vinyl, or another material.
A fixed threshold may look similar but have no height-adjustment mechanism. Do not assume that every screw you can see is an adjustment screw. Some screws simply fasten the threshold assembly to the subfloor or doorway and are not intended to change height.
Do not pry up the center cap, drill new holes, or disassemble sealed components to find an adjustment mechanism. If manufacturer instructions are available, use them to identify the correct screws and adjustment direction.
If you cannot confidently identify the adjustment system, stop rather than experimenting with structural fasteners.
Inspect Before Making an Adjustment
Check the Door Sweep or Bottom Seal
Inspect the bottom seal before changing the threshold. A torn, curled, hardened, loose, missing, or shifted sweep can create a gap that threshold adjustment will not fix.
Uneven wear also matters. If the sweep makes firm contact at one corner but barely touches at the other, the issue may involve the door, hinges, frame, or threshold geometry rather than simple threshold height.
An incorrect replacement sweep can create the same symptoms. Raising the threshold to meet a sweep that is too short or poorly fitted can introduce heavy drag elsewhere.
If the bottom seal itself appears to be the problem, review choosing a door sweep for an exterior door before adjusting the threshold.
Clean the Threshold Surface
Remove loose dirt, grit, leaves, and other accessible debris from the threshold before judging contact. A small amount of material trapped beneath the sweep can make the door scrape and can give the impression that the threshold is too high.
Cleaning also makes it easier to see whether the threshold is cracked, loose, corroded, worn, or damaged.
Do not dismantle inaccessible drainage channels or sealed threshold components as part of routine cleaning.
Check the Bottom Gap
Close the door normally and observe the gap across the full width. A small, relatively even gap may respond well to a modest threshold adjustment.
A gap that changes dramatically from one side to the other is different. Tight contact at one corner combined with a large opening elsewhere can point to door sag, frame movement, threshold damage, or a shifted sweep.
Threshold adjustment should not be used to compensate for severe geometry problems.
Confirm Normal Door Operation
Before making any change, the door should:
- Open without needing to be lifted.
- Close without slamming.
- Avoid heavy rubbing.
- Latch normally.
- Lock normally.
- Remain secure.
- Continue to function safely as an emergency exit.
If the door already has significant operational problems, determine the cause before changing the threshold height.
How to Adjust an Exterior-Door Threshold
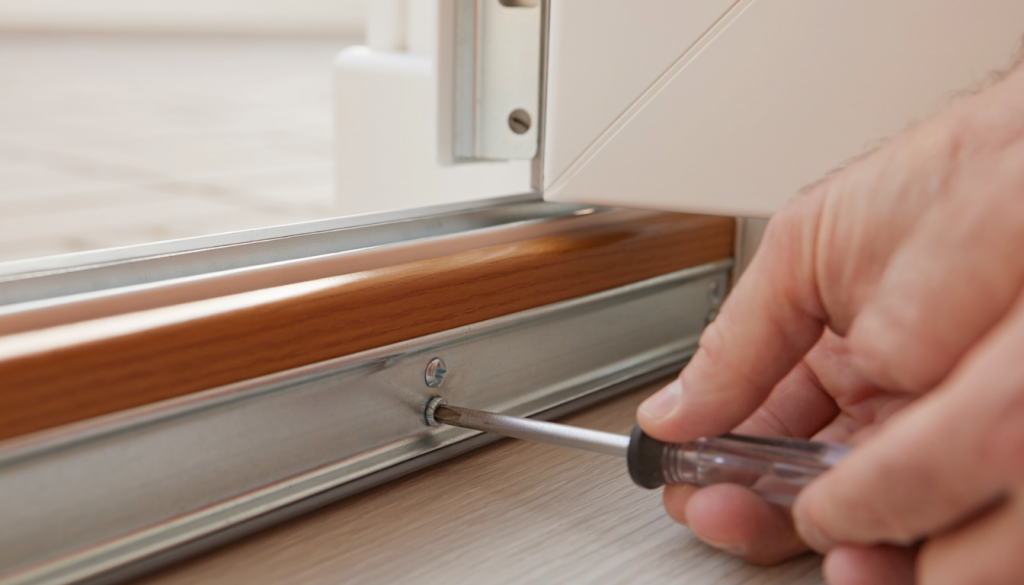
Identify the Adjustment Screws
Proceed only if the screws are clearly part of the movable threshold cap or contact section. Do not assume a particular turning direction because screw action can vary by design.
Some thresholds may rise when a screw is turned one way and lower when turned the other. Others may work differently. Follow manufacturer instructions when available.
If instructions are unavailable and the adjustment mechanism is obvious, make only a tiny test movement and observe what happens. If the effect is unclear, return the screw to its starting position.
Use a correctly fitting hand screwdriver. A power driver can make it too easy to over-adjust, strip a screw, or apply excessive force.
Record the Starting Position
Before moving anything, take a photo of the threshold and adjustment screws. Note their visible positions so you have a reference.
You can also mark the screwdriver handle or otherwise keep track of partial turns. This makes it much easier to return to the original setting if the adjustment makes the door worse.
Recording the starting point is especially useful when several screws must be adjusted.
Make One Small Adjustment
Use partial turns rather than large changes. Make one controlled adjustment, then test the door before continuing.
If the gap is even across most of the threshold, several screws may need similar small changes to keep the contact surface level. A localized change may be appropriate only when the threshold design supports independent adjustment, and the condition genuinely requires it.
Avoid creating sharp height differences between adjacent adjustment points. The threshold cap should not twist, bow, loosen, or rock as you work.
Close and Test the Door
After each small adjustment:
- Close the door using normal pressure.
- Inspect the sweep contact.
- Open the door and check for scraping.
- Make sure fins do not roll or fold.
- Verify that the door closes completely.
- Test the latch.
- Test the deadbolt.
- Recheck the bottom gap.
The goal is light, even contact, not maximum compression.
If the change improves one area but creates heavy drag elsewhere, return toward the recorded starting point and reassess the cause.
Signs the Threshold Is Too High
A threshold that is too high usually creates excessive contact with the sweep. The door may become noticeably harder to open or close, and a solid fin may roll or fold as it passes over the threshold.
Brush-style seals may remain heavily crushed, and scraping can develop. In more severe cases, the door may stop short of full closure or the latch and deadbolt may become difficult to operate.
If these symptoms began after adjustment, reverse the change slightly and move back toward the original recorded position.
Do not force the door closed and do not assume the sweep simply needs time to wear in.
Signs the Threshold Is Too Low
When the threshold is too low, daylight or airflow may remain beneath the door. The sweep may barely touch the threshold or fail to contact it at all, especially near the lower corners.
Raise the threshold only in small increments and retest after every change.
Do not continue raising it indefinitely to compensate for a damaged, undersized, shifted, or incorrectly installed sweep. If the adjustment limit is reached and even contact still cannot be achieved, another repair is needed.
When Adjustment Will Not Fix the Gap
Threshold adjustment cannot correct a badly sagging or warped door, loose or damaged hinges, a severely uneven bottom gap, or an out-of-square frame. It also cannot repair an incorrectly positioned or damaged sweep.
A fixed threshold obviously cannot be adjusted in the same way, and a loose, cracked, corroded, rotten, or rocking threshold needs repair rather than continued screw adjustment.
Problems beneath the opening can matter as well. Damaged flooring or subflooring, active water intrusion, failed water-management components, and structural movement can all affect the doorway geometry.
If the threshold touches firmly at one corner while sitting far below the sweep at the other, the underlying problem may involve the door, frame, or structure. Do not create extreme height differences between adjacent screws to compensate.
If the source of the gap is uncertain, see how to fix a drafty door before making additional changes.
Common Threshold-Adjustment Mistakes
One of the most common mistakes is assuming every threshold can be adjusted. Some are fixed, and turning structural fasteners does not convert them into adjustable systems.
Another mistake is making large screw changes without testing. A small movement can significantly change sweep contact, especially when several adjustment points work together.
Using a power driver increases the chance of over-adjusting or damaging the screws. Forcing seized hardware can create similar problems and may damage the threshold assembly.
It is also a mistake to raise the cap until the sweep drags heavily. The objective is not to produce the tightest possible seal. The door still has to move freely and latch and lock normally.
Always clean the contact area before adjusting, do not ignore a damaged sweep, and do not block drainage features. Avoid steep differences between adjacent adjustment screws and never force the door after making a change.
Safety and When to Call a Professional
Professional evaluation is appropriate when:
- Adjustment screws are seized, stripped, broken, or badly corroded.
- The threshold is loose, cracked, rotten, severely corroded, or unstable.
- The adjustment system cannot be identified confidently.
- The door is heavy or difficult to control.
- The door must be removed.
- The door cannot close or remain secure.
- The bottom gap is severely uneven.
- Water enters during rain.
- Soft or deteriorated wood is present.
- Staining, mold, or concealed moisture appears widespread.
- Flooring beneath the opening is damaged.
- Frame movement is visible.
- The door slab is badly warped.
- Major hinge, stop, frame, or hardware changes are required.
- Glass is cracked, loose, shifting, or unstable.
- Security or emergency exit operation is affected.
- Older coatings may contain lead and would need to be disturbed.
Do not remove the door slab, dismantle the threshold, force seized screws, pry up the threshold cap, drill new holes, alter structural framing, or disturb questionable older coatings as part of a routine threshold adjustment.
Final Thoughts
The safest way to adjust an exterior door threshold is to first confirm that it is truly adjustable, inspect the door sweep and alignment, clean the contact surface, and record the starting position.
Make only small partial-turn adjustments and test the door after every change. Stop when the sweep makes light, even contact and the door still opens, closes, latches, locks, and functions safely. If adjustment cannot achieve that result, the doorway likely needs another repair rather than additional threshold movement.