
how to clean a shower: a routine cleaning guide
If you want to know how to clean a shower efficiently, start by identifying the surfaces inside the enclosure. Remove loose items, use cleaners and soft tools that are compatible with each material, work generally from upper surfaces downward, clean the shower floor last, rinse as directed, and help the enclosure dry.
This routine is for ordinary dirt, body oils, and light everyday residue. Established mineral deposits, stubborn soap scum, mold, damaged grout, and deteriorating surfaces need separate attention rather than harder scrubbing.
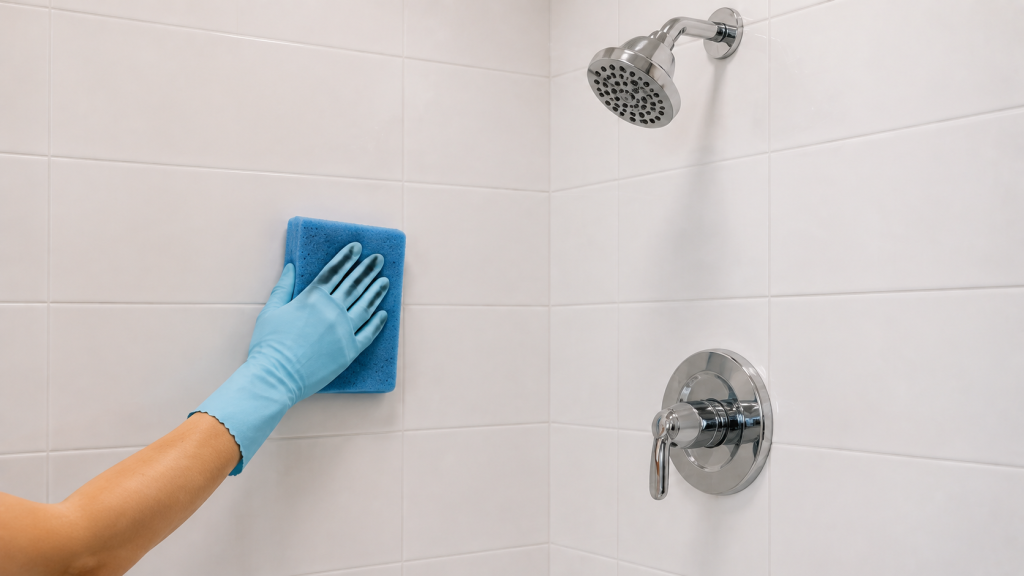
Cleaning safety: Never mix cleaning products. Never mix bleach with ammonia or acids, including vinegar, and never mix drain cleaners with other products. Follow cleaner-label requirements for ventilation and protective equipment, and keep cleaning water away from outlets and electrical equipment.
Before You Start: Identify the Shower Surfaces
One shower can contain several materials, and a cleaner that works on one may damage another.
Common surfaces include:
- Ceramic or porcelain tile with grout.
- Natural stone such as marble, limestone, travertine, or granite.
- Acrylic, fiberglass, composite, or solid-surface wall panels and shower bases.
- Clear or coated shower glass.
- Metal faucets, handles, frames, and trim.
- Refinished surfaces or specialty coatings.
If you are unsure what a surface is, check model information, purchase records, manufacturer documentation, or installation paperwork before using aggressive chemicals or abrasive tools.
For tiled walls, see our guide on how to clean shower tile without damaging the grout.
| Surface | Routine-care starting point | Main caution |
|---|---|---|
| Ceramic or porcelain tile and grout | Use a cleaner approved for the tile installation and grout; remove residue as directed | Cleaner that is safe for tile may still affect grout, sealers, or adjacent materials |
| Natural stone | Use a neutral or stone-approved cleaner with a soft tool | Vinegar and other acids can etch acid-sensitive stone |
| Acrylic, fiberglass, or composite | Follow the shower manufacturer’s approved cleaner and tool guidance | Abrasives and incompatible chemicals can scratch, dull, crack, or damage some products |
| Glass or coated glass | Use care instructions for the glass and any factory-applied coating | Abrasives or harsh chemicals may scratch glass or damage coatings and metal framing |
| Metal trim and fixtures | Use finish-specific care and soft, nonabrasive tools | Acids, bleach, caustic cleaners, abrasives, and other chemicals can damage certain finishes |
Also consider where cleaner will run. A product applied to an upper wall can reach the shower base, grout, metal trim, or stone below it. Protect adjacent finishes and do not use a product unless its directions are compatible with the surfaces it may contact.
Do not assume vinegar, bleach, an acidic bathroom cleaner, abrasive powder, cleaning eraser, or toilet-bowl cleaner is safe throughout the enclosure.
Refinished surfaces and specialty coatings require their own care instructions, even when the material underneath appears familiar.
Gather a Small Set of Supplies
Routine shower cleaning does not require a cart full of chemicals.
Gather:
- Soft cloths or manufacturer-approved nonabrasive sponges.
- One or more cleaners verified for the surfaces being cleaned.
- A compatible long-handled soft cleaning tool if it helps you reach safely.
- A squeegee if approved for the glass or other surface.
- Clean water and a safe way to rinse where required.
- Gloves, eye protection, or other protective equipment specified by the cleaner label.
If a shower manufacturer permits mild detergent, follow its instructions and rinse the surface as directed. Do not treat dish detergent or any other mild-sounding cleaner as automatically compatible with every shower material.
How to Clean a Shower Step by Step
The general order is high surfaces first and the shower floor last. Individual cleaner instructions take priority if they require a different application or rinsing sequence.
- Ventilate and read the directions.
Use the bathroom exhaust fan or other appropriate ventilation. Read both the cleaner label and the care instructions for the surfaces you plan to clean. Check where the product can be used, what protective equipment is required, whether the surface should be wet or dry, and how the cleaner must be removed. - Clear the enclosure.
Remove shampoo bottles, soap, razors, toys, removable caddies, and other loose accessories. Pick up loose hair and debris without taking apart the drain or plumbing fittings.Keep a stable position while working. Do not stand on a shower curb, chair, unstable stool, or slippery wet shower floor to reach high areas. Use a compatible long-handled soft tool when it provides safe reach, or get help with an area you cannot reach securely. - Prepare the surfaces as directed.
Some products are intended for a damp surface, while others have different preparation requirements. Follow the product instructions instead of automatically soaking the entire enclosure first.Do not spray several different cleaners around the shower and allow the runoff to mingle. - Clean upper walls and work downward.
Begin with the upper accessible wall surfaces and clean manageable sections at a time. Apply only a cleaner verified for those materials. Allow only the working time permitted by the product and surface-care instructions. There is no universal soaking time for shower cleaners, and some finishes specifically prohibit allowing cleaners to sit or soak. Do not let a cleaner dry on the surface unless its directions explicitly allow it. Wipe gently with an approved soft cloth, sponge, or other nonabrasive tool. Routine dirt should not require increasingly aggressive scrubbing. - Clean accessible fixture exteriors and handles.
Wipe faucet trim, controls, grab bars, and other accessible metal surfaces according to their finish-specific care instructions. Avoid treating all chrome-colored, brushed, matte, or specialty finishes alike. A chemical approved for one manufacturer’s finish may be restricted on another.Do not remove handles, plumbing fittings, fixed hardware, or electrical components as part of routine cleaning. - Clean the shower door or curtain.
For glass doors, use a cleaner and tool approved for the glass, coating, and surrounding metal. A soft cloth or compatible squeegee may be appropriate for routine care. For a shower curtain or liner, follow its care label. Materials differ, so do not assume every liner can be washed or cleaned with the same chemical. Keep this step focused on ordinary soil. Heavy water spotting and established mineral deposits on glass need surface-specific treatment rather than stronger routine cleaning. - Clean the shower base or floor last.
Hair, cleaner runoff, and loosened debris tend to move downward, which is why the base comes near the end. Use a cleaner and tool appropriate for the base material or tile-and-grout installation. Pay attention to corners and other accessible areas where ordinary residue collects, but do not dismantle the drain. Avoid leaving cleaner residue on the walking surface. Residue can make a wet shower floor more slippery. - Rinse or remove cleaner residue as directed.
Rinse each product according to its label and the surface manufacturer’s instructions. Include runoff that has reached the base or adjacent finishes. If a cleaner requires wiping rather than rinsing, follow that direction instead. The goal is to remove the product correctly, not to apply a universal rinsing rule to every surface. - Help the enclosure and accessories dry.
Use a compatible squeegee or soft cloth where appropriate, then arrange doors, curtains, mats, bottles, and other removable items so they can dry in accordance with their care instructions.Do not prescribe one door or curtain position for every shower. Enclosures vary, and the goal is simply to avoid trapping unnecessary moisture.
Never apply a new cleaner over another cleaner’s residue
If one product does not complete the job, do not immediately spray another over it.
Before sequential use, follow both products’ instructions for removing residue and preparing the surface. If those directions do not make safe sequential use clear, stop rather than experimenting and consult the cleaner or surface manufacturer.
Routine shower cleaning also does not automatically require disinfection. When disinfection is appropriate, verify that the disinfectant is compatible with the surface, clean first as directed, and keep the surface wet for the full contact time stated on the disinfectant label.
When Routine Cleaning Is Not Enough
If ordinary cleaning does not remove a problem, identify what you are dealing with before increasing chemical strength or scrubbing pressure.
| What you see | Better next step |
|---|---|
| Persistent soap scum | Use a specialist method verified for the affected surface rather than repeatedly scrubbing the whole enclosure |
| Mineral deposits or stubborn water spots | Identify the underlying material and coating before choosing a targeted treatment |
| Discolored grout | Evaluate the grout separately; harder wall scrubbing may not address the cause |
| Visible mold | Treat it as a mold-and-moisture issue, not simply ordinary shower dirt |
| Peeling, cracking, loose material, or soft surfaces | Stop cleaning aggressively and investigate material or moisture damage |
| Recurring wetness or staining outside expected areas | Look for a continuing moisture source or suspected leak |
Recurring, widespread, or suspected hidden mold, substantial water damage, deteriorating substrate, and suspected concealed leaks deserve appropriate professional assessment. Routine cleaning cannot repair failed waterproofing, damaged materials, or hidden plumbing problems.
How Often Should You Clean a Shower?
For a regularly used shower, a routine cleaning about once a week is a practical starting point rather than a universal requirement.
Adjust that schedule for:
- How many people use the shower.
- How quickly visible soil and residue accumulate.
- How well the enclosure dries.
- The materials and finishes involved.
- The manufacturer’s care instructions.
After-use care can handle obvious water and loose residue. Weekly cleaning addresses ordinary soil before it becomes established buildup. Less-visible areas and removable accessories may need occasional attention based on actual condition rather than a fixed calendar.
A lightly used guest shower may need less frequent full cleaning, while a heavily used shower may need more.
After-Use Habits That Reduce Buildup
A few brief habits can make routine cleaning easier:
- Remove obvious hair or residue when convenient.
- Squeegee compatible glass, stone, or other smooth surfaces when their care instructions allow it.
- Let wet accessories, curtains, doors, and mats dry appropriately.
- Use bathroom ventilation during and after bathing as appropriate for the room.
These habits can reduce standing moisture and some surface buildup, but they do not eliminate the need for cleaning or guarantee that mold will not develop.
If the shower remains persistently damp despite ordinary use and ventilation, or moisture appears where it should not, investigate the reason rather than relying on more frequent wiping.
If your shower has glass doors, our guide on how to clean glass shower doors covers routine care and compatible methods for remaining buildup.
Shower Cleaning FAQs
What is the best order for cleaning a shower?
For routine cleaning, clear the enclosure first, then work generally from upper walls downward. Clean fixtures and doors along the way, clean the shower base or floor last, remove cleaner residue as directed, and help surfaces dry.
That order keeps loosened debris and runoff from repeatedly landing on areas you have already finished. Cleaner-specific directions still take priority.
Can you use one cleaner on the entire shower?
Sometimes, but only if the product is explicitly compatible with every surface it will contact.
A shower may contain tile, grout, natural stone, acrylic, coated glass, metal trim, and sealants in one small area. Do not assume one bottle labeled “bathroom cleaner” is safe for all of them.
Should you clean the shower immediately after using it?
Quick after-use care can be useful, such as removing hair, addressing obvious residue, squeegeeing compatible surfaces, and helping the enclosure dry.
That is different from applying chemical cleaners immediately after bathing. Do not assume a cleaner should be sprayed onto a hot or wet surface. Follow its preparation instructions and wait until you can work with stable footing.
Final Thoughts
Routine shower cleaning is easier when you treat the enclosure as a collection of different materials rather than one surface. Use compatible products, work in a sensible order, remove residue correctly, and avoid unnecessary abrasion.
When ordinary cleaning stops working, identify whether the problem is soap scum, mineral buildup, grout discoloration, mold, or material damage. Choosing the correct next step is safer than simply using a stronger chemical or scrubbing harder.