
how to clean glass shower doors
To learn how to clean glass shower doors without damaging them, first check whether the glass has a protective coating and note the surrounding finishes. Use a compatible cleaner with a soft, nonabrasive tool, remove the cleaner within its permitted working time, then finish with an approved squeegee or clean microfiber cloth. Ordinary film, mineral deposits, and permanently damaged glass may need different responses.
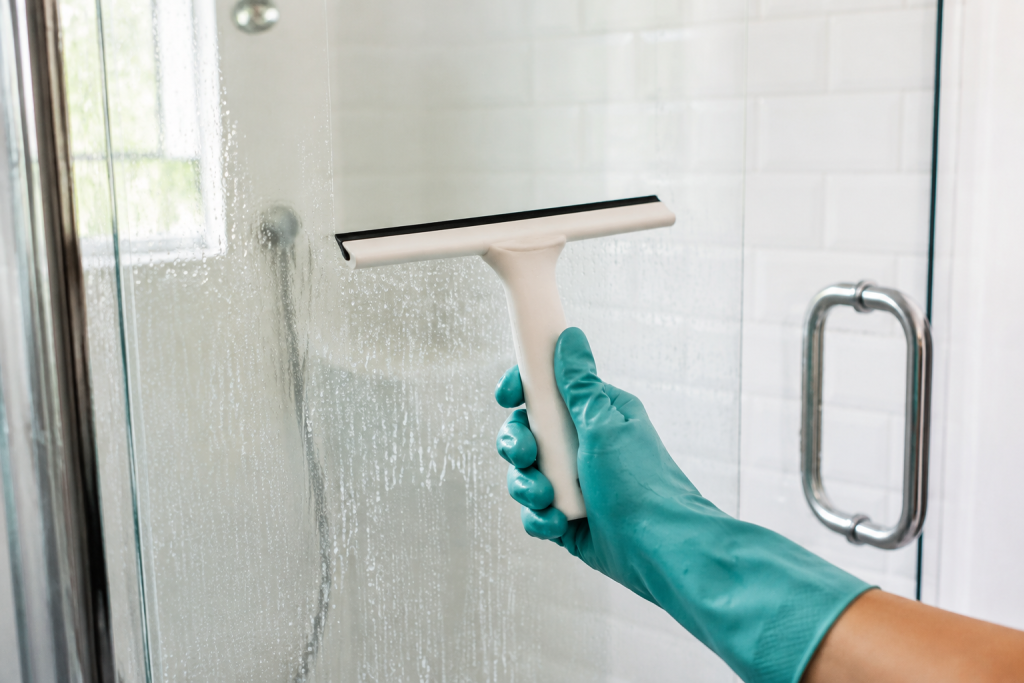
Check the Glass, Coating, and Nearby Materials
Before choosing a cleaner, identify the door and its finishes as accurately as you can. Some shower doors have a factory-applied treatment designed to reduce buildup or protect the glass, and those treatments can have specific cleaning restrictions.
Check the door brand and model, purchase records, installer paperwork, or manufacturer care instructions. Do not rely on appearance or water beading alone to determine whether the glass is treated or what type of coating it has.
Look at the complete area that cleaner or rinse water could touch:
- Clear or textured glass.
- Factory-treated or coated glass.
- Metal frames, hinges, handles, and other hardware.
- Flexible seals and door sweeps.
- Nearby tile, grout, natural stone, and caulk.
- The shower base or tub below the door.
A cleaner that is acceptable on the glass may still discolor metal, etch natural stone, affect a coating, or damage another nearby material.
Tempered shower glass is designed for safety, but it is not scratchproof or immune to damage. If you see a chipped edge, crack, or other glass damage, stop using the door and have it professionally assessed rather than cleaning around the defect.
Gather Suitable Cleaning Supplies
For routine cleaning, keep the supply list simple:
- A cleaner approved for the specific glass or coating and nearby finishes.
- Clean microfiber cloths or another permitted soft cloth.
- A manufacturer-permitted nonabrasive sponge, if needed.
- A clean squeegee with a smooth, undamaged blade.
- Clean water for rinsing when the cleaner requires it.
- Gloves, eye protection, or other protective equipment required by the product label.
For one concrete example, DreamLine’s care instructions for its glass shower doors allow cleaning with a soft cloth and mild soap, such as liquid dish soap, while warning against harsh or abrasive cleaners. That is a useful routine for those doors, not universal permission to use dish soap on every coated shower enclosure. When soap is permitted, remove its residue thoroughly so it does not leave another film.
Keep runoff in mind before applying anything. A vinegar-based cleaner that may be acceptable for one glass treatment, for example, can damage acid-sensitive natural stone and some metal finishes.
Never mix cleaning products. Never mix bleach with ammonia or acids, including vinegar. Never mix drain cleaners with other products. Follow every product’s requirements for ventilation and protective equipment.
Do not apply a different cleaner over residue from the first product. Follow both products’ directions for safe sequential use. If the directions do not make the transition clear, do not switch products on that surface.
A hidden-area test may reveal an unexpected appearance change, but it does not make a product acceptable when the glass, coating, or surrounding-material manufacturer prohibits it.
How to Clean Glass Shower Doors
- Ventilate, read the directions, and inspect the door. Provide the ventilation required by the cleaner label and inspect the glass, exposed edges, hardware, and seals before starting. Stop if the glass is cracked or chipped or if the door feels loose, binds, sags, or moves abnormally. Keep the door in a stable normal position, and do not lean your weight against it or use its handle as a support rail.
- Remove loose grit and prepare the surface. Gently remove hair, dust, or other loose material with a clean, soft cloth so it cannot be dragged across the glass during cleaning. Wet or leave the glass dry according to the cleaner instructions rather than automatically pre-rinsing it, and use stable footing instead of standing on a shower curb or balancing on a stool to reach higher areas.
- Apply the compatible cleaner to a manageable area. Treat a section small enough to clean and finish within the product’s permitted working time. Control spray and runoff around metal hardware, seals, grout, caulk, natural stone, tile, and the shower base rather than saturating the entire enclosure at once.
- Allow only the permitted working time. Let the cleaner remain on the glass only as long as its directions allow. Longer exposure is not automatically more effective and may damage a coating or nearby finish. Do not leave one section soaking while you clean the rest of the enclosure, and do not allow cleaner to dry unless the instructions specifically permit it.
- Wipe the glass gently. Use a clean microfiber cloth or another soft, manufacturer-permitted nonabrasive tool. Use enough pressure to loosen ordinary film without aggressive scrubbing, and frequently move to a clean portion of the cloth so grit or loosened residue is not repeatedly dragged across the glass.
- Remove cleaner, dirty solution, and runoff. Rinse or wipe the treated section according to the product directions. Use fresh water and clean cloths as needed so you are removing the loosened material instead of redistributing dirty cleaner across the glass. Do not flood door tracks or direct large amounts of rinse water outside the enclosure.
- Squeegee or dry the glass as permitted. Pull a clean, undamaged squeegee across accessible glass or dry it with a clean microfiber cloth when the door’s care instructions allow. Clean both sides when they are safely accessible; the bathroom-facing side may need less work than the shower-facing side because it receives less water and bathing residue.
- Clean accessible frames and hardware separately. Wipe frames, handles, hinges, tracks, and accessible seals with soft tools and products compatible with their particular finishes. Remove loose debris from accessible areas without dismantling hardware, adjusting hinges, taking out glass panels, blocking drainage openings, or modifying the door.
If the remaining film is soap scum, see our guide on how to remove soap scum while protecting the glass coating and nearby finishes.
If Water Spots or Cloudy Film Remain
Do not immediately reach for a stronger cleaner. What looks like the same cloudy deposit can have several causes.
| What remains | Possible explanation | Next step |
|---|---|---|
| Streaks or hazy film | Cleaner or soap residue | Remove residue and reassess |
| Greasy or cloudy layer | Body-product or soap film | Repeat compatible routine if allowed |
| Defined pale water spots | Possible mineral deposits | Check coating and targeted-cleaner compatibility |
| Cloudiness that will not clean away | Possible etching, scratching, or coating damage | Stop escalating and consider professional assessment |
First, verify that the routine cleaner was completely removed. A film left by soap or cleaner can look remarkably similar to deposits on the glass.
If the care instructions allow another routine cleaning, repeat the same method before escalating. Continued aggressive scrubbing is not a substitute for identifying what is actually on the glass.
For persistent water spots, identify the door or coating before selecting a mineral treatment. One manufacturer-specific example illustrates why: for Guardian ShowerGuard glass with hard-water spotting, the care guidance lists a 50/50 mixture of water and vinegar as a suitable mildly acidic treatment. That recommendation applies to ShowerGuard glass under its care instructions. It does not establish that the same mixture is safe for another coating, metal frame, marble surround, grout, or shower base.
Do not use a universal vinegar-and-dish-soap mixture simply because the door looks cloudy. Avoid baking-soda pastes, steel wool, polishing compounds, razor scraping, or other aggressive methods unless the exact manufacturer specifically approves the method for that glass and treatment.
Stop if cleaning causes a visible change in the coating, creates scratching, affects nearby finishes, or repeatedly fails to improve the deposit. Persistent cloudiness can reflect glass etching or coating deterioration rather than removable dirt, and professional glass-restoration methods are outside a beginner cleaning job.
Clean Frames, Tracks, Seals, and Hardware Carefully
Frames and hardware often need gentler treatment than the glass. Some metal finishes can be damaged by acids, bleach, ammonia, abrasive cleaners, solvents, or abrasive tools even when a glass surface tolerates the product.
Use a clean, soft cloth and a finish-compatible cleaner. Remove loose debris from accessible track areas with a soft cloth or other nonabrasive tool, but do not dismantle the track or door.
Treat seals and sweeps as separate components rather than scrub surfaces. Clean only as permitted by the door manufacturer, and do not plug, seal, enlarge, or otherwise modify drainage openings.
If a sweep is damaged, hardware is loose, or the door is out of alignment, cleaning is no longer the appropriate fix.
If the bottom sweep is split, brittle, or no longer stays attached, our shower door sweep replacement guide explains how to identify a compatible part and recognize when professional service is needed.
Reduce Buildup Between Cleanings
Regular removal of water is one of the simplest ways to slow visible spotting and film. When permitted for your door, use a clean squeegee after showering and wipe compatible hardware dry with a soft cloth.
Allow the enclosure to dry between uses and use bathroom ventilation appropriately. Follow the door manufacturer’s instructions on whether the door should remain open, partly open, or in another position after use.
A practical cleaning schedule depends on how frequently the shower is used, the mineral content of the water, the products used in the shower, and how quickly visible film develops. Light routine cleaning when residue first appears is generally easier on the enclosure than waiting for heavy buildup that requires a stronger treatment.
A protective glass treatment can reduce how firmly residue adheres, but it does not mean the door will never need cleaning.
Do not apply automotive rain repellents, waxes, or aftermarket glass coatings unless the exact shower-door or coating manufacturer permits them. Applying or restoring a coating is a separate task from routine cleaning.
When to Stop and Get Help
Stop cleaning and arrange professional assessment if you find:
- Cracked glass or a chipped glass edge.
- Loose hardware or a door that binds, sags, or moves abnormally.
- A door that feels unstable during normal operation.
- Damaged seals that allow recurring water escape.
- Persistent cloudiness that may be etching or coating damage.
- Recurring mold or significant moisture damage around the enclosure.
For cracked glass, damaged edges, or an unstable door, stop operating the door rather than attempting removal or repair yourself. A shower-door or glass professional can determine whether the glass or hardware needs repair or replacement.
Water repeatedly escaping beyond the enclosure may also require investigation beyond cleaning, particularly when surrounding materials are becoming soft, stained, swollen, or otherwise damaged.
FAQs
Can you use vinegar on glass shower doors?
Sometimes, but not universally. Certain glass manufacturers specifically allow diluted vinegar for particular hard-water deposits, while nearby metal finishes, coatings, marble, limestone, and other materials may not tolerate acids. Use vinegar only when the door or coating and every surface exposed to runoff permit it.
Why are my shower doors still cloudy after cleaning?
First, rule out cleaner residue by completing the specified rinse or wipe procedure and allowing the glass to dry. Remaining haze may be soap or body-product film, mineral deposits, scratches, glass etching, or deterioration of a surface treatment. If a compatible targeted cleaner does not improve it, stronger scrubbing may cause more harm than good.
Can you use a cleaning eraser or razor blade on shower glass?
Do not assume either is safe. Some specific glass treatments permit particular non-scratch cleaning erasers, while other manufacturers restrict abrasive tools. Razor blades and other sharp tools can scratch or damage glass or coatings and should not be used unless the exact manufacturer explicitly permits the method.
Final Thoughts
Clean sound glass shower doors with compatible products, soft tools, controlled working times, and complete residue removal. Routine care should solve ordinary film without requiring aggressive chemicals or scraping.
When cloudiness remains, identify whether you are dealing with residue, mineral buildup, or actual surface damage before escalating. If the glass is chipped, cracked, unstable, or no longer responding to approved cleaning methods, stop and have the door professionally assessed.