
how to remove soap scum from shower surfaces
How to remove soap scum safely depends on what the shower is made of. Identify the surface first, choose a compatible cleaner, work in manageable sections, gently loosen the residue, remove the dirty cleaner thoroughly, and dry the surface when appropriate. If cloudy film remains, reassess it before using anything stronger because mineral deposits, cleaner residue, staining, or surface damage can resemble soap scum.
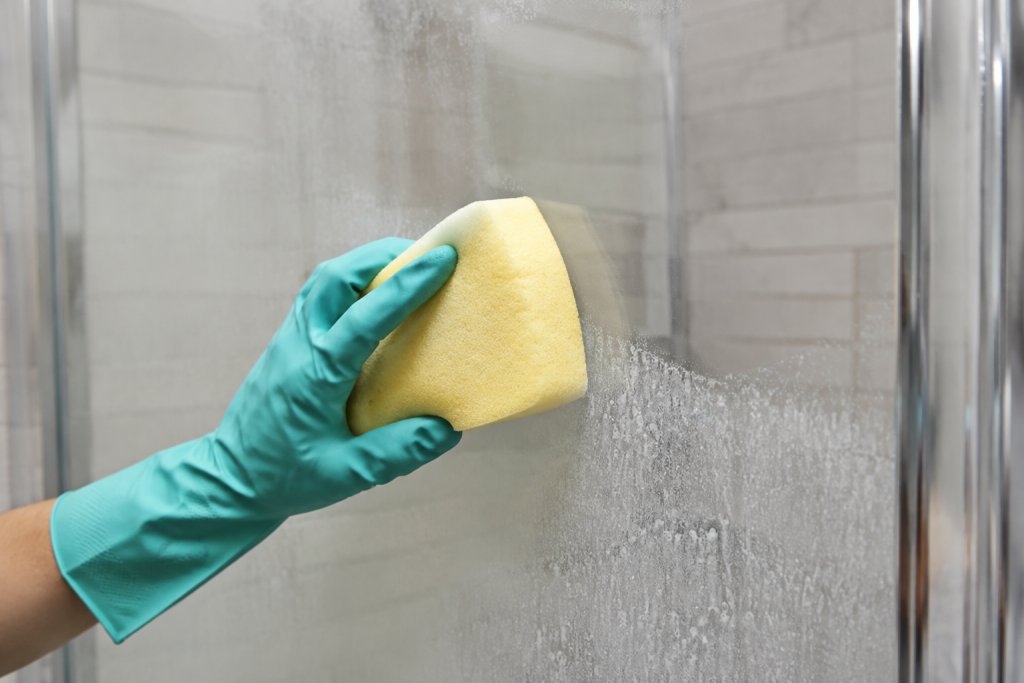
Identify What Is Actually on the Surface
Soap scum forms when soap reacts with minerals such as calcium and magnesium in hard water, creating residue that does not dissolve readily in water. This buildup can collect alongside body oils, dirt, bathing products, and separate mineral deposits, so a cloudy door or dull tile may contain several types of residue.
That matters because different problems respond to different cleaners.
- Soap or body-product film may look dull, greasy, cloudy, or streaked.
- Cleaner residue can leave haze or streaks after an incomplete rinse or wipe.
- Mineral deposits often appear as pale spots, chalky buildup, or crusty deposits.
- Suspected mold may create dark or colored spotting, but appearance alone cannot identify it reliably.
- Scratches, etching, or coating damage may create permanent haze that cleaning cannot remove.
Do not assume every cloudy shower is dirty. A surface can have soap scum and mineral deposits at the same time, and permanent damage can become more noticeable after removable residue is gone.
Start with the gentlest compatible cleaning method. If the appearance does not improve after the cleaner has been completely removed and the surface has dried, identify the remaining problem before escalating.
Check the Shower Materials Before Choosing a Cleaner
A shower enclosure rarely consists of one material. The cleaner applied to a tile wall may run across grout, caulk, metal trim, and the shower base before it is rinsed away.
| Surface | What to check before cleaning |
|---|---|
| Glass or treated glass | Door manufacturer’s cleaner and tool restrictions |
| Glazed ceramic or porcelain | Tile finish plus grout compatibility |
| Natural stone | Stone type, sealer, and acid sensitivity |
| Grout and flexible sealant | Grout formulation, sealer, and sealant restrictions |
| Shower base | Acrylic, fiberglass, enamel, stone, or composite care instructions |
| Metal hardware and trim | Finish-specific chemical and abrasion restrictions |
Do not assume you can identify a glass coating, stone sealer, grout formulation, or shower-base material by appearance alone. Installation records, leftover product packaging, purchase information, or manufacturer documentation can help.
Natural stone deserves particular caution. Marble, limestone, travertine, and other acid-sensitive materials can be damaged by acidic cleaners that may be acceptable on a different shower surface.
Metal finishes can also react differently from the glass or tile beside them. Control spray and runoff instead of treating the complete enclosure with one product simply because it works on the largest surface.
Stop before cleaning if you find cracked glass, loose tile, crumbling grout, deteriorated sealant, unstable hardware, soft surrounding material, or significant moisture damage. Those conditions need repair or assessment rather than stronger soap-scum removal.
For glass doors, our guide on how to clean glass shower doors covers coating compatibility and care for nearby frames and seals.
Choose Suitable Supplies and a Compatible Cleaner
A basic soap-scum cleaning kit usually needs only:
- A cleaner approved for the surface being treated.
- Clean microfiber cloths or another permitted soft cloth.
- A compatible nonabrasive sponge or brush when needed.
- Clean rinse water if required by the cleaner.
- A clean squeegee for surfaces where its use is permitted.
- Gloves, eye protection, or other protective equipment required by the product label.
One useful material-specific example is STONETECH Soap Scum Remover. It is a ready-to-use cleaner listed for surfaces including ceramic and porcelain tile, glass tile, grout, granite, marble, limestone, travertine, and slate. Its directions call for spraying the soiled area, cleaning with a clean cloth or nylon brush as needed, rinsing well with clean water, and wiping dry. The manufacturer does not specify a dwell period in those directions, so there is no reason to invent one.
That approval does not extend automatically to shower-door coatings, metal hardware, flexible sealant, acrylic or fiberglass bases, or other surfaces that may receive overspray or runoff.
Never mix cleaning products. Never mix bleach with ammonia or acids, including vinegar. Never mix drain cleaners with other products. Follow label requirements for ventilation, gloves, eye protection, and any other precautions.
Do not put a second cleaner over residue from the first. Follow both products’ directions for safe sequential use. If it is unclear whether one product has been removed sufficiently before another is used, do not switch cleaners on that surface.
A test in a hidden spot can reveal an unwanted appearance change, but it does not override a manufacturer’s restriction against using a product on that material.
Routine soap-scum removal also does not require adding a separate disinfection procedure.
How to Remove Soap Scum From Shower Surfaces
- Read the directions, ventilate, and inspect the area. Identify the surfaces that will contact the cleaner and read the complete cleaner instructions before starting. Provide the ventilation and protective equipment the label requires, and stop if you find loose components, cracked glass, crumbling material, or significant water damage. Work from stable footing and never stand on a shower curb, chair, or slippery surface to reach higher areas.
- Remove movable items and prepare the surface as directed. Take bottles, mats, and other removable items out of the work area and gently remove loose hair or debris. Pre-wet the surface only if the chosen cleaner or material instructions call for it; some products are intended for a dry surface, so do not make pre-rinsing a universal first step.
- Apply the compatible cleaner to a manageable section. Treat an area small enough to clean and finish before the product exceeds any permitted working time. Control spray around glass coatings, natural stone, grout, caulk, metal, and the shower base, and do not flood door tracks, fixtures, or other enclosure components.
- Observe only the permitted working time. If the cleaner specifies a dwell or contact period, follow it rather than assuming longer exposure will work better. If no dwell time is specified, follow the stated cleaning sequence. Do not allow cleaner to dry on a surface unless the instructions explicitly permit it.
- Gently loosen the buildup. Wipe or scrub with a clean cloth, nonabrasive sponge, nylon brush, or other tool specifically permitted for the material and cleaner. Use moderate pressure instead of aggressive abrasion, and frequently move to a clean part of the cloth or sponge so loosened residue is not continually spread across the surface.
- Remove the dirty solution and residue completely. Rinse, wipe, or otherwise remove the cleaner exactly as directed, using clean water and fresh cloths as needed. Do not simply move cloudy solution around the enclosure. Keep runoff away from electrical equipment and outlets and avoid spraying water outside the shower.
- Dry where appropriate and inspect the result. Use a clean microfiber cloth or compatible squeegee where permitted, then allow the surface to dry before judging remaining haze or discoloration. Drying makes it easier to tell whether the apparent buildup was removed or whether another deposit or damaged finish remains.
- Repeat only when permitted, then reassess. A second application of the same compatible method may help when the cleaner permits repetition. If it stops improving the surface, do not automatically switch to a stronger chemical. Identify whether the remaining problem is mineral buildup, staining, mold, scratching, etching, or another condition before choosing the next treatment.
Do not dismantle shower doors, remove fixtures, open drains, or take apart other shower components as part of soap-scum cleaning.
When Soap Scum Does Not Come Off
First, rule out leftover cleaner. Soap, specialty cleaners, and dirty rinse water can all leave a film that looks like the buildup you were trying to remove.
If the surface is sound and the instructions allow another application, repeat the approved method and remove the residue thoroughly.
Next, reconsider the deposit. Hard-water minerals can remain after oily or soapy film is gone. Persistent cloudiness on glass can also be scratching, corrosion, etching, or deterioration of a surface treatment.
This is where a targeted treatment can make sense, but only for the identified material. For example, Guardian’s care instructions for ShowerGuard-treated glass permit a 50/50 mixture of water and vinegar for hard-water spots that remain after standard glass cleaning. That is a specific hard-water treatment for that glass system, not a general soap-scum recipe for an entire shower.
Do not let that vinegar solution run onto marble, limestone, travertine, incompatible metal finishes, grout, sealant, or other materials whose care instructions do not permit acids.
If an approved targeted treatment still makes no meaningful improvement, stop. More chemical exposure or harder scrubbing will not restore etched glass, scratched finishes, deeply stained materials, or deteriorated coatings.
Avoid Common Soap-Scum Cleaning Mistakes
- Using a universal vinegar-and-dish-soap recipe. Vinegar may be permitted for a particular material and prohibited for another, and mixing cleaning products unnecessarily creates additional compatibility and chemical-safety concerns.
- Assuming abrasive tools are always safe. Cleaning erasers, abrasive powders, stiff brushes, and razor blades can be acceptable in narrowly defined applications but can scratch or damage other surfaces.
- Extending the working time. Leaving a cleaner on longer than directed can damage finishes without improving the result.
- Ignoring the runoff path. Stone, grout, caulk, metal, glass coatings, and the shower base may all receive cleaner intended for another surface.
- Switching chemicals over leftover residue. Remove the first product as directed before considering another treatment.
- Treating permanent damage as dirt. Scratches, etching, corrosion, and coating deterioration do not disappear because the cleaner becomes stronger.
Stop if a finish changes color, becomes dull, scratches, softens, erodes, or otherwise deteriorates while you work.
Reduce Future Soap-Scum Buildup
Removing water and bathing residue before deposits become heavy can reduce the amount of aggressive cleaning the shower needs later.
Use a clean squeegee on compatible glass, tile, or stone surfaces where the manufacturer permits it. Dry compatible hardware or other areas that tend to collect water, and use normal bathroom ventilation to help the enclosure dry after showering.
Clean visible film while it is still light instead of following a fixed schedule that may not match your household. A heavily used shower or one exposed to hard water may develop visible buildup much faster than another bathroom.
Soap choice can affect the type and amount of residue left behind, but changing products will not eliminate every source of shower film. Hard-water minerals, body products, shampoos, conditioners, oils, and other residues can still accumulate.
Water treatment may reduce mineral-related deposits in some homes, but selecting or installing a water-softening system is a separate decision from cleaning soap scum.
No coating, cleaner, or maintenance habit makes a shower permanently maintenance-free.
Follow our routine guide on how to clean a shower to work soap-scum prevention into your regular cleaning.
FAQs
Can vinegar remove soap scum?
Vinegar can be appropriate for some specific surfaces and deposits, but it should not be treated as a universal soap-scum cleaner. It can damage acid-sensitive natural stone and may be unsuitable for certain metal finishes, coatings, grout, or sealants. Use it only when the affected materials specifically permit an acidic treatment.
Why is my shower still cloudy after cleaning?
Cleaner residue, mineral deposits, soap film, scratches, glass etching, coating deterioration, or staining can all produce a cloudy appearance. Remove the original cleaner completely and let the surface dry first. If repeated compatible cleaning stops improving the appearance, reassess the cause instead of increasing chemical strength or abrasion.
How do you remove soap scum from natural stone?
Use a non-acidic cleaner specifically approved for the type of natural stone and any existing sealer. Avoid assuming that a tile or glass cleaner is stone-safe. When deciding how to remove soap scum from stone, control runoff, use permitted nonabrasive tools, remove cleaner residue thoroughly, and stop if the finish changes.
Final Thoughts
The safest way to remove soap scum is to match the cleaner and tool to the actual shower material, work in small sections, and remove the dirty solution completely. That approach is more reliable than applying the same homemade mixture to glass, tile, grout, stone, metal, sealant, and the shower base.
If you are still deciding how to remove soap scum after a compatible method stops improving the surface, reassess what remains before reaching for something stronger. Mineral deposits and permanent surface damage need a different response than ordinary soap residue.