
how to clean greasy kitchen cabinets safely
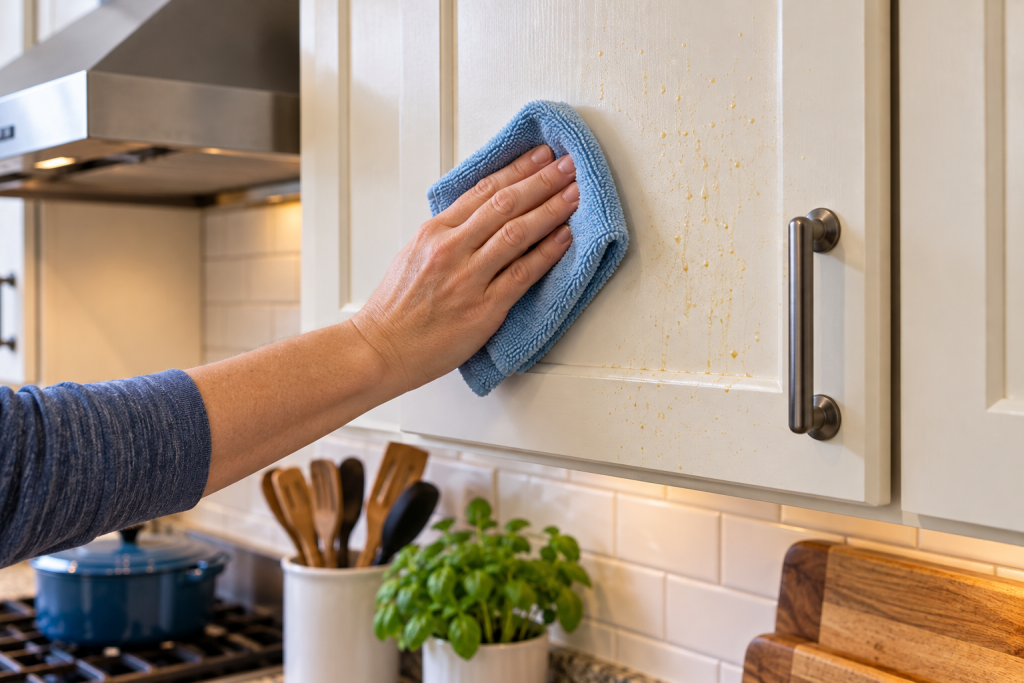
If you are trying to learn how to clean greasy kitchen cabinets, start with the mildest cleaner that can loosen cooking film without dulling, softening, or discoloring the finish. Remove dust first, use a damp rather than wet cloth, make repeated gentle passes over stubborn grease, wipe away cleaner residue, and dry the surface promptly.
| Cabinet surface | Good starting point | Main caution |
|---|---|---|
| Painted | Mild soapy water if compatible | Abrasion or strong cleaner may change the sheen |
| Stained or clear-coated wood | Soft damp cloth; mild cleaner if approved | Avoid excess moisture and aggressive chemicals |
| Laminate | Damp microfiber cloth and mild cleaner | Do not flood seams or edges |
| Thermofoil or vinyl-wrapped | Mild nonabrasive cleaning if approved | Protect seams, edges, and lifting areas |
| Unknown or specialty finish | Test a mild method first | Check manufacturer guidance before escalating |
The visible finish matters more than whether the cabinet underneath is plywood, MDF, particleboard, or solid wood. When the manufacturer is known, follow its care instructions before trying a stronger degreaser.
Identify the Cabinet Finish Before Cleaning
Kitchen cabinets collect a combination of airborne cooking grease, splatter, fingerprints, and dust. The buildup is usually heaviest near the range, microwave, handles, and frequently opened doors and drawers.
Before cleaning, look closely at the surface.
Painted cabinets may be wood or engineered material beneath the paint. Their resistance to washing depends partly on the coating and its condition. A durable factory coating may tolerate cleaning differently from an older or softer field-applied paint.
Stained or clear-coated wood has a protective finish over the wood. Routine cleaning should target that finished surface rather than treating the cabinet as bare wood.
Laminate typically has a durable decorative surface bonded to a substrate. The face may handle mild cleaning well while seams and edges remain vulnerable to excessive water.
Thermofoil or vinyl-wrapped doors have a thin surface material bonded over a shaped core. Avoid assuming they have the same chemical resistance as conventional laminate.
If you cannot identify the finish, choose the conservative path: soft cloth, limited moisture, mild cleaner, and a test in an inconspicuous area.
What You Need
A basic cabinet-cleaning kit can stay simple:
- Clean microfiber or soft lint-free cloths
- A mild dishwashing liquid or other cleaner approved for the finish
- Warm water
- A separate clean damp cloth for removing cleaner residue
- A soft, dry towel
- A soft detail brush for grooves when the finish permits it
Keep several clean cloths available when the cabinets are heavily greasy. Once a cloth becomes oily, continuing to wipe with it can spread a thin film instead of removing it.
Abrasive pads, steel wool, sharp scrapers, and strong solvents are not routine cabinet-cleaning tools.
How to Clean Greasy Kitchen Cabinets Step by Step
Use this method as a starting point when mild soap and water are compatible with the cabinet finish.
- Remove loose dust and crumbs. Wipe or brush away dry debris before introducing moisture. Pay attention to door tops, trim, and recessed details where dust can mix with grease and become harder to remove.
- Prepare a mild compatible cleaner. Use warm water with a mild dishwashing liquid when the cabinet manufacturer allows it, or use another cleaner specifically approved for the finish. Stronger is not automatically better.
- Dampen the cloth rather than soaking it. Wet the cloth and wring it thoroughly. The goal is enough moisture to lift grease without sending liquid into door joints, seams, edges, or openings around hardware.
- Wipe greasy areas gently. Work on a small section at a time. Use light pressure and turn the cloth frequently so removed grease is not spread over the next area.
- Repeat mild passes on stubborn buildup. Older sticky grease may not release on the first wipe. Apply the compatible cleaner again with a fresh section of cloth instead of immediately switching to a rough pad or harsh chemical.
- Clean edges, grooves, and around handles. Wrap the damp cloth around a fingertip for narrow areas or use a soft detail brush where appropriate. Avoid flooding seams, joints, screw holes, and unfinished edges.
- Remove cleaner residue. Wipe the cleaned section with a separate cloth lightly dampened with clean water when the finish’s care instructions call for rinsing. Residual soap can leave a dull or sticky film.
- Dry the cabinet promptly. Use a clean, soft cloth to remove remaining moisture, especially along edges, joints, trim, and hardware-adjacent areas.
- Inspect the finish. If a dark, dull, rough, swollen, or peeling area remains, decide whether you are still looking at grease. Continuing to scrub physical finish damage will not restore the surface.
Removing Heavy, Sticky Grease and Cleaning Detailed Areas
Old grease near a cooktop may feel tacky and hold a layer of dust. Resist the urge to solve that problem with one aggressive scrubbing session.
Work in small sections with fresh cloth surfaces. Several gentle passes with a compatible cleaner are less likely to damage a finish than concentrated scrubbing with an abrasive pad.
Do not soak a cabinet door to soften grease. Liquid can migrate into joints, seams, edge banding, or the substrate beneath a surface material.
Grease also concentrates around knobs and pulls because cooking residue mixes with skin oils from frequent handling. You normally do not need to remove all hardware for routine cleaning. Use a damp cloth around a fingertip to work close to the hardware, then dry the surrounding area.
For routed doors and decorative grooves, a soft brush can help lift softened residue if the finish tolerates brushing. Avoid sharp picks or scrapers that can cut through paint or clear coat.
If the grease remains after several mild passes, check the cabinet manufacturer’s approved cleaning options before stepping up to a stronger degreaser.
Cleaning Different Cabinet Finishes
Painted cabinets
Painted cabinets should be cleaned as coated surfaces, not scrubbed like unfinished wood.
Paint formulations and sheen levels vary in washability. Nonabrasive, mild soapy water is an appropriate starting point for many washable painted surfaces, but testing an inconspicuous area is worthwhile when the coating is unknown.
Watch for a change in sheen as you clean. Repeated rubbing can make some finishes appear duller or shinier than the surrounding paint.
Avoid letting water collect along panel joints and door edges. If paint is already peeling, soft, cracked, or separating from the substrate, more cleaning will not correct the coating failure.
Stained or clear-coated wood
On stained wood cabinetry, you are normally cleaning the protective topcoat rather than washing bare wood.
Use limited moisture and dry promptly. Do not automatically reach for vinegar, oil soap, furniture polish, wax, or wood conditioner simply because the cabinet looks like wood. Cabinet manufacturers differ on which of these products they allow, and some warn that polishing or waxing compounds can leave difficult buildup.
A worn clear coat can also make a cabinet look permanently dirty. If an area stays dull or discolored after gentle cleaning and the finish appears thin or damaged, further degreasing may make the problem more visible rather than solve it.
If you want help choosing a compatible product for finished wood surfaces, see our guide to the best cleaner for wood kitchen cabinets.
Laminate and thermofoil
Many laminate and thermofoil cabinet surfaces tolerate mild nonabrasive cleaning, but their construction still matters.
For laminate, control water around seams and edges. Moisture that penetrates a joint can reach the underlying substrate and cause swelling.
Thermofoil and similar wrapped surfaces should also be cleaned without aggressive abrasives or unapproved solvents. Certain cabinet manufacturers specifically exclude solvents that can affect the surface material or its bonded edges.
If laminate is separating, an edge is swollen, or thermofoil is lifting or peeling, cleaning will not rebond the material. Treat that as physical deterioration rather than stubborn grease.
Dish Soap, Vinegar, Baking Soda, and Degreasers
Common household cleaning advice often treats cabinet finishes as interchangeable. They are not.
Dish soap: A mild dishwashing liquid is a reasonable first choice on many cabinet finishes when the manufacturer permits it. Cabinet manufacturers commonly specify mild soap or dishwashing liquid for grease and ordinary grime.
Vinegar: Do not assume an acidic vinegar solution is safe simply because it is homemade. Painted coatings, clear finishes, laminates, wrapped surfaces, and specialty coatings have different chemical tolerances. Use vinegar only when the cabinet or finish manufacturer permits it.
Baking soda: Baking soda provides abrasive action. That may be undesirable on painted, high-gloss, clear-coated, or other scratch-sensitive finishes. Do not use it as a universal cabinet scrub.
Commercial degreasers: These can cut heavy cooking residue effectively, but the word “degreaser” does not establish finish compatibility. Check the product label and cabinet-care guidance first, then test an inconspicuous area when appropriate.
Furniture polish and oil products: Do not add these automatically after cleaning. Some cabinet manufacturers discourage waxes, silicone polishes, or other polishing products because buildup can leave surfaces hazy, streaked, or discolored.
Avoid mixing household cleaning chemicals. There is rarely a reason to combine products when cleaning cabinet grease.
What Can Damage Cabinets—and When Cleaning Will Not Help
The main cleaning risks are unnecessary abrasion, excessive moisture, and incompatible chemicals.
Avoid:
- Steel wool and harsh scouring pads
- Abrasive powders
- Sharp scrapers
- Strong solvents not approved for the finish
- Heavy applications of water
- Steam cleaning unless the cabinet manufacturer specifically allows it
- Strong degreasers used without a compatibility check
- Letting cleaner pool around seams and edges
- Mixing household cleaners
Also know when to stop.
Peeling or chipped paint is missing or failing finish, not grease.
A dull or worn clear coat cannot be restored by repeated washing.
Swollen seams or edges suggest moisture has affected the material beneath the surface.
Delaminating laminate or lifting thermofoil is a bonding or material problem.
Permanent discoloration can result from finish damage, heat, moisture, prolonged staining, or wear and may remain after the grease has been removed.
If an area is becoming softer, rougher, lighter, or more damaged each time you wipe it, stop escalating the cleaning method.
Prevent Heavy Grease Buildup and Avoid Common Mistakes
Cabinets do not need an arbitrary deep-cleaning schedule. Let cooking habits and visible buildup determine the frequency.
Wipe fresh splatter before it hardens, and clean greasy fingerprints around handles when they become noticeable. Cabinets next to a range may need attention sooner than doors across the room.
Using the range hood appropriately while cooking can also help manage airborne cooking residue. Regular light cleaning is easier on cabinet finishes than allowing a thick sticky film to accumulate for months.
Common cleaning mistakes include:
- Starting with the strongest degreaser available
- Using more water because grease is stubborn
- Scrubbing a painted finish aggressively
- Assuming vinegar is safe on every cabinet
- Treating baking soda as a universal non-scratch cleaner
- Letting cleaner collect along seams
- Polishing over grease instead of removing it
- Continuing to scrub peeling, swollen, or otherwise damaged material
The goal is to remove contamination while leaving the finish unchanged.
If your cabinet doors are also hanging crooked or rubbing after cleaning, see our cabinet hinge adjustment guide for the next repair step.
Frequently Asked Questions
What is the best way to clean greasy kitchen cabinets?
For how to clean greasy kitchen cabinets safely, identify the finish first and begin with a soft cloth, limited moisture, and the mildest compatible cleaner that removes the grease. Use repeated gentle passes, remove cleaner residue as appropriate, and dry the cabinet promptly.
Can I use dish soap on greasy kitchen cabinets?
Often, yes. Several major cabinet manufacturers recommend mild dishwashing liquid for ordinary grease and grime on their finishes. Because cabinets vary, confirm that mild soap is appropriate for your particular finish before cleaning a large area.
Is vinegar safe for kitchen cabinets?
Not universally. Cabinet paints, clear coatings, laminates, and wrapped finishes differ in chemical resistance. Do not use vinegar as an all-purpose cabinet cleaner unless the manufacturer of the cabinet or finish allows it.
Can baking soda damage cabinet finishes?
It can affect some surfaces because it is abrasive. Repeated rubbing may dull or scratch a sensitive paint, high-gloss laminate, or clear finish. Use a nonabrasive cleaning method first unless the cabinet manufacturer specifically approves baking soda.
Why do my cabinets still feel sticky after cleaning?
You may still have grease on the surface, or the cleaning product itself may have left residue. Try another gentle pass with a clean cloth and remove cleaner residue according to the finish’s care instructions. If the surface itself feels softened or deteriorated, stop cleaning and inspect for finish damage.
Final Thoughts
The safest approach to how to clean greasy kitchen cabinets is to identify the finish, remove loose dirt, start with a mild compatible cleaner, use controlled moisture, and make repeated gentle passes instead of aggressive scrubbing. Clean detailed areas carefully and dry the surface when you finish.
If grease is gone but the cabinet remains dull, swollen, peeling, soft, or discolored, stop treating the problem as dirt. Cleaning removes buildup; it cannot replace a worn coating, repair water-damaged material, or rebond a failing cabinet surface.