
how to sand a deck before staining
Learning how to sand a deck before staining starts with confirming that the boards are clean, dry, stable, and suitable for refinishing. Sanding can remove loose fibers, smooth rough areas, and help prepare an existing finish, but it should remove only as much wood as necessary.
Inspect the entire deck before using power tools. Sanding cannot repair rot, unstable stairs, loose railings, moving boards, failed framing, or separation from the house. Those conditions require repair or professional evaluation first.
| Deck condition | Sanding approach | Main caution |
|---|---|---|
| Light surface roughness | Test a mild grit and use light pressure | Do not remove sound wood unnecessarily |
| Raised wood fibers after cleaning | Sand lightly after the deck is fully dry | Stop if fibers begin tearing or fraying |
| Peeling or flaking finish | Follow coating instructions and test removal | Some coatings require stripping instead |
| Deep splinters | Smooth only if the board remains solid | Severe splitting may require board replacement |
| Protruding fasteners | Correct accessible surface fasteners before sanding | Never run a sander over exposed metal |
| Soft, rotten, or badly damaged boards | Do not sand | Arrange repair or professional evaluation |
Inspect the Deck Before Sanding
Walk around the deck from the ground before stepping onto it. Look for sagging, leaning supports, unusual movement, or separation between the deck and the house.
Inspect the surface for loose or moving boards, raised nails and screws, cracks, and splinters. Pay particular attention to stairs, exterior doors, railing posts, and areas that remain damp.
Dark discoloration does not always mean wood is rotten. Softness, crumbling fibers, deep deterioration, and significant movement are more serious warning signs.
Check railings with gentle hand pressure only. Do not lean against a questionable railing or test stairs by bouncing on them.
Sanding cannot repair rot, moving framing, unstable stairs, loose railings, or structural damage. Stop using affected areas and contact a qualified deck professional when stability is uncertain.
Confirm the Existing Finish
Determine whether the deck has stain, paint, sealer, or an unknown coating. Sanding requirements vary according to the finish type, its condition, and the product you plan to apply next.
A lightly weathered penetrating stain may need different preparation than peeling paint or a thick film-forming coating. Follow the existing coating and new stain manufacturers’ instructions whenever they are available.
Some finishes require a compatible stripper or professional removal instead of routine sanding. Do not assume that every coating can be safely sanded away.
Older painted surfaces may contain lead or other hazardous materials. If the coating is old or its history is unknown, stop and arrange appropriate testing before creating dust. Do not sand a coating that may contain lead.
Let the Deck Dry Completely
Sand only clean, fully dry wood. Damp boards can clog sandpaper, produce uneven results, and make it harder to judge the actual surface condition.
Drying time depends on temperature, shade, humidity, airflow, wood condition, recent rain, and how the deck was cleaned. There is no universal waiting period that works for every deck.
Check shaded areas, stair corners, spaces near the house, and locations previously covered by rugs or planters. These areas may remain damp after exposed boards appear dry.
Do not begin when rain, heavy dew, or high humidity is likely to make the deck damp again.
Gather the Right Tools and Safety Gear
Choose equipment suitable for exterior wood and the size of the area. Read the sander and abrasive manufacturers’ instructions before starting.
Useful tools and protective equipment
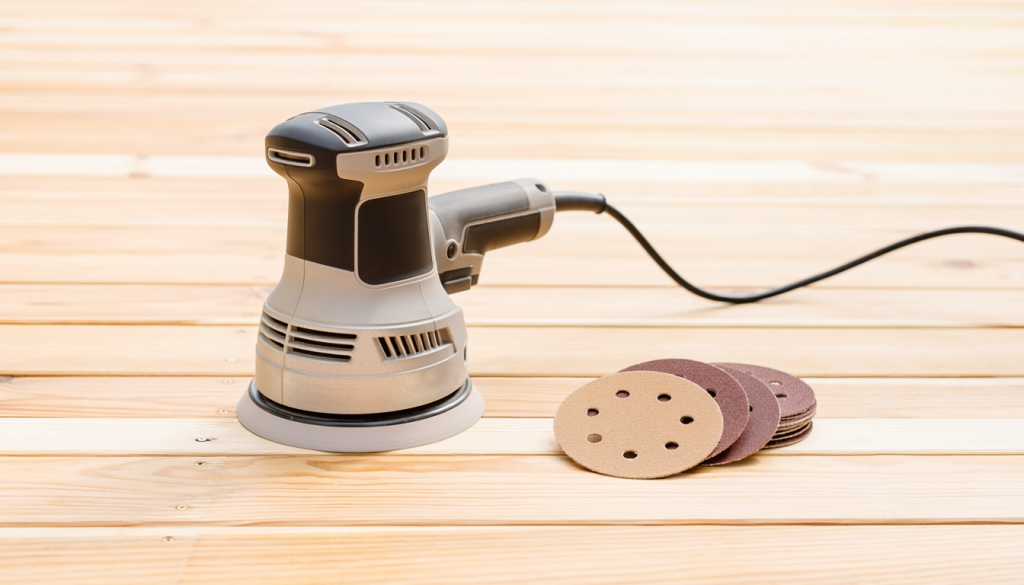
- Random-orbit or suitable deck sander
- Sanding pole or hand sanding block
- Compatible sandpaper
- Broom or shop vacuum approved for fine dust
- Eye protection
- Hearing protection
- Dust mask or respirator appropriate for the material
- Work gloves
- Knee protection when useful
Dust protection must match the material being sanded. Stop if the coating or wood may contain a hazardous substance that has not been identified.
Choose the Right Sandpaper Grit
Coarser abrasives remove roughness and failed finish faster, but they also increase the risk of scratches, gouges, and excessive wood removal. Medium grits provide a smoother surface with less aggressive cutting.
Very fine sanding can polish or close the wood surface enough to affect how some stains penetrate. The best grit depends on the board condition, existing finish, wood species, and stain requirements.
Start with the least aggressive grit that can complete the job. Test a small, inconspicuous area and inspect it before continuing.
Follow the stain and decking manufacturers’ recommendations rather than relying on one universal grit sequence.
Prepare the Work Area
Remove lightweight furniture, rugs, planters, grills, and accessories. Lift items rather than dragging them across the boards.
Sweep the deck and clear accessible debris from board gaps with a non-damaging tool. Protect nearby doors, siding, windows, plants, vehicles, and equipment from dust.
Check the weather forecast and product requirements. Do not sand during rain, strong wind, or damp conditions.
Keep children, visitors, and pets away from the work area. Secure loose clothing and tie back long hair before operating a sander.
How to Sand a Deck Before Staining
- Inspect the deck. Identify rot, movement, loose railings, unstable stairs, and damaged boards before using tools.
- Confirm the wood is clean and dry. Check shaded and sheltered areas, not only boards in direct sun.
- Address accessible protruding fasteners. Correct only simple surface fasteners when appropriate. Do not alter structural hardware.
- Test the sanding method. Use a hidden area to check the grit, pressure, and effect on the existing finish.
- Begin with the least aggressive suitable grit. Increase cutting action only when necessary and permitted.
- Sand with the wood grain. Follow the board direction to reduce visible cross-grain scratches.
- Keep the sander moving. Do not pause in one spot while the abrasive is contacting the wood.
- Use lighter pressure near edges. Board ends and corners can be damaged quickly.
- Hand-sand restricted areas. Use a sanding block or suitable detail tool rather than forcing a large machine into tight spaces.
- Remove all sanding dust. Clean boards, gaps, stairs, edges, and railing bases.
- Inspect the dry surface. Check for scratches, residue, raised fibers, missed coating, and damaged areas before staining.
Sand With the Wood Grain
Move the tool in the direction of the boards whenever practical. Cross-grain sanding can leave scratches that become more visible after stain is applied.
Keep the sanding pad flat against the surface. Tilting the tool concentrates pressure along one edge and may create grooves.
Use steady movement and light to moderate pressure. Pressing down harder does not always speed the work and may overload the tool or damage the boards.
Stop if the wood becomes gouged, uneven, scorched, or unusually warm. Allow the tool and surface to cool before determining whether work should continue.
Avoid Over-Sanding
The goal is to prepare the surface, not make outdoor deck boards look like indoor furniture.
Excessive sanding may thin board surfaces, round the edges, expose fasteners, or create depressions that collect water. Uneven removal can also make stain appear darker in some areas and lighter in others.
Very fine sanding may interfere with stain absorption, depending on the product and wood. Stop once loose fibers, minor roughness, and appropriate portions of failed finish have been addressed.
Do not remove sound wood simply to eliminate every mark or color variation.
Sand Deck Edges, Corners, and Between Railings
Use a hand sanding block or suitable detail tool where a larger sander cannot operate safely. Keep fingers away from moving abrasives.
Work carefully near siding, trim, posts, door thresholds, and railing components. A power sander can damage adjacent materials quickly.
Do not force a tool between narrow balusters or into tight corners. Do not remove railings, brackets, posts, or structural parts to reach hidden surfaces.
Some inaccessible areas may require a different refinishing method or professional attention.
Handle Raised Nails and Screws Safely
Locate protruding fasteners before sanding. Mark them so they are not overlooked while the tool is running.
Never pass a sander over an exposed nail, screw, bolt, or metal bracket. Contact can damage the abrasive and tool, create sparks, or send debris into the air.
An accessible surface nail or screw may sometimes be reset or replaced with compatible hardware when the board is otherwise sound. Follow appropriate deck and fastener guidance.
Repeatedly rising nails, enlarged holes, and loose fasteners may indicate board movement. Structural bolts, anchors, brackets, and connectors require professional evaluation when they are loose, missing, corroded, or separating.
For an isolated fastener that has lifted above the walking surface, follow the separate guidance for deck nails popping up before running a sander nearby.
Sand Railings and Stairs Carefully
Hand-contact surfaces may need light sanding to remove splinters and rough fibers. Use controlled pressure around corners, balusters, and decorative parts.
Check stair-tread edges for splinters, peeling finish, and raised fasteners. Keep the stairs closed to use while tools, cords, and dust are present.
Thin or shaped railing components can be damaged by aggressive sanding. Use hand tools when they provide better control.
Do not sand or continue using railings and stairs that move, sag, or have deteriorated structural parts.
Remove Sanding Dust Completely
Sweep the deck thoroughly after sanding. Remove dust from board surfaces, gaps, corners, stair treads, edges, and railing bases.
Use a shop vacuum only when it is suitable for fine wood dust and operated according to its instructions. Avoid using equipment that spreads fine dust through the work area.
Follow the stain manufacturer’s final-cleaning directions. Some products have specific requirements for removing dust before application.
Do not leave dust on the deck. It may interfere with stain penetration, adhesion, color, and finish uniformity.
Avoid blowing dust toward the house, people, vehicles, plants, or neighboring property. Do not wash the deck again unless the stain or decking instructions call for it.
How Soon Can You Stain After Sanding?
The deck must be clean, dry, and free of sanding dust before stain is applied. The weather must also meet the stain manufacturer’s requirements.
Rain, dew, humidity, surface temperature, and air temperature can affect the application window. A surface that was dry after sanding may become damp overnight.
Follow the stain manufacturer’s preparation and timing instructions. Do not rely on a universal waiting period.
Inspect the deck immediately before staining. Delay the application if moisture, dust, new debris, or unsuitable weather is present.
When the boards are weathered and the next finish is still undecided, review what to look for when choosing the best stain for an old deck.
When Sanding Is Not Enough
Sanding addresses surface preparation. It cannot correct every type of damage or coating problem.
Sanding alone is not appropriate for
- Soft or rotten boards
- Deep structural cracks
- Widespread peeling paint
- Thick or incompatible coatings
- Severe cupping or warping
- Structural movement or sagging
- Loose railings or unstable stairs
- Unknown potentially hazardous coatings
- Large areas requiring complete refinishing
Stripping, professional coating removal, board replacement, or structural evaluation may be needed. Do not continue sanding when the underlying condition is uncertain.
Common Deck-Sanding Mistakes
Avoid these common errors
- Sanding damp wood
- Starting with an unnecessarily aggressive grit
- Holding the sander in one spot
- Sanding across the grain
- Running abrasives over fasteners
- Rounding board edges
- Skipping complete dust removal
- Sanding unstable or rotten boards
- Using a very fine grit that interferes with stain absorption
- Staining before moisture and weather conditions are suitable
When to Call a Professional
Arrange professional help when the deck condition, coating, or project size is beyond safe surface preparation.
Contact a qualified professional for
- Widespread rot
- Loose or moving boards across a large area
- Structural movement or sagging
- Loose railings or unstable stairs
- Thick, layered, or unknown coatings
- Possible lead-containing paint
- Extensive coating removal
- Large damaged or deteriorated areas
- Structural framing or board-replacement questions
Do not use sanding to hide or smooth over damage that affects the deck’s stability.
Final Thoughts
Successful deck preparation depends on careful inspection, fully dry wood, a suitable abrasive, light pressure, and steady sanding with the grain. Start with the least aggressive method, keep the tool moving, and remove all dust before opening the stain.
Sanding can smooth rough fibers and prepare a sound surface, but it cannot repair rot, structural movement, unstable stairs, or loose railings. Address those conditions before refinishing begins.