
how to seal patio pavers after cleaning
Learning how to seal patio pavers begins with deciding whether the patio is clean, dry, stable, and compatible with the selected product. Sealer can change the color, sheen, stain resistance, and maintenance needs of pavers, so careful preparation matters more than applying a heavy coat.
Do not seal over dampness, loose joints, sinking pavers, failed edges, or recurring standing water. These conditions should be corrected or professionally evaluated before a coating is applied.
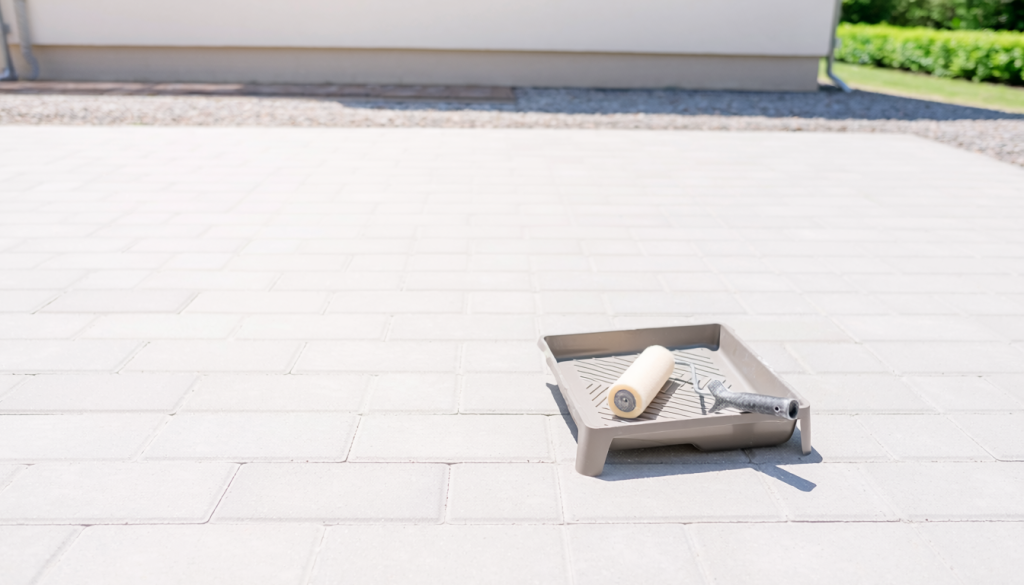
| Patio condition | Ready for sealer? | First step |
|---|---|---|
| Clean and completely dry pavers | Possibly | Confirm product compatibility and test a hidden area |
| Damp or recently washed pavers | No | Wait for the full manufacturer-required drying period |
| Loose or missing joint sand | Not yet | Stabilize the joints with a compatible product and method |
| White haze or efflorescence | No | Identify and address the residue before sealing |
| Existing sealer is peeling or cloudy | No | Contact the manufacturer or a coating professional |
| Uneven, sinking, or poorly draining pavers | No | Arrange drainage or hardscape evaluation |
Decide Whether the Patio Should Be Sealed
Sealer is optional for many paver patios. Some installations perform well with routine cleaning and joint maintenance alone.
A sealer may deepen color, add sheen, reduce the absorption of certain spills, or make routine cleaning easier. It also creates a finish that may need future maintenance or recoating.
Not every paver or installation is suitable for sealing. Highly porous materials, certain factory finishes, permeable systems, and patios with moisture or drainage problems may have special restrictions.
Follow instructions from the paver manufacturer, installer, joint-material manufacturer, and sealer producer. Their requirements take priority over general application advice.
Sealer does not repair loose pavers, failed joints, poor drainage, settlement, or edge movement. It also does not make a patio waterproof or permanently prevent stains and weeds.
Always test the sealer in an inconspicuous area. Let the test section cure as directed before judging its color, sheen, texture, and slipperiness.
Inspect the Patio Before Sealing
Walk across the patio in good daylight and look for loose or rocking pavers, raised corners, sunken sections, cracks, chips, and trip hazards.
Inspect the joints for missing or loose sand. Look for sand collecting on the paver surface, weeds, ant activity, or gaps that continue to widen.
Check for standing water after ordinary rain. Water that repeatedly collects in depressions or drains toward the house must be addressed before sealing.
Inspect the patio perimeter for spreading pavers, failed edge restraints, soil erosion, and loose edge units. Sealing will not stabilize a moving perimeter.
White haze, powdery residue, peeling coatings, and cloudy patches also need attention. Applying a new sealer over an unresolved surface problem can make it harder to correct.
Widespread settlement, recurring drainage problems, or major edge failure requires professional evaluation before the patio is sealed.
Recurring puddles, erosion, or runoff toward the house should be evaluated as patio drainage problems before any coating is applied.
Confirm the Pavers Are Clean
Dirt, grease, algae, weeds, cleaning residue, and loose material can become trapped beneath sealer. Once coated, these flaws may become more noticeable or difficult to remove.
Clean stains as thoroughly as reasonably possible using products approved for the pavers and existing coating. Some stains may improve without disappearing completely.
Rinse according to the cleaner instructions. Do not seal over soap, detergent, dust, loosened joint material, or visible residue.
Never mix cleaning products. Combining bleach, acids, ammonia, degreasers, or specialty cleaners can damage the surface and create hazardous fumes.
After cleaning, allow the patio to dry fully. Do not rely only on the appearance of the exposed paver faces; joints, shaded sections, and low areas may remain damp longer.
Let the Pavers Dry Completely
Applying sealer to damp pavers can trap moisture and cause whitening, cloudiness, poor adhesion, bubbling, or uneven curing.
Drying time varies with temperature, humidity, shade, wind, paver porosity, recent rainfall, and the amount of water used during cleaning. There is no universal waiting period.
Check joints and sheltered areas as well as the open surface. Spaces beneath overhangs or beside walls may dry more slowly.
Follow the sealer manufacturer’s required drying period. Delay the project if rain, irrigation, dew, or high humidity could rewet the patio before application.
Check the Weather and Application Window
Read the product label before selecting an application day. Sealer manufacturers typically specify acceptable air and surface temperatures, rain-free periods, humidity limits, and curing conditions.
Direct sunlight can heat the pavers and cause some products to dry too quickly. Strong wind can spread dust, increase overspray, or shorten working time.
Consider nighttime conditions as well. Dew or falling temperatures may affect a coating that still needs time to cure.
Applying sealer outside the approved weather range can cause streaking, uneven sheen, poor bonding, bubbles, or coating failure. Postpone the work when the forecast does not meet the product requirements.
Choose a Compatible Paver Sealer
Penetrating sealers soak into the surface and usually leave little or no visible film. They are often chosen when the homeowner wants a more natural appearance.
Film-forming sealers create a coating on top of the pavers. Depending on the product, they may add sheen, deepen color, or produce a wet-look finish.
Natural-look products are intended to limit visible color change. Color-enhancing or wet-look sealers may noticeably darken the pavers, sometimes for an extended period.
Water-based products may have lower odor and different application characteristics than solvent-based products. Solvent-based sealers may deepen color more strongly but can involve stronger fumes, fire hazards, and stricter handling requirements.
No type is universally best. The correct choice depends on the paver material, joint product, existing coating, desired appearance, exposure, drainage, and manufacturer guidance.
Appearance and slip resistance can change after sealing. Test the product and view the cured result under both dry and wet conditions when possible.
Check Existing Sealer Compatibility
Water beading does not reliably identify every previous sealer. The patio may have a penetrating treatment, a film-forming coating, or several products applied at different times.
Applying an incompatible product can cause peeling, whitening, bubbling, tackiness, poor adhesion, or an uneven appearance.
A test area is essential when the existing coating is known and even more important when it is not. Follow the new product manufacturer’s compatibility instructions.
Thick, peeling, cloudy, or failed coatings may require specialized removal. Do not use chemical strippers or solvents without approved instructions and suitable expertise.
Contact the sealer manufacturer or a coating professional when compatibility is uncertain.
Inspect and Prepare the Paver Joints
Joint sand should be stable and at the level specified for the paver system and joint product. Open or poorly filled joints may allow movement and collect debris.
Remove loose sand from the paver faces before sealing. Do not coat piles of sand, dust, or material that has not settled into the joints.
Polymeric sand may need a separate curing period before sealer can be applied. Follow both manufacturers’ instructions because the required sequence and timing can vary.
The sealer and joint material must be compatible. Some products are designed to stabilize joints, while others are not intended to contact certain sands.
Do not use sealer as glue for unstable pavers. Movement, washed-out joints, and drainage problems must be addressed first.
Before replacing joint material, compare polymeric sand vs regular sand for pavers and confirm compatibility with the patio and sealer.
Gather Tools and Protective Equipment
Use only application tools approved on the product label.
Common tools and protective items include
- Broom or suitable blower used carefully
- Paint tray or manufacturer-approved container
- Approved roller, sprayer, or applicator
- Detail brush when permitted
- Chemical-resistant gloves
- Eye protection
- Protective clothing
- Respiratory protection when required by the label
- Barriers to keep people and pets away
Solvent-based products may produce stronger fumes and present additional fire, ventilation, storage, and handling hazards. Keep them away from flames, sparks, pilot lights, smoking materials, and other ignition sources as directed.
How to Seal Patio Pavers Step by Step
- Confirm the patio is stable. Do not proceed over sinking pavers, failed edges, recurring puddles, or major joint problems.
- Verify that the surface is clean and dry. Check the joints, shaded areas, and low spots.
- Review the weather and label. Confirm temperature, humidity, rain, sunlight, and curing requirements.
- Protect nearby surfaces. Cover or mask walls, doors, siding, metal, plants, and adjacent materials as directed.
- Test the sealer. Apply it in a hidden area and allow the test to cure fully.
- Prepare the product as directed. Mix or stir only when the label requires it. Do not combine products.
- Apply a thin, even coat. Use the approved tool and follow the stated coverage rate.
- Work in manageable sections. Maintain the required edge and avoid trapping yourself away from an exit.
- Prevent puddles and heavy overlaps. Watch joints, depressions, textured areas, and borders.
- Apply a second coat only when permitted. Follow the specified recoat window.
- Close the patio during curing. Keep people, pets, furniture, water, and irrigation away.
- Inspect the cured finish. Check appearance, residue, tackiness, and slipperiness before replacing items.
Apply Sealer in Thin, Even Coats
More sealer is not always better. Heavy application can cause bubbles, cloudiness, tackiness, excessive shine, and slippery buildup.
Follow the stated coverage rate rather than estimating by appearance. Maintain a wet edge when required so adjacent sections blend evenly.
Avoid repeated passes over areas that have started to cure. Disturbing a partially set coating can leave roller marks, streaks, or dark overlaps.
Watch low and textured areas for pooling. Remove excess product only by the method and within the time allowed by the manufacturer.
Roll, Spray, or Brush the Sealer
The correct application tool depends on the product.
Rollers may work well for some film-forming sealers. Sprayers may be suitable for certain penetrating products, while brushes can help around edges and tight areas.
Spraying requires careful overspray control, suitable protective equipment, and strict compliance with the label. Do not spray solvent-based products unless the manufacturer permits it and all ventilation and fire-safety requirements can be met.
Never substitute an application method that the label does not approve.
Avoid Sealer Puddles and Overapplication
Milky patches, bubbles, sticky areas, dark overlap marks, excessive shine, and slippery sections can indicate excessive product or poor curing conditions.
Sealer may also collect in low spots or joints where it can dry unevenly. Inspect each section as you work.
Do not keep adding product to correct an uneven wet appearance unless the instructions direct you to do so. Many sealers change as they cure.
Correcting a cured coating problem may require manufacturer guidance or professional removal. Do not experiment with solvents or additional coats.
Should You Apply a Second Coat?
Some sealers are designed for one coat. Others allow or require a second application.
Recoat timing is product-specific. Applying the next coat too soon may trap solvent or moisture, while applying it too late may cause poor bonding.
Additional coats may increase color depth, sheen, buildup, and slipperiness. Two coats are not automatically better than one.
Follow the label and stop once the approved coverage and appearance have been achieved.
Keep the Patio Closed While the Sealer Cures
Keep people and pets off the patio for the full period stated by the manufacturer. A surface that feels dry may not be ready for normal use.
Do not return furniture, grills, rugs, or planters too early. These items can leave marks, trap moisture, or interfere with curing.
Protect the patio from rain, sprinklers, planter drainage, and cleaning water. Foot-traffic and furniture timelines may differ, so follow each requirement separately.
Cool, shaded, or humid conditions may require additional time when the product instructions say so.
Prevent a Slippery Paver Surface
Film-forming and high-gloss sealers may make some pavers more slippery, especially when wet.
Use extra caution on pool decks, steps, slopes, shaded patios, and areas exposed to irrigation or frequent rain.
Some manufacturers offer compatible slip-resistant additives. Use only an additive approved for the selected sealer and follow the specified amount and application method.
Test the texture and appearance before treating the full patio. Keep the area closed if the cured surface remains unexpectedly slippery.
No sealer or additive can guarantee slip prevention.
Protect Nearby Surfaces and Landscaping
Mask walls, siding, doors, windows, metal fixtures, and adjacent concrete when the product instructions recommend it.
Protect plants according to the label. Control spray drift and runoff, particularly near ponds, drains, waterways, and neighboring property.
Keep sealer out of storm drains and natural water sources. Clean tools and dispose of containers, rags, and leftover material according to the label and local requirements.
Some solvent-soaked materials may present a fire hazard. Follow all storage and disposal warnings.
Common Paver-Sealing Mistakes
Avoid these common errors
- Sealing damp pavers
- Applying over dirt or cleaner residue
- Ignoring an existing coating
- Using an incompatible product
- Applying too much sealer
- Sealing unstable or sinking pavers
- Allowing product to puddle
- Working in unsuitable weather
- Replacing furniture too soon
- Assuming sealer will stop weeds, drainage problems, or movement
When Not to Seal Patio Pavers
Delay sealing when you find
- Recurring standing water
- Widespread sinking or heaving
- Loose or rocking pavers
- Failed patio edges
- Active efflorescence or unexplained white residue
- Peeling or cloudy existing coatings
- Damp pavers or joints
- Unknown product compatibility
- Manufacturer restrictions
Resolve the underlying condition before reconsidering a coating.
When to Call a Professional
Professional help may be appropriate for
- Thick or failing existing sealer
- Widespread cloudy or peeling coating
- Extensive efflorescence
- Major drainage problems
- Large sections of uneven or loose pavers
- Failed patio edges
- Difficult solvent-based applications
- Large or complex patios
- Work near pools, steep slopes, or sensitive surfaces
- Questions about coating removal or compatibility
A hardscape professional can evaluate settlement and edge failure, while a coating specialist or manufacturer representative may help with failed sealer and compatibility concerns.
Final Thoughts
Successful paver sealing depends on a stable patio, compatible product, clean and completely dry surfaces, suitable weather, thin application, and proper curing. Testing first can help reveal unwanted color, sheen, or texture changes before the entire patio is treated.
Sealer may enhance appearance or improve resistance to certain stains, but it does not repair settlement, poor drainage, unstable joints, or structural problems. Address those conditions before applying any coating.