
When to remove painter’s tape without peeling paint
Knowing when to remove painter’s tape is less about following one universal clock and more about the condition of the paint and the tape manufacturer’s instructions. In many ordinary interior projects, the goal is to remove the tape after the final coat has set enough that it will not smear, but before the paint has hardened into a strong film across the tape edge. Remove it slowly and watch the paint line as you work.
| Condition | What it means | Best next step |
|---|---|---|
| Paint is visibly wet | Edge may smear during removal | Check product instructions and allow appropriate setting |
| Paint has set but is not fully hardened | Often a useful removal stage for compatible tapes | Test a short section and remove carefully |
| Tape has been left on for an extended period | Adhesive or dried paint edge may complicate removal | Work slowly and inspect the edge |
| Paint has hardened over the tape | Paint film may bridge across the tape line | Carefully separate the film if necessary |
| Paint begins lifting with the tape | Coating is tearing or losing adhesion | Stop pulling and inspect the cause |
Do not automatically leave painter’s tape in place until the paint has fully cured. Different tapes and paints have different application, drying, and removal requirements, so the product instructions should control the timing.
When to Remove Painters Tape
Painter’s tape needs to come off at a point when the paint edge can remain clean without being damaged by the removal process.
Remove tape too soon, while the coating is excessively wet, and the paint can smear, run, or deform along the line.
Wait too long with a tape or coating system that is not intended for extended removal, and paint can harden across the tape edge. Instead of separating cleanly, the paint film may tear when the tape is pulled away.
Some tapes also have specific removal windows. A product intended for short-term masking may behave differently from one designed to remain on a surface longer.
The safest approach is to consider three things:
- The tape manufacturer’s removal instructions
- The paint manufacturer’s drying and recoating instructions
- The actual condition of the paint edge when you begin removal
Do not substitute a generic rule such as “always remove after a certain number of minutes” for the instructions that apply to the products you are using.
Why Paint Peels When Removing Painter’s Tape
Timing matters, but it is not the only reason paint can come away with tape.
Sometimes the tape exposes an adhesion problem that was already present. In other situations, the paint itself has formed a continuous film over the tape and tears during removal.
Identifying which problem you have can help prevent the damage from continuing along the entire tape line.
Poor Surface Adhesion
Paint needs a sound, clean, properly prepared surface underneath it.
Dust, grease, chalky residue, glossy surfaces, weak older paint, poor preparation, and problems with an underlying primer or coating can all contribute to weak adhesion.
When tape is removed from a poorly bonded coating, the pulling force can lift paint that was already vulnerable to failure.
This is different from paint that is well bonded to the wall but tears only because a hardened film bridges across the tape edge.
If paint is releasing well beyond the tape line or peeling from the wall in unrelated areas, the problem may be broader than tape removal. See Paint Peeling Off a Wall: Causes and Repair for that type of adhesion failure.
Paint Bridges Across the Tape Edge
As paint is applied next to painter’s tape, some coating can overlap the edge of the tape.
As that paint dries, it can form a continuous film connecting the painted surface to the tape.
If the film becomes sufficiently firm before removal, pulling the tape can tug on that connected paint layer. Instead of separating at the intended line, the coating may tear irregularly or lift from the adjacent surface.
This is one reason removal technique becomes especially important when the paint has dried substantially around the tape.
Paint Is Still Too Soft
Earlier removal is not automatically better.
If the paint is still excessively wet or soft, pulling the tape can disturb the edge instead of producing a clean line. The coating may smear, stretch, or transfer where you do not want it.
Follow the paint and tape instructions and pay attention to the condition of the coating rather than trying to beat an arbitrary deadline.
Tape Was Left On Too Long
Painter’s tape is not necessarily intended to remain on a surface indefinitely.
Different tapes have different recommended periods of use and removal instructions. Leaving a tape beyond its intended window can make removal more difficult, particularly when paint has hardened across the edge.
The adhesive itself may also behave differently after extended contact with a surface.
Check the specific tape rather than assuming that every painter’s tape has the same removal window.
How to Remove Painter’s Tape Cleanly
Careful removal can reduce the chance of tearing the paint edge, particularly when you watch how the coating responds instead of pulling the entire strip at once.
Step 1: Check the paint and tape instructions
Before removing the tape, check the manufacturer’s directions for both products.
The tape instructions may specify when or how it should be removed. The paint instructions provide information about drying and recoating that can help you judge the coating’s condition.
If the instructions conflict with a generic painting tip, follow the requirements for the actual products being used.
Freshly painted and delicate surfaces deserve particular care. Not every tape is intended for every surface or every stage of paint curing.
For more information about choosing tape for different surfaces, see Best Painter’s Tape for Clean Lines and Delicate Surfaces.
Step 2: Test a short section
When practical, begin at a less conspicuous section of the tape line.
Slowly release a short length and watch both the tape and the paint edge.
A test section can reveal whether the paint is separating cleanly, smearing, stretching, or beginning to lift before you commit to pulling a long strip.
If the edge immediately starts tearing, stop and determine why.
Step 3: Pull slowly
Remove the tape with a slow, steady motion rather than jerking it away.
Fast pulling gives you less opportunity to notice a paint film beginning to lift. A controlled pace lets you stop before a small problem becomes a long torn edge.
Avoid ripping off several feet of tape in one quick motion simply because the first few inches released cleanly.
Step 4: Pull back at a low angle
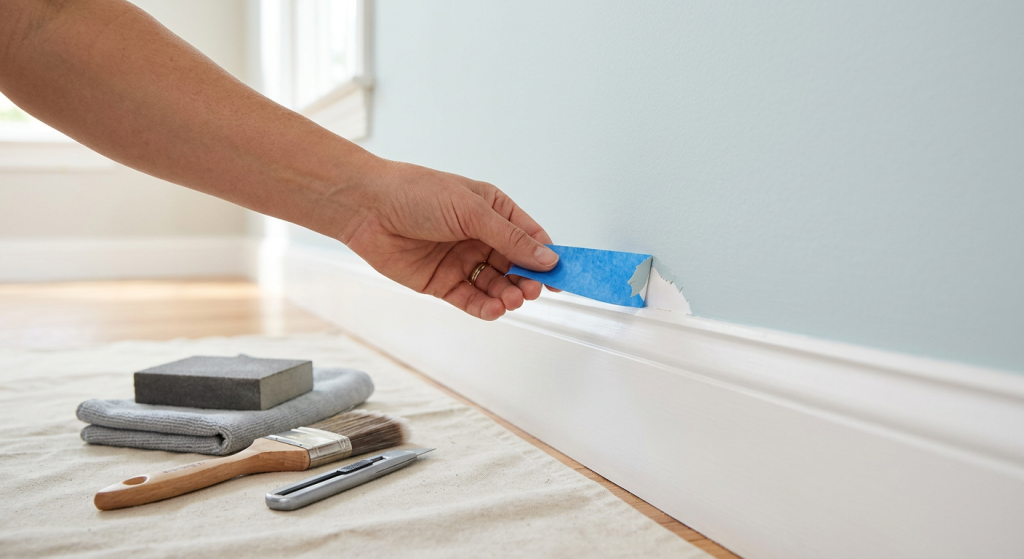
Rather than pulling the tape straight outward from the wall, peel it back toward itself at a low angle when the tape instructions permit.
This gives you more control at the separation point and lets you watch the paint line closely as the tape releases.
There is no need to rely on one exact universal angle. The goal is controlled removal close to the surface rather than abruptly pulling the tape away from the wall.
Step 5: Watch the paint edge
Keep your attention on the point where the tape is separating from the painted surface.
If the paint starts to lift, tear, or stretch with the tape, stop.
Do not keep pulling in the hope that the problem will correct itself. Continuing can turn a small damaged section into a much longer repair.
Inspect whether the paint is bridging over the tape or whether the coating itself appears poorly bonded to the underlying surface.
Step 6: Separate a hardened paint film if needed
If paint has dried into a firm film across the tape edge, carefully separating that film before continuing removal may reduce tearing.
Use an appropriate sharp tool only when necessary, and work along the intended paint boundary with controlled pressure. The objective is to separate the film—not cut deeply into drywall, trim, caulk, or another finished surface.
Keep your free hand out of the cutting path and maintain control of the tool.
Scoring is not automatically required every time painter’s tape is removed. Use it only when the dried paint film needs help separating cleanly.
What to Do If Paint Starts Peeling With the Tape
Stop pulling as soon as you notice the paint lifting.
First, determine whether a hardened paint film is simply bridging the tape edge. If so, carefully separating that film may allow removal to continue without extending the tear.
If paint is pulling away from the wall itself, inspect the exposed surface. The problem may involve poor adhesion rather than removal timing alone.
After the damaged area has dried as required, remove only material that is no longer sound. Smooth or feather the damaged edge as appropriate, clean away dust, and repair the surface before repainting.
Exposed or repaired substrate may require appropriate primer before the finish coat.
Use thin, controlled applications rather than trying to conceal a torn edge with a heavy layer of paint. A visible ridge underneath the new coating can remain noticeable even after the color matches.
If older painted surfaces may contain lead-based paint, do not use uncontrolled scraping or sanding on suspect coatings. Determine an appropriate lead-safe method before disturbing the paint.
Be Careful With Freshly Painted and Delicate Surfaces
Applying tape over a newly painted surface introduces a different risk from masking an older, well-established finish.
A coating can feel dry at the surface without having developed the resistance to tape adhesion that it will have later. Tape that is too aggressive for the surface can also increase the chance of damage during removal.
Use a tape rated for the type and condition of the surface and follow its instructions for application and removal.
Do not assume that ordinary painter’s tape and tape intended for delicate or freshly painted surfaces are interchangeable.
Surface condition matters as well. Tape cannot compensate for paint that was applied over dust, grease, loose coating, or another poorly prepared surface.
Common Painter’s Tape Removal Mistakes
Leaving tape on indefinitely: Tape products have their own use and removal instructions. Longer is not automatically safer.
Removing tape while paint is excessively wet: Very wet paint can smear or deform along the edge.
Waiting automatically for full cure: Paint can harden across the tape line and create a film that tears during removal.
Yanking tape away from the wall: Fast, outward pulling reduces control and can make it harder to stop when an edge begins lifting.
Continuing after paint starts peeling: Stop and inspect the edge instead of tearing through the rest of the line.
Applying tape over dusty or poorly bonded paint: The tape may expose an adhesion problem when it is removed.
Using an overly aggressive tape on a delicate surface: Match the tape to the surface and follow its instructions.
Scoring every tape line automatically: A blade is useful when a hardened film needs separation, but unnecessary cutting can damage adjacent surfaces.
Repainting directly over a damaged edge: Remove loose material and smooth the transition before applying new coating.
Final Thoughts
The practical answer to when to remove painters tape depends on the paint, the tape, and the condition of the paint edge. Do not automatically remove tape while the coating is very wet, and do not assume it should remain in place until the paint has fully cured. Follow the product instructions and aim for controlled removal before a hardened paint bridge makes the edge difficult to separate.
Pull the tape slowly, keep it close to the surface, and watch the paint line continuously. If paint starts lifting, stop rather than pulling through the problem. Good timing helps, but careful removal and sound paint adhesion are just as important for producing a clean edge.