Why Is Paint Bubbling on My Wall?
If you are asking why is paint bubbling on my wall, the paint is usually losing its bond because moisture, poor surface prep, heat, humidity, or an unstable old paint layer is pushing it away from the wall. Paint bubbles form when the paint film lifts from the surface underneath instead of staying tightly attached.
Sometimes the problem is small and easy to repair. A few bubbles on a dry, solid wall can often be scraped, sanded, patched, primed, and repainted. But bubbling paint can also be a warning sign of moisture, soft drywall, mold, or damage under the paint.
The most important step is to find out why the paint bubbled before you repaint. If you only pop the bubbles and paint over them, the problem can come right back.
Quick Cause and Fix Guide
| What You See | Likely Cause | Best First Step |
|---|---|---|
| A few small paint bubbles | Poor prep, dust, or weak adhesion | Scrape, sand, prime, and repaint |
| Bubbles near a bathroom, window, or ceiling | Moisture or humidity | Find and fix the moisture source first |
| Bubbles with stains or soft drywall | Water damage behind the paint | Stop and inspect before repainting |
| Large areas bubbling or peeling | Old paint failure or incompatible coating | Remove loose paint and prepare the surface properly |
why is paint bubbling on wall?
Paint bubbles on a wall when the paint separates from the surface underneath. That surface may be drywall, primer, old paint, patching compound, spackle, or a previous coating.
For paint to stick well, the wall needs to be clean, dry, dull, stable, and properly primed when needed. If paint is applied over dust, grease, moisture, glossy paint, or damaged drywall, it may not bond correctly.
Bubbling can happen soon after painting or months later. Fresh paint may bubble if the wall was damp, dirty, humid, or too warm during painting. Older paint may bubble when moisture gets behind it or when the old paint layer starts to fail.
Small Paint Bubbles vs Peeling Paint vs Widespread Failure
Not all paint bubbling means the same thing. A small bubble in one spot is different from paint peeling in sheets or bubbling across an entire wall.
Small bubbles are often caused by poor surface prep, a little trapped dust, a missed primer spot, or a small area of weak old paint. These can often be repaired with careful scraping, sanding, primer, and paint.
Peeling paint means the paint has already lifted and broken open. Bubbling paint is often the stage before peeling. If the bubble breaks or dries out, it may turn into a flaking or peeling edge.
Widespread paint failure is more serious. If large areas are bubbling, peeling, or lifting, the problem is likely bigger than one bad spot. The wall may have moisture, old paint failure, incompatible coatings, or poor prep across a larger surface.
If the bubbles have already opened into loose edges, this guide explains why paint is peeling off my wall and how to repair the surface.
A small repair is more likely when:
- The bubbles are limited to one small area.
- The drywall feels firm and dry.
- There are no stains or soft spots.
- The surrounding paint is well attached.
- The bubbling does not return after proper repair.
A larger problem is more likely when:
- Bubbles appear across a wide area.
- The paint peels off in sheets.
- Bubbling keeps coming back after repainting.
- The wall feels damp, soft, or crumbly.
- There are water stains or mold-like spots.
- The bubbles are near a ceiling, window, bathroom, or plumbing wall.
A small bubble can be a paint problem. Recurring or widespread bubbling is often a wall problem.
Moisture Is One of the Biggest Causes
Moisture is one of the most common reasons paint bubbles on walls. Paint does not bond well to damp surfaces, and moisture trapped behind paint can push the paint film outward.
This can happen from a roof leak, plumbing leak, window leak, bathroom humidity, poor ventilation, or moisture moving through a wall from another area.
Moisture-related bubbles often appear near ceilings, exterior walls, bathrooms, kitchens, laundry rooms, windows, or baseboards. They may also appear with staining, musty smells, soft drywall, or peeling paint.
Stop before repainting if you notice:
- Brown or yellow stains.
- Soft or swollen drywall.
- Mold-like spots.
- A musty smell.
- Bubbling near a ceiling or window.
- Paint that feels damp or rubbery.
- Bubbling that keeps returning in the same place.
Do not cover moisture damage with primer and paint until the source is fixed. If the wall is still damp, the new paint can bubble again.
Painting Over Damp Surfaces
Paint can bubble if it is applied before the wall is fully dry. This can happen after cleaning walls, patching drywall, repairing a leak, or painting in a humid room.
A wall can feel dry on the surface but still hold moisture in patching compound, drywall, or the layers underneath. If paint traps that moisture, bubbles may form as the moisture tries to escape.
This is why drying time matters. Patching compound, spackle, primer, and paint all need time to dry before the next layer is applied.
Do not rush the repair by painting over damp compound, wet drywall, or a freshly cleaned wall.
Poor Surface Prep
Poor surface prep is another common cause of bubbling paint. Paint needs a clean, stable surface. If the wall is dusty, greasy, glossy, or flaky, the paint may lift instead of bonding.
Dust is especially common after sanding spackle or patching compound. If the dust is not wiped away with a microfiber cloth, primer and paint may stick to the dust instead of the wall.
Grease and grime are common in kitchens, dining rooms, hallways, and around light switches. These areas may look clean but still have a film that keeps paint from gripping.
Surface prep problems that can cause bubbles include:
- Painting over sanding dust.
- Painting over grease or cooking residue.
- Painting over hand oils or grime.
- Painting over loose old paint.
- Painting over glossy paint without scuff sanding.
- Skipping primer on patched areas.
- Painting over damaged drywall paper.
Good prep is not just about making the wall look clean. It is about giving the paint something solid to hold onto.
Skipped Primer
Primer helps paint bond to the wall and seals surfaces that absorb paint unevenly. Skipping primer can lead to bubbling, flashing, peeling, or uneven color.
Primer is especially important over bare drywall, patched areas, joint compound, spackle, stains, repaired spots, and surfaces where adhesion is questionable.
A bonding primer may be helpful when painting over glossy or slick surfaces. A stain-blocking primer may be needed when old stains are present, but it should only be used after the moisture source has been fixed and the wall is dry.
Primer should not be used to hide loose paint, wet drywall, or active water damage. The surface still needs to be clean, dry, and stable first.
High Humidity and Heat
High humidity can slow drying and make it harder for paint to cure properly. This is common in bathrooms, laundry rooms, basements, and kitchens.
Heat can also cause problems. If a wall is too hot or the room is too warm, paint may dry too quickly on the surface while the layer underneath stays soft. That uneven drying can contribute to bubbling.
Painting in direct sunlight, near heaters, or in a poorly ventilated humid room can increase the chance of paint failure.
Good airflow and moderate room conditions help paint dry more evenly.
Old Paint Failure
Sometimes the new paint is not the real problem. The old paint underneath may already be failing.
If old paint has lost its grip, the new coat may lift with it. This can cause bubbles, peeling edges, or large sheets of paint coming loose.
Older walls may have several layers of paint. If one of those older layers was applied over dust, grease, moisture, or a glossy surface, the weakness may show up years later.
When old paint lifts easily with a paint scraper or putty knife, you need to remove the loose material before repainting. New paint cannot hold down a failing layer underneath.
Incompatible Coatings
Paint can bubble when the new coating does not work well with the old surface. This can happen when painting over glossy paint, oil-based coatings, specialty finishes, sealers, or unknown old products without the right prep.
The surface may look normal, but the new paint may not grip well. It may bubble, scratch off, or peel after drying.
When you are not sure what is on the wall, sanding, cleaning, and primer become more important. A bonding primer can help when the surface is sound but difficult for regular paint to stick to.
Paint Applied Too Thick
Heavy coats of paint can cause bubbling and poor drying. Thick paint does not dry as evenly as thin coats. The outside may skin over while the inside stays soft longer.
This can trap moisture or solvents under the surface, leading to bubbles, wrinkles, or weak adhesion.
Thick paint is also more likely to show roller marks, ridges, and texture problems. Two thin coats usually perform better than one heavy coat.
Do not try to hide bubbles, stains, or rough spots with extra paint. Fix the surface first.
Drywall Damage Under the Paint
Paint can bubble if the drywall surface under it is damaged. Torn drywall paper, soft gypsum, loose patching compound, or old water damage can all weaken the paint bond.
This often happens after wallpaper removal, plumbing leaks, previous repairs, or aggressive scraping and sanding.
If the drywall paper is torn, the area may need to be sealed and patched before repainting. If the drywall is soft or swollen, the damaged section may need repair or replacement.
Paint is only the finish layer. It cannot make damaged drywall solid again.
When Bubbling Paint Can Be Fixed Yourself
Many small paint bubbles are beginner-friendly repairs. The key is confirming that the wall is dry, solid, and free of active moisture before you repaint.
A DIY repair is usually reasonable when:
- The bubbling is limited to a small area.
- The wall feels dry and firm.
- There are no water stains.
- There are no mold-like spots.
- The surrounding paint is well attached.
- The bubbling appears to be from poor prep or skipped primer.
- You can safely scrape, sand, prime, and repaint the area.
If the wall passes those checks, you can usually repair the spot with basic painting and patching supplies.
When to Stop and Investigate First
Bubbling paint is not always a cosmetic issue. If moisture or wall damage is involved, painting over it can make the problem harder to see while it continues underneath.
Stop before repainting if you see:
- Recurring bubbles in the same area.
- Bubbles near plumbing, windows, or ceiling lines.
- Damp or soft drywall.
- Brown, yellow, or gray stains.
- Mold-like growth.
- Peeling paint with a musty smell.
- A ceiling area that feels loose or saggy.
- Bubbling that spreads after rain or shower use.
Fix the leak, humidity problem, or damaged drywall first. Then repaint only after the surface is fully dry and stable.
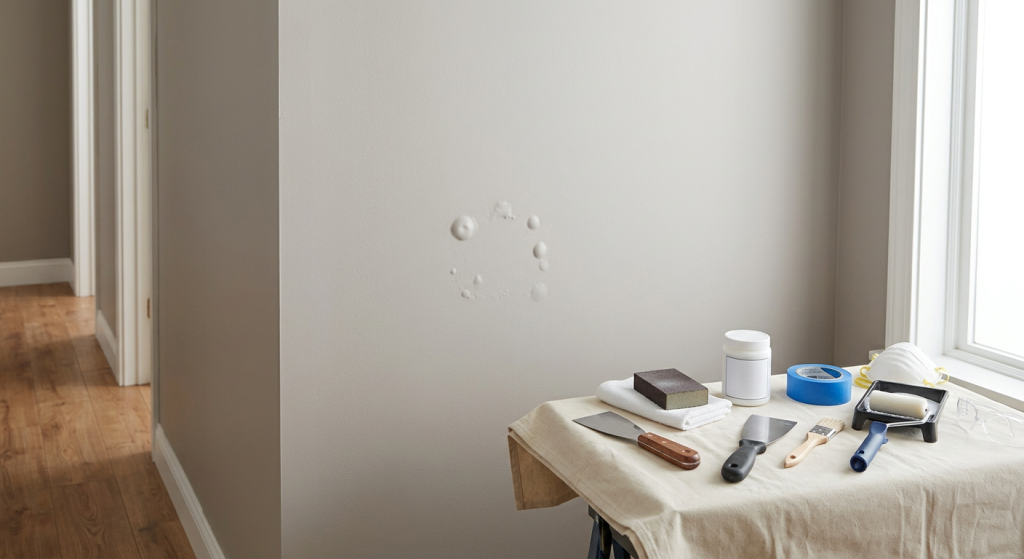
Tools and Materials for Bubbling Paint Repair
A small bubbling paint repair does not require a large tool collection, but the right supplies make the job cleaner and help the paint last.
Helpful tools and materials include:
- Paint scraper.
- Putty knife.
- Sanding sponge.
- Microfiber cloths.
- Primer.
- Bonding primer when needed.
- Stain-blocking primer when appropriate.
- Patching compound.
- Spackle for small shallow repairs.
- Painter’s tape.
- Drop cloths.
- Touch-up brushes.
- Mini rollers.
- Paint trays.
- Interior wall paint.
- Dust mask.
- Safety glasses.
A paint scraper removes loose paint. A putty knife helps with patching. A sanding sponge smooths the edges. Primer helps the new paint bond to the repaired surface.
Step-by-Step: How to Fix Bubbling Wall Paint
This process is for a small bubbling area on a dry, solid interior wall. Do not use this process to cover active leaks, soft drywall, or mold-like growth without fixing the cause first.
Step 1: Protect the Room
Move nearby furniture away from the wall. Lay down drop cloths to catch paint chips, dust, and sanding debris.
Use painter’s tape if you need to protect trim, outlets, cabinets, or nearby painted edges.
Put on safety glasses before scraping. Wear a dust mask before sanding.
Step 2: Scrape Off the Bubbled Paint
Use a paint scraper or putty knife to remove the bubbled paint. Work gently so you do not gouge the drywall.
Do not just pop the bubble and paint over it. The lifted paint has already lost its bond. It needs to be removed back to a solid edge.
Keep scraping until the remaining paint stays firmly attached.
Step 3: Inspect the Wall Under the Bubble
After scraping, look closely at the exposed surface. The wall should be dry, firm, and clean.
If the area is stained, soft, damp, or crumbly, stop and investigate. The repair will not last if the wall underneath is damaged.
Before moving forward, check for:
- Dampness.
- Soft drywall.
- Water stains.
- Mold-like spots.
- Loose patching material.
- Paint that keeps lifting.
- Torn drywall paper.
If the wall is solid and dry, continue with the repair.
Step 4: Sand the Edges Smooth
Use a sanding sponge to feather the edges where the old paint meets the exposed surface. The goal is to smooth the ridge so the repair does not show through the new paint.
Sand lightly and keep the sanding sponge flat. You do not need to remove good paint. You only need to smooth rough edges and dull any glossy surface around the repair.
If the old surface is shiny, scuff sand a little farther beyond the damaged area so primer can grip.
Step 5: Clean the Surface
Wipe the area with a clean microfiber cloth to remove sanding dust. Dust left on the wall can cause the next coat of primer or paint to fail.
If the area has grease or grime, clean it with a wall-safe cleaner and let it dry fully before moving on.
Do not prime over dust, cleaning residue, or damp spots.
Step 6: Patch Low Spots
If scraping and sanding left a shallow dip, apply a thin coat of spackle or patching compound with a putty knife.
Use just enough material to level the surface. Heavy buildup is harder to sand and may show through the final paint.
Let the patch dry fully. If needed, add a second thin coat after the first coat dries.
Step 7: Sand and Clean Again
Once the patch is dry, sand it smooth with a sanding sponge. Blend the edges into the surrounding wall.
Wipe away the dust with a microfiber cloth. This cleaning step helps the primer bond properly.
Do not rush from sanding straight to painting. Dust can ruin an otherwise good repair.
Step 8: Prime the Repair
Apply primer over the exposed area, patch, and sanded edges. Primer helps seal the repair and gives the interior wall paint a better surface to grip.
Use bonding primer if the surrounding surface is glossy or slick. Use stain-blocking primer only when there is an old stain that has already been investigated, dried, and corrected.
Let the primer dry fully before painting.
For patched or sanded areas, this guide to the best primer for patched drywall before painting explains why primer helps prevent blotchy repairs.
Step 9: Repaint the Wall
Use matching interior wall paint. Apply a thin, even coat with a mini roller or touch-up brush.
A mini roller usually blends better on open wall areas because it matches the texture left by a roller. A brush is useful for corners, edges, and small detail work.
Let the first coat dry. Apply a second thin coat if needed. Do not try to cover the repair with one thick coat of paint.
How to Make the Repair Blend Better
A bubbling paint repair can be fixed structurally but still stand out if the finish work is rushed. Smooth edges, primer, and careful repainting matter.
For a cleaner-looking repair:
- Scrape back to firmly attached paint.
- Sand the edges smooth.
- Wipe away all sanding dust.
- Patch low spots with thin coats.
- Prime the repaired area before painting.
- Use the same paint color and sheen if possible.
- Apply paint with a mini roller on open wall areas.
- Feather the paint slightly beyond the repair.
- Let each coat dry fully.
Touch-up paint may not blend perfectly on older walls. Paint can fade over time, and sheen can change as walls age. If the repair is in a bright or highly visible spot, repainting the full wall from corner to corner may give a better result.
Common Mistakes That Make Paint Bubbles Return
Most failed repairs happen because the surface problem was never fixed. Paint cannot bond to loose paint, damp drywall, dust, grease, or unstable patching compound.
Avoid these common mistakes:
- Popping bubbles and painting over them.
- Painting over loose paint.
- Skipping sanding.
- Leaving dust on the wall.
- Skipping primer on bare or patched areas.
- Painting over glossy surfaces without scuff sanding or bonding primer.
- Using heavy paint coats to hide damage.
- Painting before patching compound is dry.
- Painting over wet drywall.
- Covering water stains without finding the moisture source.
- Ignoring bubbling that keeps coming back.
A lasting paint repair starts below the paint layer. The wall has to be dry, clean, and stable before the finish coat goes on.
Safety and Cleanup Notes
Scraping and sanding paint can create dust and small chips. Take a few simple precautions before starting.
Basic safety steps include:
- Wear safety glasses when scraping or sanding.
- Wear a dust mask when sanding dried patching compound or old paint.
- Use drop cloths to catch paint chips and dust.
- Keep children and pets away from the work area.
- Clean up debris after scraping and sanding.
- Wipe the wall with a microfiber cloth before priming.
- Ventilate the room while priming and painting.
- Wash hands after handling paint chips or sanding dust.
Be careful with older paint. If your home may have old lead-based paint, do not dry-sand or scrape aggressively until you know what you are working with. Use a proper lead test or call a qualified professional for guidance.
Moisture is also a safety and health concern. If bubbling paint appears with mold-like spots, musty smells, or soft drywall, do not treat it as a simple paint touch-up.
How to Prevent Paint From Bubbling Again
The best way to prevent bubbling is to prepare the wall correctly before painting. Most bubbling problems start before the paint is even applied.
To reduce the chance of future bubbles:
- Fix leaks and moisture problems before painting.
- Let damp walls dry fully.
- Clean grease, dust, and grime from the wall.
- Scrape off loose paint.
- Sand glossy surfaces before repainting.
- Wipe away sanding dust with a microfiber cloth.
- Prime bare drywall, patches, and repaired areas.
- Use bonding primer on slick surfaces when needed.
- Apply paint in thin, even coats.
- Avoid painting in very humid conditions.
- Let primer and paint dry fully between coats.
- Use bathroom ventilation during and after showers.
Paint lasts longer when the wall is clean, dry, dull, and stable. Skipping prep may save time at first, but it often leads to more scraping and repainting later.
When to Call a Professional
Call a professional if the bubbling is widespread, keeps returning, or appears with signs of moisture. A painter, drywall repair contractor, plumber, roofer, or mold remediation professional may be needed depending on the cause.
Professional help is a good idea when:
- Paint bubbles across a large wall section.
- Bubbling keeps returning after proper repair.
- The drywall feels damp, soft, or swollen.
- You see water stains or mold-like growth.
- Bubbling appears on a ceiling.
- The problem gets worse after rain or shower use.
- You suspect old lead-based paint.
- The wall has major damage under the paint.
- You cannot find the moisture source.
A small paint bubble can be a simple repair. A recurring bubble can be a clue that the wall needs more than paint.
Final Thoughts
Paint bubbles form when the paint loses its bond with the surface underneath. The cause may be moisture, painting over a damp surface, poor prep, dust, grease, skipped primer, high humidity, heat, old paint failure, incompatible coatings, thick paint, trapped moisture, or drywall damage.
For a small bubbling spot on a dry, solid wall, the repair is usually manageable. Scrape away the loose paint, sand the edges, clean the dust, patch low spots, prime the area, and repaint with thin coats of interior wall paint.
Do not pop the bubbles and paint over them without prep. Do not cover stains, soft drywall, or recurring bubbles without checking for moisture first. The repair will last longer when the wall is clean, dry, stable, and properly primed before the final paint goes on.