Best Primer for Patched Drywall Before painting
The best primer for patched drywall is usually a water-based drywall primer or PVA-style primer that seals the repaired area so paint absorbs evenly. For most ordinary wall patches, you do not need a heavy-duty specialty primer. You need a primer that can seal joint compound, reduce flashing, and help the finish paint look consistent across the wall.
Patched drywall is more absorbent than the painted wall around it. If you paint directly over the patch, the repair may show up as a dull spot, shiny spot, or slightly different texture once the paint dries. Primer helps even out that difference before the topcoat goes on.
For beginner homeowners, the goal is simple: choose the lightest primer that solves the problem. Regular drywall primer is enough for clean patches. Stain-blocking primer is better for water marks or discoloration. Bonding primer may help when the surrounding surface is glossy or hard for paint to grip.
Quick Primer Comparison for Patched Drywall
| Primer Type | Best For | When to Use It | Notes |
|---|---|---|---|
| Drywall primer / PVA primer | Ordinary patched drywall | Clean joint compound, spackle, or skim-coated areas | Best everyday choice for most repairs |
| Stain-blocking primer | Stains or discoloration | Water marks, tannin stains, smoke, marker, or yellowing | Helps keep stains from bleeding through paint |
| Bonding primer | Slick or glossy surfaces | Glossy paint, difficult surfaces, or areas where adhesion is a concern | Useful when the wall surface may resist primer |
| Spray primer | Very small touch-ups | Tiny patches or isolated repairs | Can work, but overspray and texture control matter |
Best Primer for Patched Drywall: The Practical Choice
For most patched drywall, the best primer for patched drywall is a standard water-based drywall primer. This type of primer is made to seal porous drywall surfaces, including joint compound and spackle.
Fresh patching compound soaks up paint differently than the painted wall around it. A drywall primer helps seal that porous area so the finish coat does not sink in unevenly.
Regular drywall primer is usually the right choice when the patch is clean, dry, smooth, and free of stains. It is also usually the easiest primer type for a beginner to use because it rolls on like paint, dries relatively fast, and cleans up with soap and water.
You may see these products labeled as drywall primer, PVA primer, wallboard primer, or interior latex primer. Well-known paint brands often sell versions of these, but the label matters more than the brand name. Look for a product that says it is suitable for new drywall, patched drywall, joint compound, or interior wall repairs.
Why Patched Drywall Needs Primer Before Paint
Patched drywall needs primer because the repaired spot is usually more porous than the surrounding painted wall. Even if the patch feels smooth, it may still absorb paint faster than the rest of the surface.
That difference in absorption can make a repair visible after painting. The patch may look flat, dull, shiny, or slightly lighter or darker than the surrounding wall.
Primer helps create a more even surface before the finish paint goes on. It does not magically hide a bad patch, but it gives the paint a better chance to dry with a consistent appearance.
Primer helps reduce these common problems:
- Flashing, where the repaired area catches light differently
- Dull spots over joint compound or spackle
- Shiny spots caused by uneven paint absorption
- Uneven color over patched areas
- A visible outline around the repair
- Extra coats of paint needed to hide the patch
The bigger the patch, the more important primer becomes. A tiny nail hole may not always need a full priming step, but a spackled dent, drywall tape repair, skim coat, or sanded joint compound patch should usually be primed before painting.
If you are wondering whether primer is always needed, this guide explains when you can paint over spackle without primer and when you should not skip it.
When Regular Drywall Primer Is Enough
Regular drywall primer is enough when the patch is clean, dry, and not stained. This is the most common situation for normal homeowner repairs.
Use regular drywall primer for simple fixes like nail holes, small dents, minor gouges, drywall compound patches, and smooth skim-coated spots. It is also a good choice when you have repaired a wall and plan to repaint that section or the full wall.
Regular drywall primer is usually enough when:
- The patch is made with joint compound or spackle
- The repair is fully dry
- The surface has been sanded smooth
- There are no water stains or brown discoloration
- There is no smoke, grease, marker, or crayon bleeding through
- The surrounding paint is a normal flat, eggshell, or satin wall finish
For everyday wall repairs, this is the primer type most homeowners should start with. It solves the main problem: sealing the patch so the paint does not soak in unevenly.
Primer is especially important when you are trying to prevent paint flashing over a drywall patch after the wall dries.
When Stain-Blocking Primer Is Needed
Stain-blocking primer is needed when the patched area has a stain that may bleed through regular paint. This is especially important for water stains, brown marks, smoke discoloration, rust marks, ink, marker, or unknown yellowing.
A regular drywall primer may seal the patch, but it may not stop a stain from coming back through the finish paint. If you see discoloration before painting, treat that as a warning sign.
Stain-blocking primers are sold in water-based, oil-based, and shellac-based versions. For many small interior wall stains, a water-based stain-blocking primer may be enough. For tougher stains, homeowners often look at stronger stain-blocking options. Always read the product label and ventilation instructions before using any stronger primer.
Use stain-blocking primer when the patch area has:
- Old water stains
- Brown or yellow discoloration
- Smoke stains
- Grease or kitchen residue
- Marker, ink, or crayon marks
- Rust stains from fasteners or metal corner bead
- Stains that have already bled through a previous coat of paint
Do not rely on regular wall paint to hide an active stain. Paint may look fine at first and then discolor later. A stain-blocking primer gives you a better chance of keeping the finished wall clean-looking.
When Bonding Primer May Be Useful
Bonding primer may be useful when the patched drywall is surrounded by a slick, glossy, or hard-to-stick-to surface. It is not the default choice for most drywall patches, but it can help when adhesion is the concern.
For example, if you are painting over a glossy wall, a bathroom wall with a hard enamel-like finish, or a surface that was previously painted with a very shiny coating, a bonding primer may help the new paint grip better.
Bonding primer is also useful when you are dealing with mixed surfaces. A repair may include bare joint compound, old paint, glossy trim-adjacent areas, or previously sealed patches. In those situations, the primer has to do more than seal. It also has to help the new coating stick.
Consider bonding primer when:
- The surrounding wall paint is glossy
- The surface feels slick after cleaning
- Previous paint has adhesion problems
- You are painting over a hard, smooth coating
- The repaired area includes more than just bare joint compound
- The product label says it is suitable for glossy or difficult surfaces
For ordinary patched drywall, bonding primer is often more than you need. Use it when the surface calls for it, not just because it sounds stronger.
How to Choose Primer Based on the Repair
The right primer depends on the patch size, stain risk, wall sheen, and final paint color. Most homeowners can make a good choice by looking at the condition of the wall instead of trying to find one perfect product for every situation.
Use this simple buying guide:
- For small clean patches, choose a water-based drywall primer.
- For large skim-coated areas, choose drywall primer or a primer-sealer made for new drywall.
- For stained patches, choose a stain-blocking primer.
- For glossy walls, consider a bonding primer.
- For dark paint colors, ask whether the primer can be tinted.
- For high-sheen paint, be extra careful with sanding and primer application.
- For bathrooms or kitchens, choose a primer that fits the room conditions and topcoat.
Patch size matters because larger repairs are easier to see. If you patched a small nail hole, a careful spot prime may be enough. If you skim-coated a larger wall section, prime the full repaired area and consider painting the full wall for the most even result.
Wall sheen also matters. Flat paint hides small differences better than satin, semi-gloss, or gloss paint. The shinier the finish, the more likely a patch is to show if the surface prep is uneven.
Paint color matters too. Deep colors, bright colors, and dramatic color changes can make patches more noticeable. In those cases, a primer that creates an even base can save frustration.
What to Look for When Buying Primer for Patched Drywall
When buying primer for patched drywall, do not just grab the strongest-looking can. Match the primer to the repair.
A good primer for ordinary patches should seal porous compound, dry smoothly, and be compatible with your finish paint. For most DIY wall repairs, a water-based interior primer is the simplest choice.
Look for these label details:
- Interior use
- Drywall, wallboard, joint compound, or patched wall compatibility
- Sealer or primer-sealer wording
- Water-based cleanup for easier use
- Low odor if working indoors
- Recoat time that fits your project
- Compatibility with your planned wall paint
- Tintable option if you are using a deep paint color
For affiliate product choices, drywall primer, stain-blocking primer, and bonding primer are all natural product categories for this article. Final product selections should be verified before adding affiliate links, especially if you plan to recommend specific sizes, formulas, or retailer listings.
Common examples homeowners may recognize include drywall primers from brands like Zinsser, KILZ, Behr, Sherwin-Williams, Benjamin Moore, and Valspar. These are examples of brand categories to compare, not automatic ranked recommendations.
Brush-On, Roll-On, or Spray Primer for Small Patches
For most small patched drywall areas, brush-on or roll-on primer is better than spray primer. It gives you more control, creates less mess, and makes it easier to blend the repair into the surrounding wall.
Spray primer can be useful for tiny isolated spots, but it is easy to apply too much or create a different surface texture. Overspray can also land on nearby trim, floors, furniture, or painted wall areas.
A mini roller is often the best tool for patches larger than a few inches. It helps match the light roller texture already on most painted walls. A brush works well for tight corners, edges, and very small repairs.
Best application choice by patch size:
- Tiny nail holes: small brush or touch-up brush
- Small spackle patches: brush or mini roller
- Medium drywall repairs: mini roller
- Large skim-coated areas: standard roller or mini roller
- Corners and edges: brush first, then lightly blend with a roller if possible
- Very small isolated spots: spray primer only if overspray is controlled
If the wall was originally painted with a roller, using a mini roller over the primed patch can help the texture look more natural. A brush-only touch-up may leave brush marks that catch light after painting.
Best Tools to Use With Primer on Patched Drywall
The right primer matters, but the tools matter too. A good primer applied with the wrong tool can still leave a repair looking obvious.
For beginner homeowners, a small patch-prep kit is usually enough. You do not need a full professional setup for a few wall repairs.
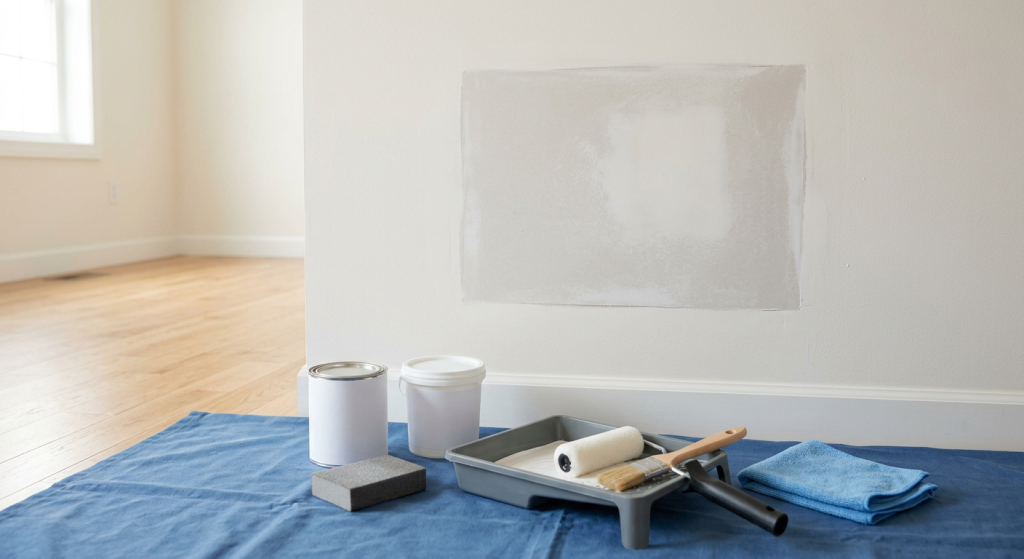
Useful tools for priming patched drywall include:
- Small paint tray for holding primer
- Mini roller for blending patch texture
- Touch-up brush for corners and tiny spots
- Sanding sponge for smoothing the patch
- Painter’s tape for protecting trim and edges
- Microfiber cloth for removing sanding dust
- Putty knife for final patch touch-ups
- Drop cloth or old towel for floor protection
- Work light for checking the patch from an angle
A sanding sponge and microfiber cloth are especially important. Primer cannot hide ridges, dust, or rough patch edges. If the repair is not smooth before primer, it will usually still be visible after paint.
How Much Primer to Apply
Apply enough primer to seal the patch, but do not build up a thick raised spot. Heavy primer buildup can make the repair more visible instead of less visible.
Most patched drywall needs one smooth coat of primer. Larger or very porous patches may need a second light coat, especially if the first coat soaks in quickly or still looks uneven after drying.
The goal is not to bury the patch. The goal is to create a sealed, even surface that accepts paint more like the surrounding wall.
Apply primer this way:
- Sand the patch smooth first.
- Wipe off all sanding dust.
- Apply a thin, even coat of primer.
- Feather the primer slightly beyond the patch edge.
- Let it dry according to the label.
- Check the surface in angled light.
- Add a second light coat only if needed.
If you are deciding between one coat and two coats, this guide on how many coats of primer over spackle explains when a second coat is worth using.
Feathering means you lightly extend the primer past the patch so there is not a hard edge. This helps the repair blend better once the finish paint is applied.
What to Avoid When Priming Patched Drywall
Some patch problems are caused by the wrong primer, but many are caused by rushing the process. A clean, smooth, dry patch is just as important as the primer itself.
Avoid these common mistakes:
- Applying primer too thick
- Using stain-blocking primer when regular drywall primer is enough
- Using regular primer over active stains
- Painting before the patch is fully dry
- Painting before the primer has dried properly
- Skipping sanding
- Leaving sanding dust on the wall
- Priming over loose compound or rough edges
- Using a brush on a rolled wall without blending the texture
- Expecting primer to hide a poorly finished patch
Heavy primer buildup is one of the most common beginner mistakes. It can create a raised edge around the patch, especially when applied with a brush. Use thin coats and let the primer do its sealing work.
Painting too soon is another common problem. Joint compound, spackle, primer, and paint all need time to dry. If you rush the steps, the final paint may look uneven or may not bond as well.
Skipping surface prep is also a problem. Dust left from sanding can keep primer from bonding cleanly. A quick wipe with a microfiber cloth can make a noticeable difference.
Should You Prime Just the Patch or the Whole Wall?
You can prime just the patch for small repairs, but larger repairs may look better if you prime a wider area. In many cases, the final paint step matters more than the primer area.
If the wall paint is old, faded, or has a sheen that is hard to match, painting only over the patched area may leave a visible touch-up mark. Primer helps, but it cannot always make old paint and new paint look identical.
For small patches, spot prime the repair and lightly feather the edges. For larger repairs, prime the patched section and consider repainting the full wall from corner to corner. This is often the cleanest way to avoid visible touch-up spots.
A simple rule of thumb:
- Tiny patch: spot prime and touch up carefully
- Small patch: spot prime, then blend paint lightly
- Medium patch: prime the repair and repaint a larger section
- Large patch or skim coat: prime the full repaired area and repaint the wall
- High-sheen wall: consider repainting the full wall for a more even finish
This is especially important with satin, semi-gloss, and glossy paint. These finishes reflect more light, so patch differences are easier to see.
Product-Buying Tips for Beginner Homeowners
When shopping for primer, start with the repair problem instead of the brand. A basic drywall primer is the right first stop for most clean patches. Move up to stain-blocking or bonding primer only when the surface calls for it.
Buying a smaller container may make sense for a few patches. A quart of primer is often easier to store and handle than a full gallon. For larger drywall repairs or skim coating, a gallon may be more practical.
Also think about the tools you need before starting. A small paint tray, mini roller, touch-up brush, sanding sponge, painter’s tape, microfiber cloths, and basic patch-prep supplies can make the job easier and cleaner.
Before buying, check these details:
- Does the primer match the problem you are solving?
- Is it made for interior walls?
- Is it suitable for drywall or joint compound?
- Does it block stains if stains are present?
- Does it help adhesion if the wall is glossy?
- Will it work under your planned paint?
- Is the container size right for the project?
- Do you have the right roller, brush, tray, and prep tools?
For affiliate content, this article can naturally support product links to drywall primer, stain-blocking primer, bonding primer, small paint trays, mini rollers, touch-up brushes, sanding sponges, painter’s tape, microfiber cloths, and patch-prep supplies. The safest approach is to present these as useful categories, then verify exact products before adding links.
Final Thoughts
The best primer for patched drywall is usually a regular water-based drywall primer because it seals the porous patch and helps the paint dry more evenly. For clean spackle, joint compound, and skim-coated repairs, that is usually all you need.
Use stain-blocking primer when there is discoloration, water staining, smoke, ink, grease, or another mark that may bleed through. Consider bonding primer when the surrounding wall is glossy or difficult for paint to grip.
For most beginner homeowners, the best result comes from matching the primer to the repair, sanding the patch smooth, wiping away dust, applying a thin coat, and letting everything dry before painting. A simple primer and a few good prep tools can make the difference between a patch that disappears and one that keeps catching your eye.