Delicate Surface Painter’s Tape vs Regular Painter’s Tape
Delicate surface painters tape vs regular painters tape is a common comparison for homeowners who want clean paint lines without damaging the wall, trim, or finish underneath.
The short answer: delicate-surface painter’s tape is safer for fragile, recently painted, repaired, or low-sheen surfaces. Regular painter’s tape is better for stronger, fully cured surfaces and general painting projects where you need a firmer hold.
Neither tape is perfect for every job. The right choice depends on the surface, the paint condition, how long the paint has cured, how strong the tape adhesive is, and how carefully you remove it.
Delicate Surface Painter’s Tape vs Regular Painter’s Tape: Quick Comparison
| Tape Type | Best For | Adhesive Strength | Main Risk |
|---|---|---|---|
| Delicate-surface painter’s tape | Fresh paint, older paint, flat paint, repaired drywall | Low to medium | May not grip well on dusty or rough surfaces |
| Regular painter’s tape | Trim, baseboards, cured walls, general painting | Medium | Can pull weak paint or drywall paper |
| Multi-surface painter’s tape | Everyday walls, trim, light DIY projects | Medium | Not always gentle enough for fragile finishes |
| Edge-lock painter’s tape | Sharper lines on smoother surfaces | Varies by product | Can still bleed if applied poorly |
For most beginner homeowners, the safest approach is simple: use delicate-surface tape when the surface underneath is questionable, and use regular painter’s tape when the surface is sound, clean, smooth, and fully cured.
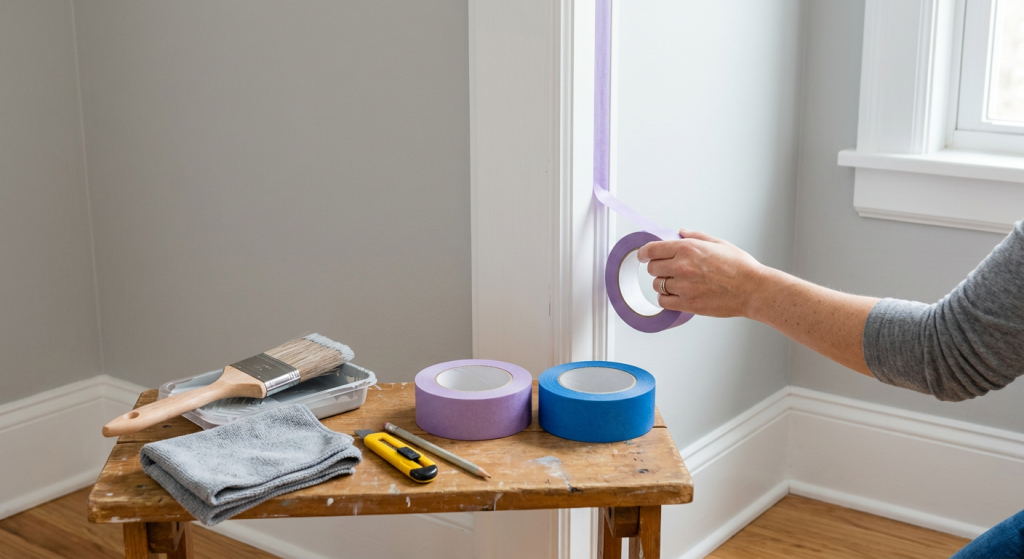
What Is Delicate-Surface Painter’s Tape?
Delicate-surface painter’s tape is made with a lower-tack adhesive. That means it is designed to stick firmly enough for painting, but not so aggressively that it grabs the surface underneath.
It is commonly used on surfaces that can be damaged by stronger tape.
Delicate-surface tape is usually the safer choice for:
- Freshly painted walls that have had time to dry but may not be fully cured
- Older paint that may not be strongly bonded
- Flat or matte paint that marks easily
- Repaired drywall patches
- Primed drywall
- Wallpaper edges
- Decorative finishes
- Cabinets or trim with a fragile finish
This type of tape is especially useful when you are painting near a wall that was recently painted another color. For example, if you painted a wall last week and now want to paint the trim, delicate-surface painter’s tape is usually the safer choice than regular painter’s tape.
The tradeoff is that delicate-surface tape may not hold as tightly on rough, dusty, textured, or uneven surfaces. It can also lift if the edge is not pressed down well.
If you are working near fresh paint, this guide to the best painters tape for freshly painted walls explains why a lower-tack tape is usually safer.
What Is Regular Painter’s Tape?
Regular painter’s tape is the standard tape most homeowners think of for painting walls, trim, baseboards, door frames, and ceilings. It has more grip than delicate-surface tape and is meant for general masking work.
Regular painter’s tape is useful when you need the tape to stay in place through a normal painting project.
Regular painter’s tape is usually better for:
- Fully cured painted walls
- Smooth baseboards
- Door and window trim
- Strong semi-gloss or satin finishes
- Masking hardware or fixtures
- General wall painting
- Projects where the tape needs a firmer hold
Regular painter’s tape is often the better choice when the surface is durable and you need a cleaner hold along trim or baseboards. It can be easier to use on long straight runs because it tends to stay put better than low-tack tape.
The risk is that regular tape can pull paint if the surface underneath is weak, dusty, damp, poorly primed, or not fully cured.
If tape has already damaged the surface, this guide explains why paint peels when removing tape and how to fix the torn edge.
The Main Difference Is Adhesive Strength
The biggest difference between delicate-surface painter’s tape and regular painter’s tape is adhesive strength.
Delicate-surface tape has a gentler adhesive. Regular painter’s tape has a stronger adhesive. That one difference affects how the tape sticks, how clean the paint line is, how long you can leave it on, and how likely it is to damage the surface during removal.
Adhesive strength matters because it affects:
- How well the tape holds to the surface
- Whether paint can bleed under the edge
- How easily the tape removes
- Whether the tape pulls paint, primer, or drywall paper
- How safe the tape is on older or freshly painted surfaces
Stronger tape is not always better. A strong adhesive can be helpful on trim, but it can be a problem on a freshly painted wall. A gentle adhesive is safer for fragile surfaces, but it may not seal as well if the wall is dusty or textured.
Which Tape Is Safer for Freshly Painted Walls?
Delicate-surface painter’s tape is usually safer for freshly painted walls.
Fresh paint can feel dry to the touch long before it has fully cured. Dry paint may be ready for light contact, but cured paint has had more time to harden and bond to the surface. If you apply strong tape too soon, the tape may pull up the new paint when you remove it.
This is one of the most important points for beginner homeowners. The wall may look finished, but the paint film underneath can still be vulnerable.
Use delicate-surface tape on freshly painted walls when:
- The wall was painted recently
- You are not sure how long the paint has cured
- The paint is flat or matte
- You are taping over a repair or patch
- You only need light masking
Even with delicate-surface tape, do not press harder than necessary, do not leave the tape on too long, and remove it carefully.
Which Tape Is Safer for Older Paint?
Delicate-surface tape is usually safer for older paint, especially if the paint looks chalky, brittle, cracked, or poorly bonded.
Older paint can be unpredictable. It may have been applied over dust, glossy paint, old primer, or a surface that was never prepared correctly. If the paint bond is weak, even the correct tape can lift it.
Regular painter’s tape can work on older paint if the finish is solid and clean. But if the paint is peeling, flaking, bubbling, or powdery, no painter’s tape is truly safe.
Before taping older paint, check for:
- Peeling edges
- Cracks or bubbles
- Soft or gummy paint
- Powdery residue
- Previous patch marks
- Paint that scratches off easily
When in doubt, test a small hidden area first. Press on a short strip of tape, wait a little while, and remove it slowly. If paint comes off during the test, do not tape that surface.
Which Tape Is Better for Flat Paint?
Delicate-surface painter’s tape is usually the better choice for flat paint.
Flat and matte paints can be more prone to marking, burnishing, and surface damage than glossier finishes. They also do not always resist tape as well as satin, semi-gloss, or gloss paint.
This does not mean flat paint always fails under tape. A properly painted, fully cured flat wall may handle painter’s tape just fine. But if you are working on a flat-painted wall and want the lower-risk option, delicate-surface tape is usually the smarter choice.
Regular painter’s tape can be used near flat paint when the surface is fully cured and in good condition, but remove it carefully and avoid leaving it on longer than needed.
Which Tape Is Better for Repaired Drywall?
Delicate-surface tape is usually safer around repaired drywall.
Repaired drywall can include joint compound, spackle, primer, and fresh paint. These layers need time to dry, bond, and cure. If the repair was rushed, sanded poorly, or not primed correctly, tape can lift the finish.
This is especially common around patched nail holes, drywall seams, corner repairs, and areas where paint was applied directly over joint compound without enough primer.
Use extra care taping over repaired drywall if:
- The patch was recently painted
- The surface feels dusty after sanding
- Primer was skipped
- The paint looks duller over the patch
- The wall has a skim-coated area
- The repair is near a corner or trim line
A sanding sponge, microfiber cloth, and primer can make a big difference before painting near drywall repairs. The smoother and cleaner the surface is, the better any painter’s tape will perform.
Which Tape Is Better for Trim?
Regular painter’s tape is often better for trim if the trim finish is fully cured and in good condition.
Trim usually has a harder finish than walls because it is often painted with satin, semi-gloss, or gloss paint. That makes it better suited for regular painter’s tape. Regular tape can hold more firmly along baseboards, door frames, and window casings.
However, delicate-surface tape may be safer if the trim is old, recently painted, chipped, or previously painted with poor prep.
Use regular painter’s tape on trim when:
- The paint is fully cured
- The finish is smooth and durable
- The trim is clean
- You need a stronger hold
- You are masking long straight edges
Use delicate-surface tape on trim when:
- The trim was painted recently
- The paint chips easily
- The finish is old or unknown
- The trim has a decorative or fragile coating
- You are worried about pulling paint
For trim work, an angled brush can also reduce how much tape you need. Tape is helpful, but it should not replace careful brushing.
When Regular Painter’s Tape Is the Better Choice
Regular painter’s tape is the better choice when the surface can handle a stronger adhesive and you need the tape to stay in place.
It is also useful when you are working on a basic paint project and the surface is not fragile.
Choose regular painter’s tape for:
- General wall painting
- Fully cured painted surfaces
- Baseboards and door trim
- Window trim
- Masking around hardware
- Protecting edges during rolling
- Projects where delicate tape lifts too easily
Regular painter’s tape is a practical default for many homeowner projects. It gives you enough grip for common jobs without being as aggressive as heavy-duty masking tape.
It is not the best choice for every surface, though. If the wall is fresh, flat, patched, or questionable, step down to delicate-surface tape.
When Delicate-Surface Painter’s Tape Is the Better Choice
Delicate-surface painter’s tape is the better choice when protecting the surface underneath matters more than maximum grip.
This is the tape to reach for when the surface is more likely to be damaged by adhesive.
Choose delicate-surface painter’s tape for:
- Freshly painted walls
- Flat or matte paint
- Older paint
- Repaired drywall
- Primed patches
- Wallpaper edges
- Decorative finishes
- Cabinets with questionable finishes
- Any surface where regular tape feels risky
The focus keyword delicate surface painters tape vs regular painters tape really comes down to risk. Regular tape gives you more hold. Delicate-surface tape gives you more protection.
For beginner homeowners, that is the easiest way to remember it.
Why Clean Removal Time Matters
Painter’s tape is not meant to stay on forever. Each product has its own clean removal window, and that window matters.
Clean removal time means the amount of time the tape can usually stay on a surface and still come off cleanly when used correctly. Some tapes are designed for short projects. Others can stay on longer.
This does not mean you should leave tape on as long as possible. It only means the tape is designed to remove cleanly within that window under normal conditions.
Tape can become harder to remove when:
- It sits too long
- It is exposed to sunlight
- It gets warm
- Paint dries heavily over the edge
- The adhesive bonds too strongly
- The surface underneath is weak
A good habit is to remove painter’s tape as soon as the paint is set enough that removal will not smear the edge. Do not let thick paint dry into a ridge over the tape.
Why Surface Condition Matters
Painter’s tape only works as well as the surface underneath it.
A clean, smooth, fully cured surface gives tape the best chance to seal properly and remove cleanly. A dirty, dusty, peeling, or damp surface increases the chance of problems.
Before applying painter’s tape, check for:
- Dust
- Grease
- Peeling paint
- Loose drywall paper
- Fresh patches
- Damp spots
- Rough texture
- Old caulk lines
A microfiber cloth is useful for wiping dust off trim, baseboards, and walls before taping. If you recently sanded a patch, remove the sanding dust before applying tape. Dust can keep the tape from sticking and can also create a messy paint edge.
Why Paint Cure Time Matters
Paint cure time matters because paint can be dry but still soft underneath.
Many homeowners tape too soon after painting. This is one of the biggest reasons tape pulls paint. The surface may feel dry, but the paint has not had enough time to harden and bond.
Cure time can vary based on paint type, humidity, temperature, ventilation, film thickness, and the surface underneath. Thick coats take longer to cure than thin, even coats.
Be more cautious with tape when:
- The paint was applied in the last few days
- The room is humid
- The paint was applied heavily
- The wall has flat paint
- The surface was patched
- The paint still feels soft or tacky
When you are unsure, use delicate-surface tape and test first. Waiting longer is usually safer than taping too soon.
When Tape Can Still Pull Paint Even If It Is the Right Type
Even the right painter’s tape can pull paint if the surface or timing is wrong.
This is important because homeowners often blame the tape right away. Sometimes the tape is too strong, but other times the paint bond underneath was already weak.
Painter’s tape can still pull paint when:
- The paint has not fully cured
- The previous paint layer was not cleaned before painting
- Primer was skipped on bare drywall or patches
- The wall was dusty during painting
- The paint was applied too thick
- Moisture is trapped under the paint
- The old paint is peeling or poorly bonded
- The tape was pulled off too fast
- The tape was left on too long
- Paint dried heavily across the tape edge
If paint comes off with tape, stop and inspect the area. Do not keep taping the same surface until you know whether the paint is weak, fresh, dusty, or poorly bonded.
How to Apply Painter’s Tape Correctly
Good tape technique matters almost as much as choosing the right tape.
Painter’s tape should be applied to a clean, dry surface. It should be pressed down at the edge, but not crushed aggressively into the wall.
To apply painter’s tape correctly:
- Clean the surface with a dry or slightly damp microfiber cloth
- Let the surface dry fully
- Apply the tape in manageable sections
- Keep the tape straight without stretching it
- Press the paint-side edge down with your finger or a clean putty knife
- Avoid wrinkling the tape
- Do not tape over loose paint or dust
- Paint with thin, controlled coats near the tape line
For corners, trim, and baseboards, take your time. A rushed tape line often leads to crooked edges, bleeding, or paint buildup.
An edge-lock painter’s tape can help on smoother surfaces, but it still needs proper pressure along the edge. No tape seals well if it is barely pressed down.
How to Remove Painter’s Tape Correctly
Tape removal is where many paint problems happen.
The goal is to remove the tape without tearing the fresh paint edge or lifting the surface underneath. Slow, steady removal is safer than ripping the tape away quickly.
To remove painter’s tape correctly:
- Remove the tape before heavy paint buildup fully hardens
- Pull slowly and steadily
- Pull the tape back over itself at an angle
- Keep the motion controlled
- Watch the paint edge as you go
- Stop if the paint starts lifting
- Use a utility knife to lightly score stubborn edges if needed
A utility knife can help if paint has dried across the tape edge. Use a light touch. The goal is to cut the paint film at the edge, not gouge the wall or trim.
Do not yank tape off quickly. That can tear paint, lift weak finishes, and create more cleanup.
Buying Guidance for Beginner Homeowners
You do not need a complicated tape collection, but it helps to have more than one type on hand.
A painter’s tape variety pack can be useful because it may include regular painter’s tape, delicate-surface tape, and sometimes multi-surface options in different widths. This gives you more flexibility when moving from walls to trim to repaired areas.
For a basic homeowner paint kit, consider:
- Delicate-surface painter’s tape for fresh, flat, older, or fragile paint
- Regular painter’s tape for trim and general painting
- Multi-surface painter’s tape for everyday projects
- Edge-lock painter’s tape for sharper lines on smooth surfaces
- A utility knife for careful tape-edge scoring
- An angled brush for cutting in
- A mini roller for small wall sections and touch-ups
- A sanding sponge for smoothing patches
- A microfiber cloth for dust removal
- A small paint tray for trim, touch-ups, and small rooms
Common painter’s tape brands include examples like ScotchBlue, FrogTape, Duck, and 3M. Treat those as starting points, not automatic final recommendations. Product lines change, and the right affiliate product choice should be verified before adding links.
Look at the label carefully. Do not choose painter’s tape by color alone. Some blue tapes are multi-surface tapes, some purple or yellow tapes are delicate-surface tapes, and some green tapes are designed for sharper lines. Always check the product description, recommended surfaces, and clean removal window.
Common Mistakes When Choosing Painter’s Tape
Most painter’s tape problems come from choosing the wrong tape for the surface or using the right tape the wrong way.
Common homeowner mistakes include:
- Using regular painter’s tape on fresh paint
- Taping over dusty drywall patches
- Assuming all painter’s tapes are the same
- Leaving tape on too long
- Pulling tape off too fast
- Applying thick paint against the tape edge
- Using tape on peeling or weak paint
- Pressing tape too aggressively onto fragile paint
- Choosing tape by color instead of label
- Skipping a small test area on questionable surfaces
The biggest mistake is thinking stronger tape creates a better result. Stronger tape only helps when the surface can handle it. On fragile surfaces, stronger tape can create more damage than it prevents.
When to Skip Tape and Use an Angled Brush Instead
Painter’s tape is helpful, but it is not always necessary.
Sometimes the better choice is to skip tape and use a good angled brush. This is especially true when the surface is too fragile for tape or when you only need to cut in a short section.
Skip tape and use an angled brush when:
- The paint underneath is peeling
- The wall was painted very recently
- The surface is powdery or chalky
- The area is small
- You are working around uneven texture
- Tape will not stick cleanly
- You are comfortable cutting in slowly
An angled brush gives you more control near ceilings, trim, corners, and touch-up areas. For small projects, it can be faster than taping everything.
A mini roller can help blend the brushed area into the surrounding wall. Use light coats and avoid heavy buildup near edges.
Final Thoughts
Delicate-surface painter’s tape and regular painter’s tape both belong in a homeowner paint kit, but they are not interchangeable.
Use delicate-surface painter’s tape when the surface underneath is fresh, flat, older, repaired, or fragile. Use regular painter’s tape when the surface is clean, fully cured, and strong enough for a firmer adhesive.
For most projects, the safest decision comes down to the surface, not the tape color. Check the condition of the paint, think about cure time, clean the area first, and remove the tape carefully.
A clean paint line is nice, but protecting the surface underneath matters more. When the surface is questionable, choose the gentler tape or skip tape and use a steady angled brush instead.