Drywall Patch Kit vs Spackle: Which Should You Use?
Drywall patch kit vs spackle is a simple choice once you look at the size of the damage: use spackle for small nail holes, screw holes, and shallow dents, but use a drywall patch kit when the hole needs support behind the repair.
Spackle is filler. It works well when the wall surface is still mostly intact. A drywall patch kit adds backing or reinforcement, which matters when the hole is too large for filler to hold by itself.
For beginner homeowners, the safest rule is this: small surface damage can usually be filled with spackle, but open holes, torn anchor spots, and larger damaged areas usually need a patch.
drywall patch kit vs spackle: Quick Comparison
| Repair Option | Best For | Strength | Beginner Fit |
|---|---|---|---|
| Lightweight spackle | Nail holes, tiny screw holes, shallow dents | Light | Easiest for small repairs |
| Vinyl spackle | Slightly deeper small holes and gouges | Medium | Good for small tougher repairs |
| Drywall patch kit | Small to medium holes needing support | Stronger | Good when filler alone is not enough |
| Joint compound with tape or patch | Larger repairs, seams, feathering | Stronger when used correctly | Takes more patience |
If the hole is only a small mark in the wall, spackle is usually enough. If you can see into the wall cavity or the drywall paper is torn and unsupported, a patch kit is usually the better choice.
What Is Spackle?
Spackle is a ready-to-use patching filler for small wall repairs.
It is commonly used before painting to fill nail holes, small screw holes, picture hanger holes, shallow dents, and minor wall dings. It spreads easily with a putty knife and can be sanded smooth after it dries.
Lightweight spackle is usually the easiest type for beginner homeowners. Vinyl spackle can be useful when the repair is still small but needs a little more strength.
Spackle is usually best for:
- Nail holes
- Small screw holes
- Picture hanger holes
- Tiny dents
- Shallow wall dings
- Small surface gouges
- Minor paint-prep repairs
Spackle is not meant to bridge open holes by itself. If there is no solid surface behind the repair, the spackle may crack, sink, or fall into the wall.
What Is a Drywall Patch Kit?
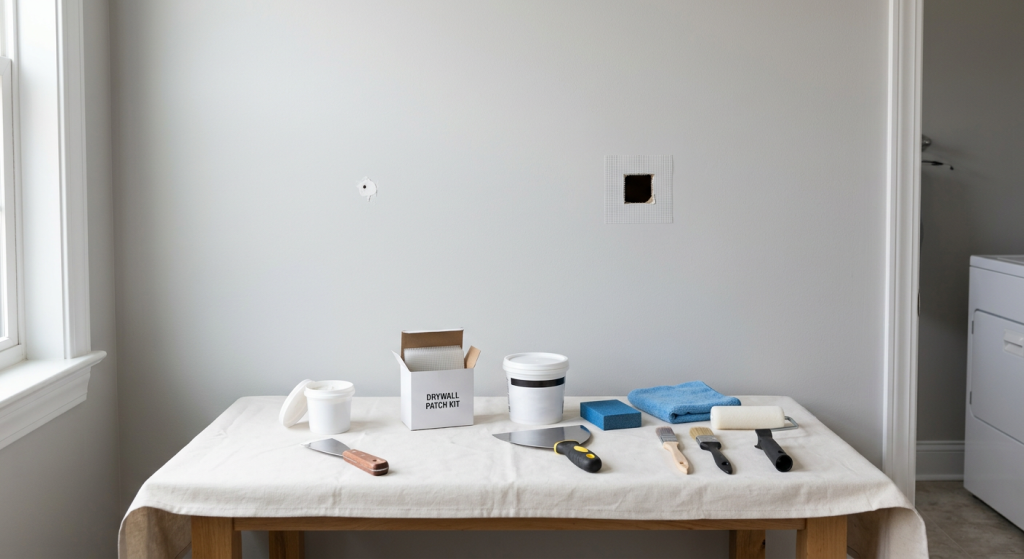
A drywall patch kit is a small repair kit designed to cover holes that need more than filler.
Many kits include a self-adhesive mesh patch, joint compound or spackle, a small putty knife, and sanding material. Some kits are made for small holes, while others are designed for larger wall repairs.
The patch gives the repair support. That support is the main difference between a patch kit and spackle alone.
A drywall patch kit may include:
- Self-adhesive mesh patch
- Lightweight patching compound
- Joint compound
- Small putty knife
- Sanding sponge or sanding sheet
- Instructions for layering and sanding
A kit can be a good option if you do not want to buy every repair supply separately.
The Main Difference Is Support
Spackle fills. A drywall patch kit reinforces.
That is the most important difference. A small nail hole already has drywall around it, so spackle has something to grip. A larger hole has an open space, broken paper, or missing drywall. That kind of damage needs support before it can be smoothed and painted.
A repair needs support when:
- The hole goes through the drywall surface
- The edges are broken or crumbly
- A drywall anchor pulled out a chunk of wall
- The hole is wider than a basic nail or screw hole
- The spackle would have to bridge empty space
- The damaged area feels soft or unstable
Do not fill a large unsupported hole with heavy spackle buildup. It may look covered at first, but it can crack, shrink, sag, or pop loose later.
When Spackle Is Enough
Spackle is enough when the damage is small, shallow, and surrounded by solid drywall.
For most picture holes and small touch-ups before painting, spackle is the faster and easier option. You do not need mesh, drywall tape, or a larger patch for every tiny hole.
Use spackle when:
- The hole is small
- The drywall around the hole is firm
- The damage is shallow
- There is no open cavity
- The patch does not need reinforcement
- You only need a cosmetic repair before painting
Use a small amount and scrape off the extra with a putty knife. A flat repair is much easier to sand and paint than a raised mound.
When a Drywall Patch Kit Is Better
A drywall patch kit is better when the damage is too large or too weak for filler alone.
This often happens when wall anchors pull out, a door knob dents or breaks the wall, furniture hits the drywall, or a small accident leaves an open hole.
Use a drywall patch kit when:
- A drywall anchor tore out
- There is a small open hole
- The drywall paper is badly torn
- The edges of the hole are weak
- The hole needs mesh or backing
- The repair needs more strength than spackle
- You need to cover and feather a larger area
A self-adhesive mesh patch can be useful for small to medium holes, but it still needs patching compound or joint compound over it. The patch provides support, and the compound creates the smooth surface.
Nail Holes: Spackle Is Easier
For nail holes, spackle is usually the best choice.
Nail holes are small and shallow, so they do not need a mesh patch. Lightweight spackle, a small putty knife, a fine-grit sanding sponge, primer, and touch-up paint are usually enough.
For nail holes, use:
- Lightweight spackle
- Small putty knife
- Fine-grit sanding sponge
- Microfiber cloth
- Primer
- Touch-up brush or mini roller
Do not overfill the hole. Press in a small amount of spackle, scrape the surface flat, and let it dry according to the product label.
Screw Holes: Spackle Usually Works
Small screw holes can usually be repaired with spackle.
If the screw hole is clean and the surrounding drywall is firm, lightweight spackle or vinyl spackle should work well. If the screw tore the wall when removed, inspect the damage before deciding.
Use spackle for screw holes when:
- The hole is small
- The drywall paper is not badly torn
- The surrounding wall feels solid
- The hole is not from a large anchor
- The repair is only cosmetic
If the screw hole is wide, ragged, or hollow behind the surface, a small repair kit may be better.
Anchor Holes: It Depends
Anchor holes are where many homeowners choose the wrong repair.
A small plastic anchor hole may only need vinyl spackle. But a torn-out wall anchor can leave a larger, weaker opening that needs support from a drywall patch kit.
Use spackle for anchor holes when:
- The anchor came out cleanly
- The hole is still small
- The drywall is firm
- The edges are not badly torn
- The repair can be filled without bridging a gap
Use a drywall patch kit for anchor holes when:
- The anchor ripped out drywall
- The hole is wide or ragged
- The surface paper is torn
- The wall feels soft around the hole
- Filler would sink into the opening
- The repair needs reinforcement
If an anchor hole keeps crumbling as you touch it, do not just pack it with more spackle. Reinforce the repair.
Dents: Spackle Is Usually Enough
Shallow dents are usually a spackle repair.
These are common behind furniture, in hallways, near doors, and around moving damage. If the drywall paper is intact and the dent is not deep, spackle can fill it nicely.
Use spackle for dents when:
- The dent is shallow
- The drywall paper is not torn badly
- The wall surface is firm
- The damaged area is small
- The repair only needs smoothing
For a deeper dent, apply a thin layer, let it dry, and add another thin layer if needed. Do not try to fix a deep dent with one heavy mound.
Gouges: Choose Based on Depth
Gouges can go either way.
A shallow gouge can usually be filled with spackle. A deep gouge with torn paper or missing drywall may need joint compound, primer, or a small patch kit.
Use spackle for gouges when:
- The damage is shallow
- The edges are firm
- The wall surface is mostly intact
- The repair is narrow
- The gouge does not expose a hollow space
Use a patch kit or joint compound when:
- The gouge is wide
- Drywall paper is torn
- The gypsum is broken
- The repair needs feathering
- The area is too large for a small putty knife
- The patch needs reinforcement
If torn drywall paper is exposed, it may need to be sealed or primed before patching so it does not bubble under the repair.
Small Holes: Patch Kit Is Often Safer
For small open holes, a patch kit is often safer than spackle alone.
A small open hole is different from a nail hole. If material is missing and there is nothing behind the repair, filler alone may not have enough support.
A patch kit is better for small holes when:
- The hole goes through the drywall face
- The hole is larger than a screw hole
- You can see dark space behind the wall
- The edges are broken
- The repair would need a thick amount of filler
- The damage came from an anchor or impact
A small drywall repair kit can make this kind of repair more beginner-friendly because it gives you the patch material and filler in one package.
Medium Holes: Use a Patch Kit or Larger Repair
Medium holes usually need more than spackle.
A self-adhesive mesh patch may work for some medium holes, depending on the kit and the size of the damage. Larger holes may need a more complete drywall repair with backing, a drywall piece, tape, and joint compound.
Medium holes may need:
- Drywall patch kit
- Self-adhesive mesh patch
- Joint compound
- Taping knife
- Sanding sponge
- Primer
- Mini roller for blending paint
If the hole is too large for the patch kit label, do not force it. Use a larger drywall repair method instead.
Why Larger Holes Need Support
Larger holes need support because patching material cannot hold itself across empty space.
Spackle and joint compound are not structural backing. They are surface repair materials. Without support, they can slump, crack, shrink, or break loose.
Support matters because it helps:
- Keep the patch in place
- Stop filler from falling into the wall
- Reduce cracking
- Create a flatter repair
- Give compound something to bond to
- Make sanding and painting easier
A supported patch is more likely to stay solid after primer and paint.
Drying Time Differences
Spackle often dries faster on small repairs than larger patch kit repairs.
That is because nail holes and small dents use very little material. A drywall patch kit usually covers a larger area and may need more than one coat of compound. Each coat needs time to dry or harden before sanding and painting.
Drying time depends on:
- Product type
- Repair size
- Patch thickness
- Room humidity
- Room temperature
- Airflow
- Whether multiple coats are needed
- Product label instructions
Always follow the label. Do not sand, prime, or paint over wet, soft, or gummy patching material.
Sanding Differences
Spackle repairs are usually quick to sand because the area is small.
Patch kit repairs often require more careful sanding because the patch edges need to be feathered into the wall. If the edges are not blended, the patch may show after painting.
Sanding a spackle repair usually involves:
- Fine-grit sanding sponge
- Light pressure
- Small sanding area
- Quick smoothing
- Dust wipe before primer
Sanding a patch kit repair usually involves:
- Medium grit only for high ridges
- Fine grit for final smoothing
- Wider feathering around the patch
- More dust cleanup
- Careful checking by touch
Do not sand aggressively. If the patch is low, add another thin coat instead of sanding harder.
Strength Differences
A drywall patch kit is usually stronger than spackle alone when the hole needs reinforcement.
That does not mean a patch kit is always better. It just means it is better for the right kind of damage. A patch kit is unnecessary for tiny nail holes, but very helpful when the wall surface is broken.
Strength depends on:
- Whether the repair has support
- The size of the hole
- The patch material
- The compound used
- How well the edges are feathered
- Whether the surface was cleaned and primed
- Whether the product was applied in thin coats
For small cosmetic holes, spackle has enough strength. For unsupported damage, a patch kit is the better choice.
Ease of Use Differences
Spackle is easier for tiny repairs.
A drywall patch kit is still beginner-friendly, but it has more steps. You need to place the patch, cover it with compound, feather the edges, let it dry, sand, prime, and paint.
Spackle is easier when:
- The repair is tiny
- You only need one small fill
- The wall surface is solid
- You want a quick paint-prep fix
- You are filling several nail holes
A drywall patch kit is easier when:
- The hole needs support
- You want the repair supplies bundled together
- The damage is too wide for filler
- You need mesh or patch material
- You are fixing a torn anchor hole
Using the wrong option makes the job harder. Spackle is easier until the hole needs support. After that, a patch kit is easier than trying to force filler to do the wrong job.
Paint Prep Differences
Both spackle and patch kit repairs need paint prep.
After sanding, the repair should be clean and primed before paint. Patching materials can absorb paint differently than the surrounding wall, which can make the repair flash through if primer is skipped.
Before painting any drywall repair:
- Let the patch dry fully
- Sand it smooth with light pressure
- Wipe away dust with a microfiber cloth
- Use a tack cloth lightly if appropriate
- Prime the repair
- Let primer dry according to the label
- Paint with a touch-up brush or mini roller
A mini roller can help match the wall texture better than a brush on larger repairs. Use light coats and avoid heavy paint buildup.
What to Look for When Buying Spackle
Spackle should match the size of the small repair.
For basic nail holes and tiny dents, lightweight spackle is usually the easiest option. For slightly deeper holes or small gouges, vinyl spackle may be more useful.
When buying spackle, look for:
- Interior use
- Lightweight spackle for small holes
- Vinyl spackle for slightly deeper small repairs
- Easy sanding
- Paintable finish
- Clear dry-time instructions
- A container size that fits the project
- Compatibility with primer and paint
A small tub or tube is usually enough for basic homeowner touch-ups.
If the repair is only a tiny hole, this guide to the best spackle for nail holes can help you avoid buying more patching material than you need.
What to Look for When Buying a Drywall Patch Kit
A drywall patch kit should match the size and type of hole.
Check the size range on the package. A patch that is too small will not support the repair correctly. A patch that is too large may create extra feathering work.
When buying a drywall patch kit, look for:
- Patch size that fits the hole
- Self-adhesive mesh patch if appropriate
- Included compound or clear product instructions
- Putty knife or taping knife if needed
- Sanding material
- Paintable repair surface
- Beginner-friendly instructions
- Indoor drywall compatibility
Common example brands homeowners may see include 3M, DAP, Duck, Red Devil, Gorilla, Homax, and Hyde. Treat these as examples to compare, not final ranked recommendations. Product formulas and kit contents can change, so final product choices should be verified before adding affiliate links.
For a deeper buying guide, read this article on the best drywall repair kit for small or medium holes before choosing a kit.
Useful Tools for Either Repair
Most wall repairs need a few basic tools beyond the filler or patch.
The right tools help keep the repair flatter, cleaner, and easier to paint.
Helpful drywall repair supplies include:
- Drywall patch kits
- Self-adhesive mesh patches
- Lightweight spackle
- Vinyl spackle
- Joint compound
- Putty knives
- Taping knives
- Sanding sponges
- Microfiber cloths
- Primer
- Touch-up brushes
- Mini rollers
- Small repair kits
A small putty knife works for spackle. A wider taping knife is better for patch kits and joint compound because it helps feather the repair into the wall.
When Joint Compound Is the Better Choice
Joint compound is better when the repair needs feathering, drywall tape, or a wider blended area.
Some drywall patch kits include compound, but you may need a separate container of pre-mixed joint compound for larger or more visible repairs. Joint compound spreads well and can be applied in thin coats.
Use joint compound when:
- You are covering drywall tape
- You are feathering a larger patch
- The repair is wider than a simple hole
- A mesh patch needs covering
- You need multiple thin coats
- The wall needs a smoother blended finish
Pre-mixed joint compound is usually easier for beginners. Setting-type compound can be useful for certain repairs, but it is less forgiving because it hardens on a schedule.
When a Larger Drywall Repair Is Needed
Some holes are too large for a basic patch kit.
If the damage is large, near an electrical box, close to plumbing, soft from moisture, or structurally weak, a more complete drywall repair may be needed. That may involve cutting out damaged drywall, adding backing, installing a drywall piece, taping, applying joint compound, sanding, priming, and painting.
Consider a larger drywall repair when:
- The hole is larger than the patch kit allows
- The drywall is soft or wet
- The damaged area keeps crumbling
- The hole is near electrical or plumbing
- There is mold or water damage
- The wall surface is unstable
- A previous patch failed
- The repair needs backing behind the wall
Do not cover moisture damage with spackle or a patch kit. Fix the source of the moisture first.
Common Mistakes When Choosing Between a Patch Kit and Spackle
Most repair problems start when the wrong product is used for the size of the damage.
Spackle is convenient, but it is not a replacement for patch material when the wall needs support.
Common choosing mistakes include:
- Using spackle alone on an open hole
- Using a patch kit for tiny nail holes
- Ignoring torn drywall paper
- Filling a large hole with heavy spackle buildup
- Choosing a patch that is too small
- Buying a kit without checking the hole size
- Using joint compound without enough feathering
- Skipping primer before paint
Choose based on the damage, not just what you already have in the drawer.
Common Mistakes During the Repair
Even the right product can look bad if it is applied too heavily or painted too soon.
Drywall repairs usually look best with thin layers, light sanding, and primer.
Common repair mistakes include:
- Applying too much spackle
- Leaving a raised mound over the hole
- Not feathering patch kit edges
- Sanding before the repair is dry
- Painting over wet patching material
- Skipping dust cleanup
- Skipping primer
- Using a tiny putty knife on a wide patch
- Sanding too aggressively
- Trying to fix a low spot by sanding more
- Judging the paint match before it dries
If the repair dries low, apply another thin coat. Do not keep sanding a dip.
Safety and Cleanup Notes
Drywall sanding creates fine dust, even on small repairs.
Take basic safety steps before sanding and clean the surface before primer. Dust left on the wall can weaken primer and make the repair look gritty.
Use these safety and cleanup habits:
- Wear a dust mask when sanding
- Wear safety glasses
- Sand with light pressure
- Avoid power sanding small patches
- Keep children and pets away from sanding dust
- Wipe the wall with a microfiber cloth
- Use a tack cloth lightly if appropriate
- Vacuum nearby dust if needed
- Prime the repair before painting
- Wash your hands after cleanup
Be more cautious with older homes, peeling paint of unknown age, water damage, mold, or unusual wall materials. Those situations may need a different repair approach.
Beginner Decision Guide
The easiest way to choose is to match the repair to the hole size and wall condition.
Small, solid, shallow damage usually needs spackle. Open, torn, weak, or larger damage usually needs a patch.
Use this quick guide:
- Nail hole: use lightweight spackle
- Small screw hole: use lightweight or vinyl spackle
- Clean small anchor hole: use vinyl spackle
- Torn anchor hole: use a drywall patch kit
- Shallow dent: use spackle
- Small gouge: use spackle or vinyl spackle
- Wide gouge: use joint compound or patch kit
- Small open hole: use a drywall patch kit
- Medium hole: use a patch kit or larger drywall repair
- Seam or tape problem: use joint compound and drywall tape
When in doubt, ask whether the filler has something solid to bond to. If not, the repair probably needs support.
Final Thoughts
Drywall patch kit vs spackle comes down to support. Spackle is the easiest choice for nail holes, small screw holes, shallow dents, and minor cosmetic repairs. A drywall patch kit is better when the hole is open, torn, weak, or too large for filler alone.
Use lightweight spackle for simple wall touch-ups. Use vinyl spackle for slightly deeper small repairs. Use a drywall patch kit or self-adhesive mesh patch when the wall needs reinforcement. Use joint compound when the repair needs feathering, tape, or a wider blended finish.
Avoid filling large unsupported holes with spackle alone. Let every repair dry fully, sand lightly, wipe away dust, prime the patch, and then paint. A solid repair starts with choosing the right product for the size of the damage.