
paint peeling off a wall: causes and repair
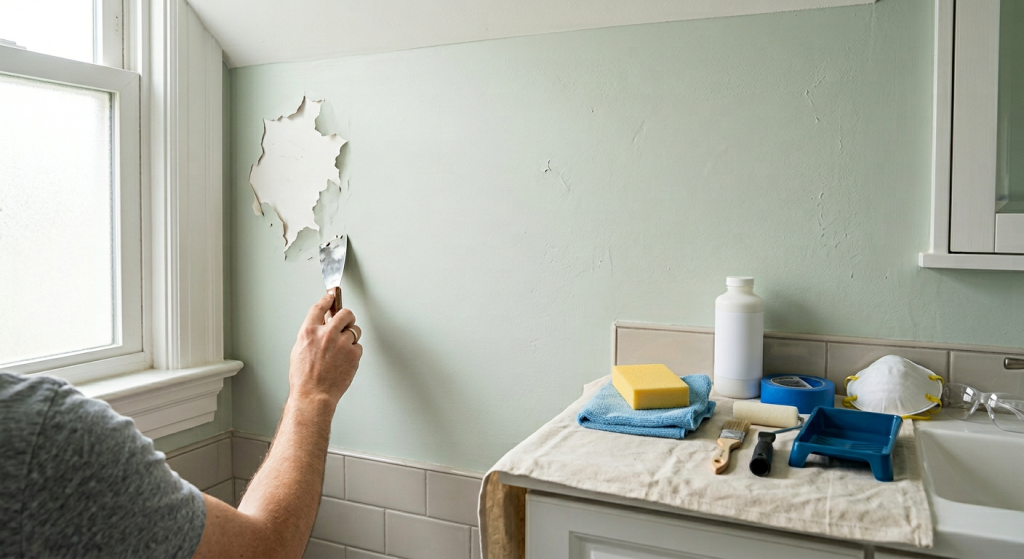
When you see paint peeling off a wall, the paint has usually lost adhesion to the layer underneath. Poor preparation, contamination, a slick surface, moisture, failing older paint, or damaged drywall can all contribute. Do not simply paint over the peeling area. Correct the underlying cause first, remove loose coating, smooth and clean the surface, repair damage, prime where appropriate, and then repaint.
| What you see | Possible cause | Best next step |
|---|---|---|
| Peeling in one small spot | Local contamination or preparation failure | Remove loose paint and inspect the surface |
| Peeling near a bathroom or laundry area | Moisture or high humidity may be involved | Identify and correct the moisture source |
| Peeling from glossy paint | Poor adhesion to a slick surface | Prepare the sound surface before recoating |
| Peeling after a recent repaint | Poor prep, contamination, or weak underlying coating | Determine which layer is failing |
| Widespread peeling | Broader adhesion or coating-system failure | Investigate before repeated spot repairs |
| Peeling with stains or soft drywall | Moisture or substrate damage | Correct the cause and assess the drywall |
Peeling is different from a raised pocket or blister beneath otherwise intact paint. Those symptoms can have overlapping causes, but they require somewhat different diagnosis. For raised bubbles or blisters, see Wall Paint Bubbling: Causes and How to Fix It.
Why Is Paint Peeling Off the Wall?
Paint adheres properly only when the surface underneath is sound, clean, appropriately prepared, and compatible with the coating.
When one of those conditions is missing, the bond can fail. Sometimes only the newest paint layer releases. In other cases, several older layers may separate together because the weak point lies deeper in the coating system.
Before repairing the wall, look at what is underneath the peeling paint. The condition of that surface often provides more useful information than the loose paint itself.
Poor Surface Preparation
Dust, grease, chalky residue, and other contaminants can interfere with paint adhesion.
If a wall was painted before it was properly cleaned, the new coating may bond partly to the contamination instead of firmly to the underlying surface. Eventually, sections can loosen and peel.
Loose old paint creates a similar problem. A new coating cannot make an unstable layer underneath it sound. If the old paint releases from the wall, the newer paint applied over it can come away at the same time.
Preparation problems can be localized or widespread. A greasy spot or isolated residue may cause one small failure, while inadequate preparation across an entire wall can contribute to peeling over a much larger area.
Glossy or Slick Surfaces
A smooth, glossy surface can make adhesion more difficult when it has not been prepared as required for the new coating.
This does not mean every glossy wall will peel. Paint systems and preparation requirements vary. The important point is that a new coating needs an appropriately prepared surface to form a reliable bond.
If peeling occurs after painting over a slick older finish, inspect the boundary between the coatings. A clean separation between layers can suggest that adhesion between the old and new finishes is part of the problem.
Follow the coating manufacturer’s preparation requirements rather than assuming another coat will solve the failure.
Moisture
Moisture can interfere with paint adhesion and can contribute to paint separating from the wall.
Possible sources include:
- Plumbing leaks
- Exterior water intrusion
- Condensation
- Persistently high indoor humidity
- Moisture entering from an adjacent space
The location can provide clues, but it does not prove the source. Peeling near a bathroom, for example, may be associated with humidity, condensation, a plumbing problem, or another condition that requires investigation.
Look for staining, recurring dampness, swollen material, softness, or deterioration along with the peeling.
If moisture is present, do not seal the area with primer and paint in an attempt to hide it. Identify and correct the source, then determine whether the drywall remains sound enough for a cosmetic coating repair.
Primer or Coating Problems
Some surfaces and coating situations require an appropriate primer to create a suitable base for finish paint.
Problems can also occur when a new coating is applied over an older layer that is already poorly bonded. In that situation, the new paint may adhere to the old paint while the old layer continues to release from the wall.
Coating compatibility and preparation requirements vary, so avoid assuming that one primer will solve every adhesion problem.
Primer is useful only after the underlying surface is sound and properly prepared. It cannot restore deteriorated drywall or permanently bond layers that should have been removed.
For more information about selecting primer for sound new or repaired drywall, see Best Primer for Drywall: New and Patched Surfaces.
Damaged Drywall or Substrate
Sometimes peeling paint is a symptom rather than the main problem.
Drywall that is soft, swollen, crumbling, delaminated, or otherwise deteriorated needs to be evaluated before repainting. Adding primer and paint over a damaged substrate does not restore the drywall underneath.
Likewise, recurring movement or cracking can disrupt the coating even when the paint itself was applied correctly.
If the substrate is unstable, correct that condition before treating the area as an ordinary paint repair.
How to Repair Peeling Paint on an Interior Wall
A lasting repair starts by determining why the paint failed. The objective is not simply to make the loose edges disappear—it is to create a sound surface that can hold the replacement coating.
If the existing coating may contain lead, do not use uncontrolled scraping or sanding. Older painted surfaces may require lead-safe work practices before they can be disturbed.
Step 1: Determine the cause
Inspect the peeling area and the wall around it.
Look for water stains, dampness, soft drywall, cracking, loose coating beyond the obvious damaged spot, or signs that multiple paint layers are separating.
Consider whether the problem appeared soon after repainting, occurs in a moisture-prone area, or is limited to one contaminated or damaged location.
If there is an active moisture problem, correct it before continuing. Allow the wall to dry as appropriate and determine whether the underlying drywall has been damaged.
Do not proceed directly to repainting simply because the visible surface can be made to look dry.
Step 2: Remove loose paint
Remove paint that is loose, lifting, or no longer securely bonded.
The goal is to reach stable coating around the failed area, not to strip sound paint from the entire wall without a reason.
Work carefully at the edges. Aggressive scraping can enlarge the repair unnecessarily or damage the drywall paper underneath.
If suspect older paint could contain lead, stop before ordinary scraping or sanding and use an appropriate lead-safe approach.
Step 3: Feather the edges
Once loose material has been removed, the remaining paint may leave a noticeable ridge around the exposed area.
Smooth or feather that transition so the edge does not remain visible after repainting. Use controlled sanding where appropriate rather than aggressively grinding away sound coating or drywall paper.
A wider, gradual transition generally finishes better than leaving a sharp paint edge and trying to hide it with a thick layer of primer or paint.
Remove only what is necessary to produce a stable, smooth surface.
Step 4: Clean the surface
Remove sanding dust, loose residue, grease, and other contamination before applying repair material or coatings.
Use a cleaning method compatible with the existing surface and the products you plan to apply. Follow cleaner and coating instructions rather than assuming one cleaning product is safe for every paint finish or substrate.
Allow the wall to dry properly before continuing.
Painting over dust or residue can recreate the same type of adhesion problem you are trying to correct.
Step 5: Repair the substrate if needed
Inspect the exposed wall after the failing coating has been removed.
Minor surface defects may need an appropriate patching material so the area can be finished smoothly. Keep the repair controlled rather than building up a large mound that will require excessive sanding.
If the drywall paper is badly damaged, the gypsum is crumbling, or the panel is soft or swollen, address that damage before coating.
Mold-like growth, persistent moisture, or widespread deterioration also calls for investigation of the underlying condition rather than a cosmetic patch-and-paint approach.
Step 6: Prime the prepared area
Once the surface is sound, clean, repaired, and dry, use an appropriate primer where the surface or coating system requires it.
Primer can help create a suitable surface over repairs or exposed drywall and improve consistency before finish paint. It should not be used as a substitute for removing loose paint or correcting moisture damage.
Follow the primer instructions for surface preparation, application, ventilation, drying, and recoating.
Step 7: Repaint
Apply a compatible finish paint according to its instructions.
Avoid using a heavy coat in an attempt to conceal remaining ridges or surface defects. Paint should be applied over a properly prepared surface rather than expected to correct one.
Follow the specified application conditions, drying requirements, ventilation guidance, and recoating instructions.
After the paint dries, inspect the repaired area under normal room lighting to make sure the transition is smooth and the coating remains securely bonded.
Small Peeling Area vs Widespread Paint Failure
The extent of peeling can help determine whether a spot repair makes sense.
A small isolated area may result from localized contamination, a minor preparation problem, an isolated weak point in an older coating, or a moisture event confined to that location.
Once the cause has been identified and corrected, removing the failed paint and repairing that limited area may be reasonable.
Widespread peeling deserves a broader assessment.
If paint is releasing across substantial portions of a wall, repeated spot repairs may simply chase the failure from one area to another. Possible explanations include widespread preparation problems, poor adhesion between coating layers, moisture, incompatible coatings, or deterioration beneath the paint.
Test and inspect beyond the first visible peeling area before committing to a small patch.
The important distinction is whether you have one failed spot surrounded by sound coating or a coating system that is losing adhesion across the wall.
Common Mistakes When Repairing Peeling Wall Paint
Painting directly over loose paint: New paint does not restore adhesion underneath a failing layer. Remove loose material first.
Skipping cleaning: Dust, grease, and residue can interfere with the new coating just as they may have contributed to the original failure.
Ignoring moisture: Primer and paint do not correct a plumbing leak, water intrusion, condensation problem, or persistently damp wall.
Sanding too aggressively: Excessive sanding can damage drywall paper and unnecessarily enlarge a manageable repair.
Priming damp drywall: Correct the moisture source and allow the wall to dry appropriately before coating.
Expecting primer to repair damaged drywall: Primer prepares a suitable surface for coating. It does not restore soft, swollen, crumbling, or structurally deteriorated drywall.
Feathering too narrowly: Leaving an abrupt ridge around the repair can make the damaged area visible after repainting.
Assuming paint will hide poor preparation: Finish paint can emphasize ridges, rough patches, and other defects rather than conceal them.
Repeatedly spot-patching widespread failure: If surrounding paint continues to release, investigate the broader adhesion problem instead of treating each new peel as an unrelated defect.
Final Thoughts
When you find paint peeling off wall surfaces, treat the peeling as evidence that adhesion has failed somewhere in the coating system. Determine why it failed before covering it again. Small areas may need only controlled removal, smoothing, cleaning, minor repair, appropriate primer, and repainting once the underlying cause has been corrected.
Widespread peeling, recurring moisture, soft drywall, or deteriorating wall material deserves a broader investigation. A durable paint repair depends on a clean, dry, stable surface—not simply another coat over the visible problem.