
how to remove stains from a stainless steel sink
If you are trying to learn how to remove stains from stainless steel sink surfaces, identify the mark before choosing a cleaner. White deposits, brown rust-colored spots, food stains, gray metal transfer, cloudy film, and scratches require different responses. Start with mild cleaning and a soft tool, then move to a compatible stain treatment only when you know what you are trying to remove.
| What you see | Likely cause | What to try first |
|---|---|---|
| White or chalky spots | Hard-water minerals | Mild cleaning, then an approved mineral-deposit treatment |
| Brown or orange spots | Iron or rust-colored surface contamination | Mild cleaning, then an approved rust treatment |
| Gray or black lines | Metal transfer or a scratch | Clean gently and inspect |
| Cloudy or greasy film | Soap, grease, or cleaner residue | Mild detergent and thorough rinsing |
| Food discoloration | Coffee, tea, tomato, or dried residue | Mild detergent and a soft sponge |
| Rainbow-colored film | Surface deposits or another finish change | Clean ordinary residue first |
| Visible groove or gouge | Physical damage | Stop treating it as a stain |
Stainless steel is highly corrosion-resistant, but that does not mean every brown spot is impossible or that every discoloration comes from the steel itself. Iron particles, water conditions, cookware, cleaning tools, chemicals, and surface deposits can all affect its appearance.
How to Remove Stains From Stainless Steel Sink Surfaces Safely
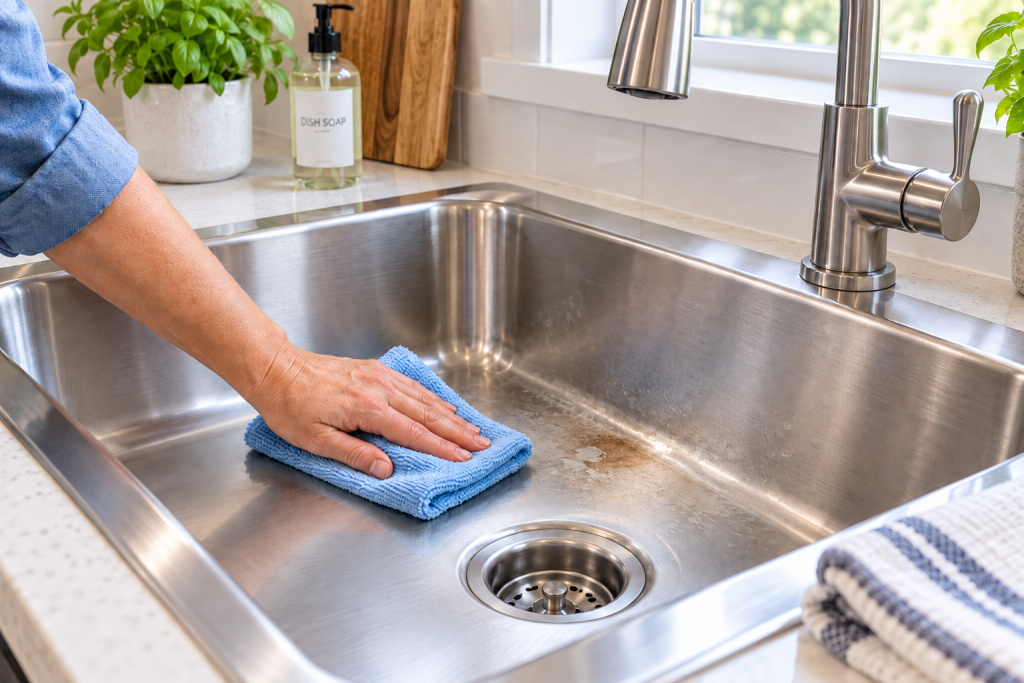
Before targeting a stain, establish a clean baseline. Rinse away grit and loose food, then wash the marked area with a compatible mild detergent and a soft cloth or non-scratch sponge.
If the sink has a visible brushed grain, wipe in the same direction as the grain rather than scrubbing across it. Rinse away all cleaner, dry the surface with a soft cloth, and inspect the mark again.
This simple check matters because grease, soap film, dried food, and cleaner residue can make a sink look stained when the underlying stainless steel is fine. If the mark remains, choose the next method according to what it looks like and what probably caused it.
Hard-Water Stains and Mineral Deposits
Hard-water deposits usually appear white, chalky, cloudy, or crusty. They develop when water evaporates and leaves dissolved minerals behind.
Mineral buildup is better approached by loosening or dissolving the deposit than by grinding at it with an abrasive pad. After ordinary washing, use a mineral-deposit treatment that your sink manufacturer permits.
Vinegar is one example of why compatibility matters. Some stainless-steel sink manufacturers specifically recommend vinegar for hard-water deposits. Others caution against leaving acidic substances on their stainless surfaces. That means vinegar should not be treated as a universal stainless-steel remedy.
If your manufacturer approves an acidic cleaner or vinegar treatment, follow its instructions rather than improvising a stronger mixture or longer contact time. Rinse the sink thoroughly afterward and dry it so fresh water spots do not immediately replace the ones you removed.
Brown or Orange Rust-Colored Marks
A brown or orange spot does not automatically mean the sink itself is rusting through.
Stainless steel can collect iron-containing particles from outside sources. Water, steel wool, metal tools, cast-iron or carbon-steel cookware, and debris introduced during construction or renovation can leave particles on the surface. Those particles can oxidize and create rust-colored spots.
Start by washing the area gently. If the color remains, use a rust or stainless-steel cleaning method specifically approved for your sink and finish.
Do not attack the spot with steel wool or an ordinary steel brush. Besides scratching the finish, steel cleaning tools can leave additional iron-containing particles on stainless steel and contribute to more rust-colored contamination.
Recurring spots deserve a little investigation. If brown marks keep returning despite correct cleaning, consider whether an iron-containing object is repeatedly being left wet in the basin or whether particles are entering with the water. That is more useful than repeatedly scrubbing the same location harder.
If the affected area is visibly pitted rather than merely discolored, the problem may have progressed beyond a removable surface deposit.
Food, Beverage, Grease, and Soap Film
Coffee, tea, tomato-based foods, grease, and other kitchen residue can leave visible marks, especially when allowed to dry.
Start with mild liquid detergent and a soft sponge or microfiber cloth. Give dried material time to loosen during normal wet cleaning rather than scraping it with a knife or other hard object.
Greasy or cloudy areas may require more than one gentle cleaning pass. Rinse carefully between passes because detergent residue itself can leave a haze that looks like another stain.
If strongly colored food has been removed but discoloration remains, move to a cleaner that the sink manufacturer approves for stubborn stains. Avoid assuming that a more abrasive product is automatically the next step.
Gray or Black Metal-Transfer Marks
Cookware, utensils, and other metal objects can sometimes leave dark lines on stainless steel. A transferred mark and a scratch can look similar at first.
Clean the area gently and dry it before deciding which one you have. If the line becomes lighter or changes as surface residue is removed, transferred material is more likely.
A line that remains as a visible groove, catches light differently from the surrounding surface, or can be felt as surface damage may be a scratch instead.
Do not keep increasing pressure simply because a dark line remains. Cleaning can remove material sitting on the stainless steel, but it cannot erase a gouge in the metal.
Rainbow or Colored Discoloration
Rainbow-like discoloration can be another type of surface film rather than a conventional food stain. At least one major stainless-steel sink manufacturer identifies its characteristic “rainbow effect” as water-borne deposits left on the surface.
Do not assume every colored patch has the same cause, however. A mark that appears after unusual chemical or heat exposure may require different evaluation.
First remove ordinary grease, soap, and mineral residue using a compatible method. If the color remains, check the care guidance for the actual sink finish before trying a polish or stronger cleaner.
For broader sink-care guidance across different materials and finishes, see how to clean a kitchen sink without damaging the surface.
Baking Soda, Vinegar, Commercial Cleaners, and Polish
Several popular cleaning methods can be appropriate for some stainless-steel sinks without being appropriate for all of them.
Baking soda: Baking soda is often suggested as a mild abrasive, but manufacturers differ on the amount and type of abrasion allowed on their finishes. Some stainless finishes tolerate approved mild-abrasive cleaning methods, while other care instructions warn against abrasive powders. Do not assume baking soda is harmless simply because it is a common household product.
Vinegar: Vinegar can be useful for mineral deposits when the sink manufacturer permits it. Some manufacturers specifically recommend it for hard-water buildup, while other stainless care guidance cautions against extended acid exposure. Use it only when compatible with your sink and do not invent soaking times or stronger concentrations.
Commercial stainless-steel cleaners: These may be useful for stubborn residue, mineral deposits, or rust-colored surface marks, depending on the product. Choose a cleaner that is approved for the sink’s particular finish and the problem you are treating. A product labeled for stainless-steel cookware or appliances is not automatically appropriate for every sink finish.
Stainless-steel polish: Polish is primarily a finish-care product, not a universal stain remover. It will not repair a deep scratch or gouge. Some manufacturers also exclude polishing products from particular matte, textured, or specialty finishes, so verify compatibility before polishing the basin.
The safest escalation is problem-specific: identify the deposit, then choose the least aggressive approved treatment that addresses it.
What Not to Use on a Stainless-Steel Sink
Avoid cleaning methods that can scratch the finish, contaminate the surface, or create unnecessary corrosion risk.
- Steel wool and ordinary steel scouring pads
- Carbon-steel or wire brushes
- Harsh abrasive pads not approved for the finish
- Knives, metal scrapers, or aggressive scraping
- Heavy rubbing across a visible brushed grain
- Cleaners containing chlorides or chlorine when the manufacturer prohibits them
- Strong cleaners left on the surface longer than their directions allow
- Mixing cleaning chemicals unless the product labels specifically indicate the combination is safe
Several stainless-steel sink manufacturers specifically restrict bleach or other chlorine-containing cleaners because chloride exposure can contribute to corrosion. Instructions differ by sink, so follow the actual manufacturer’s care guidance if a chlorine-containing product contacts the surface. Prompt, thorough rinsing is commonly advised.
Never mix household bleach with ammonia, vinegar or other acids, or other household cleaners. Combining cleaning chemicals can release dangerous vapors.
Protect the Grain and Finish While Removing Stains
On a brushed stainless-steel sink, the fine directional lines you see are part of the finish. When cleaning requires rubbing, following those lines helps avoid creating obvious cross-grain marks.
Not every stainless sink has the same grain or finish, so do not force a brushed-finish technique onto a mirror, matte, textured, coated, or specialty surface.
A few habits reduce unnecessary wear:
- Remove grit before wiping or scrubbing.
- Use soft cloths, soft sponges, or approved non-scratch pads.
- Use concentrated scrubbing only when the manufacturer specifically permits it.
- Rinse cleaners completely from the basin.
- Dry the sink instead of letting mineral-rich water repeatedly evaporate.
- Keep ordinary steel wool, wire brushes, and incompatible metal cleaning tools away from the surface.
A sink grid designed for the basin can reduce direct cookware contact, but keep the grid and the area underneath it clean so trapped residue does not become a new source of marks.
When a Stain Is Actually Surface Damage
Cleaning has reached its limit when the problem is physical damage rather than material sitting on the surface.
Scratches usually appear as lines cut into or across the finish. A gouge is deeper and more obvious. Pitting can look like tiny cavities or rough spots rather than a removable coating. Aggressive abrasives can also change the sheen of one area and leave a permanently different-looking patch.
Some manufacturers provide finish-specific methods for blending minor scratches on certain stainless-steel sinks. Those instructions do not apply automatically to every finish.
Do not sand, resurface, or aggressively scour an unknown stainless finish in an attempt to remove what appears to be a stain. If ordinary and manufacturer-approved stain cleaning leaves behind obvious physical damage, treat the issue as finish damage rather than continuing to escalate cleaners.
If you are still deciding which sink surface best fits your maintenance preferences, compare the best kitchen sink material options for everyday use and easy care.
Common Mistakes When Removing Stainless-Steel Sink Stains
The most common mistakes come from treating every mark the same way.
- Assuming every brown spot means the entire sink is rusting
- Using steel wool to attack a rust-colored deposit
- Scrubbing aggressively before identifying the mark
- Working heavily across a visible brushed grain
- Leaving a strong cleaner on longer in hopes that it will work better
- Mixing household cleaning chemicals
- Polishing a sink when the actual problem is mineral buildup
- Assuming a cleaner approved for one stainless finish is safe for another
When a gentle treatment fails, reconsider the cause before increasing abrasion.
Frequently Asked Questions
Why does my stainless-steel sink have brown stains?
Brown or orange spots often come from iron-containing particles or other surface contamination. Water conditions, metal cookware, steel wool, tools, or construction debris can contribute. Clean the area gently first, then use a rust-removal method approved for your particular sink if necessary.
How do I remove hard-water stains from stainless steel?
Begin with mild cleaning to remove soap and grease. If a chalky mineral deposit remains, use a manufacturer-approved limescale or mineral-deposit treatment. Vinegar is approved by some stainless-steel sink manufacturers but should not be assumed compatible with every finish.
Can baking soda scratch stainless steel?
Baking soda has mild abrasive action. Whether that level of abrasion is acceptable depends on the sink finish and manufacturer guidance. If you do not know that it is permitted, start with a nonabrasive cleaner instead.
Can bleach damage stainless steel?
It can. Several stainless-steel sink manufacturers warn against bleach or chloride-containing cleaners because they can contribute to corrosion or finish damage, particularly with sufficient exposure. Follow the sink maker’s guidance and rinse accidental contact promptly when directed.
What is the safest way to learn how to remove stains from stainless steel sink surfaces?
Identify the stain first, wash with a compatible mild cleaner and soft tool, rinse and dry, then use a targeted treatment only if residue remains. That prevents mineral deposits, metal transfer, food staining, and physical scratches from all receiving the same unnecessarily aggressive treatment.
Final Thoughts
The key to how to remove stains from stainless steel sink surfaces is diagnosis before abrasion. Identify whether you are seeing minerals, rust-colored contamination, food residue, grease, metal transfer, or another surface film, then start with the gentlest compatible method.
Follow the grain when your sink has a directional brushed finish, rinse cleaners thoroughly, and dry the surface afterward. If a mark is actually a scratch, gouge, pitted area, or permanent finish change, stronger cleaning will not turn physical damage back into an unstained surface.