
How to clean a kitchen sink without damaging the finish
If you are trying to learn how to clean kitchen sink surfaces without damaging the finish, start by identifying what the sink is made of. Then use the gentlest compatible cleaner and tool that will remove ordinary food residue, grease, and film. For many sinks, routine cleaning means a soft cloth or sponge, a suitable mild cleaner, a thorough rinse, and drying when appropriate.
The important part is not assuming that every sink can handle the same scrubber or chemical. Stainless steel, enamel, composite, fireclay, and solid-surface sinks can have different care requirements, and nearby faucets or accessories may have finishes that need their own cleaning method.
| Surface or condition | Good starting point | What to check before using |
|---|---|---|
| Stainless steel | Soft sponge, compatible mild cleaner | Finish direction and cleaner restrictions |
| Porcelain or enamel | Soft cloth or non-scratch sponge | Abrasive restrictions and finish condition |
| Granite composite | Soft sponge and approved routine cleaner | Brand-specific chemical compatibility |
| Fireclay | Soft cloth or sponge | Cleaner restrictions for that glaze |
| Solid surface | Soft cloth or compatible sponge | Specific material and finish instructions |
Never mix household cleaning chemicals. If you change from one cleaner to another, rinse the surface thoroughly first.
Identify the Sink Material and Choose Compatible Supplies
Sink material matters because the visible surface is what your cleaner and scrubber actually contact. A method that is routine care for one material can dull, scratch, discolor, or otherwise alter another.
Start with any product information you already have. A model name, purchase record, sink label, or manufacturer care guide is more reliable than appearance alone. Stainless steel is usually easy to recognize, but glossy enameled sinks and glazed fireclay can look similar. Composite sinks often have a stone-like appearance, while some solid-surface sinks blend almost seamlessly into a matching countertop.
Also consider whether the original surface has been refinished, coated, painted, polished, or otherwise altered. An older sink may no longer tolerate everything the original factory finish did. Decorative drains, colored strainers, protective coatings, and accessories introduce additional surfaces with their own limitations.
Build a simple routine-cleaning kit
You do not need a large collection of products for ordinary sink care. A useful starting kit includes:
- Soft microfiber or other nonabrasive cloths
- A soft sponge or a non-scratch sponge confirmed suitable for the surface
- A soft detail brush when the material permits one
- Mild dishwashing liquid or another cleaner approved for routine use on the sink
- Clean water for rinsing
- A clean, dry cloth for finishing
Choose the least aggressive option that handles the soil you actually have. Ordinary food residue and fresh grease rarely justify starting with a heavy-duty abrasive or strong chemical.
A product marketed as a kitchen, bathroom, mineral-deposit, rust, or multipurpose cleaner is not automatically compatible with every sink. The same caution applies to powders, abrasive pads, acidic cleaners, chlorine-based products, solvents, and polishes. Compatibility depends on the sink material and sometimes the individual finish.
How to Clean Kitchen Sink Surfaces Step by Step
This procedure provides a safe framework for routine soil. Adjust the cleaner, wiping direction, and drying method to suit your particular sink.
Step 1: Clear the sink
Remove dishes, food containers, strainers that are meant to come out, sink grids, mats, and other removable accessories. This gives you access to the basin and prevents trapped debris from being dragged across the finish.
Step 2: Remove loose food and debris
Pick up scraps rather than grinding them around the bowl with a sponge. Empty an accessible removable strainer if necessary. Do not push large amounts of food into the drain as part of cleaning.
Step 3: Rinse the basin
Use clean water to wash away loose particles and soften ordinary residue. Rinsing first reduces the amount of grit that can be moved across the surface during wiping.
Step 4: Apply a compatible routine cleaner
Put a small amount on a damp cloth or sponge rather than assuming that more cleaner will work better. Mild dishwashing liquid is suitable for routine care on many manufacturer-specified sink surfaces, but verify compatibility when the material or finish is uncertain.
Step 5: Clean the basin gently
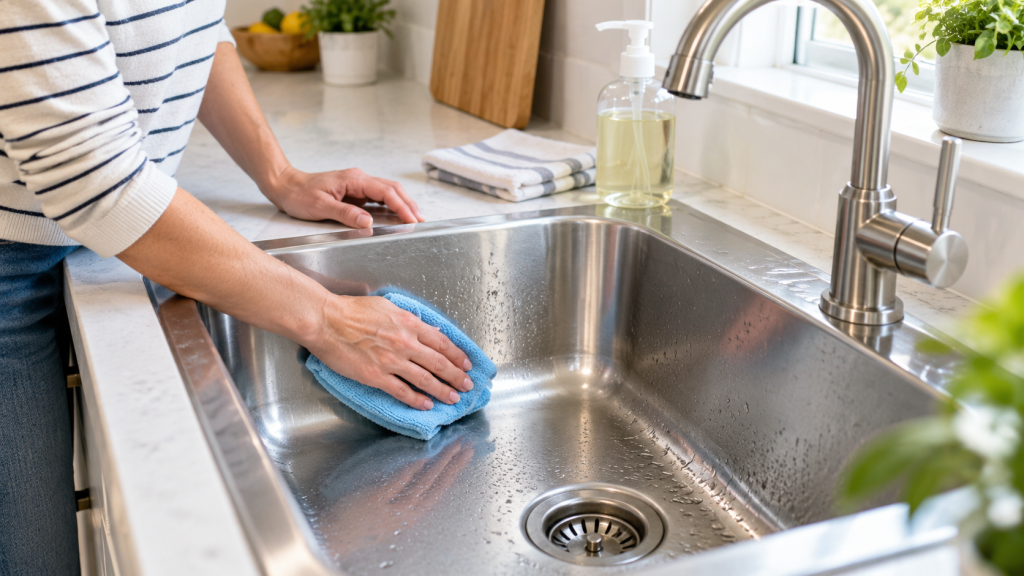
Wipe the bottom and sides with light pressure. On brushed stainless steel, follow the direction of the brushed finish rather than scrubbing across it or making aggressive circular passes. For other materials, use the wiping method recommended for that surface.
Step 6: Clean the accessible edges and details
Wipe around the drain flange, basin corners, rim, and other exposed areas where residue collects. A soft detail brush can help in tight spaces if it is appropriate for the finish. Avoid forcing tools into sealed joints or disassembling drain or faucet parts for routine surface cleaning.
Step 7: Rinse thoroughly
Remove cleaner from the basin, drain area, and edges with clean water. Check corners and textured areas where residue can remain. Also rinse accidental overspray from neighboring surfaces rather than allowing an incompatible cleaner to sit there.
Step 8: Dry and reset the area
Dry the sink when appropriate, particularly where water spotting or mineral residue is a concern. Clean and dry removable accessories separately according to their materials before putting them back.
The finished sink should feel free of greasy film and cleaner residue. If a mark remains after ordinary cleaning, identify what it is before increasing the scrubbing force or changing chemicals.
Adjust Routine Care to the Sink Material
The general procedure stays similar, but the details matter. Treat the following as starting points rather than permission to use the same chemical on every product in a material category.
Stainless steel
For routine stainless-steel care, use a soft sponge or cloth and a compatible cleaner, rinse well, and dry the surface. If the sink has a visible brushed finish, clean and dry in the direction of that finish. Concentrated scrubbing in one spot or rubbing across a directional finish can change its appearance.
Do not treat every rust-colored mark or discoloration as ordinary dirt. Stainless-steel staining, transferred metal, mineral residue, and surface discoloration can require different treatment. Persistent staining is better handled as a separate stain-removal problem rather than by automatically reaching for a stronger abrasive.
For discoloration that routine cleaning does not remove, see how to remove stains from a stainless steel sink safely.
Porcelain and enameled sinks
A glossy enameled surface can look hard enough to tolerate aggressive scrubbing, but abrasive tools or cleaners can affect its luster or finish. Use a soft cloth or a non-scratch sponge compatible with the particular sink, and rinse away the cleaner completely.
Also avoid leaving staining materials sitting in the basin longer than necessary. When routine washing does not remove a mark, stop escalating the scrubbing pressure. Detailed porcelain stain removal and scratch prevention depend on the type and condition of the surface and deserve a material-specific method.
For more detailed care guidance, see our step-by-step guide on how to clean a porcelain sink without scratching the finish.
Granite-composite and other composite sinks
Composite formulas are not identical, so care instructions can vary between manufacturers. Some granite-composite manufacturers specify dish soap, the soft side of a sponge, clean-water rinsing, and drying for everyday care.
Mineral deposits can also change how dark or light composite sinks look. Before treating that discoloration with an acidic, alkaline, chlorine-based, or abrasive cleaner, confirm that the specific sink manufacturer permits it. A chemical approved for one composite formulation should not be treated as universally safe for all composite sinks.
Fireclay
Fireclay has a hard glazed surface, but routine care still benefits from gentle cleaning. Soft cloths or non-scratching sponges and a compatible liquid cleaner are common manufacturer approaches.
Cleaner restrictions can differ by product. Some fireclay manufacturers permit particular acidic cleaners while warning against abrasive powders, concentrated drain cleaners, or cleaners intended for other finishes. That is a good example of why material identification should come before chemical selection instead of after a stain appears.
Solid-surface and other engineered sinks
Integrated or solid-surface sinks may have care procedures that differ substantially from glazed enamel, composite stone, or stainless steel. Some manufacturers allow cleaning methods on their solid-surface products that would be inappropriate to generalize to neighboring finishes.
Confirm the actual material before treating an integrated sink as though it were porcelain or stone. If the sink and countertop form a continuous surface, pay particular attention to the care instructions for the complete system rather than choosing a cleaner based only on the basin’s color.
If you are comparing sink materials as well as cleaning needs, see our guide to the best kitchen sink material for everyday use and easy care.
Clean Nearby Sink Finishes and Accessories Separately
Cleaning the basin is only part of making the sink area look finished. The faucet, drain trim, accessories, and countertop edge also collect splashes and residue, but they should not automatically receive the basin cleaner.
For the faucet exterior, begin with a soft, damp cloth unless its manufacturer specifies another method. Chrome, stainless-look finishes, matte colors, painted or coated finishes, and specialty surface treatments may have different restrictions. A cleaner tolerated by a sink basin can damage a faucet finish.
Wipe the visible drain flange and removable strainer without taking apart plumbing. If the drain trim has a plated or colored finish, treat it as a separate finished component rather than as part of the sink material.
Sink grids, racks, cutting boards, colanders, and mats should be removed so the basin underneath can be cleaned. Clean each accessory according to its own material. Rinse and dry the underside before replacing it so you are not trapping food residue or dirty water against the sink.
At the sink rim, wipe accessible seams and caulked edges gently. Do not dig a brush or scraper into the joint. Caulk that is separating, missing, or physically deteriorated is a maintenance issue rather than something harder scrubbing will correct.
If mineral buildup or debris is affecting the faucet outlet, see how to clean a kitchen faucet head and restore normal flow.
Know When Routine Cleaning Is Not Enough
A persistent mark is a reason to identify the problem, not automatically a reason to scrub harder.
Food film and fresh grease should normally respond to routine cleaning. A mark that remains may instead be a mineral deposit, transferred metal, rust-colored contamination, discoloration, or a true stain. Those problems can require material-specific treatment, and the wrong aggressive cleaner can create a larger cosmetic problem than the original mark.
This distinction is particularly important with porcelain and stainless steel. Detailed porcelain cleaning methods and stainless-steel stain removal involve their own surface considerations, so routine kitchen sink cleaning should stop before turning into an improvised restoration procedure.
Some sink symptoms come from the drain
Surface cleaner will not solve every unpleasant condition around a kitchen sink.
A persistent odor may originate in the drain, disposal area, or plumbing instead of the basin. Repeated gurgling can indicate an airflow or drainage issue. A sink that drains slowly may have a developing restriction even if the visible bowl is spotless.
You can clean accessible surfaces and remove ordinary debris, but do not keep adding cleaners because a plumbing symptom remains. Odors, gurgling, and slow drainage should be evaluated according to the symptom rather than treated as proof that the sink surface is dirty.
Build a Practical Cleaning Routine and Avoid Common Mistakes
A kitchen sink does not need one rigid cleaning timetable for every household and material. Clean based on use, visible soil, and the care requirements of the surface.
Rinse away food residue after messy preparation. Clean greasy film before it builds into a heavier layer. Address spills and staining foods promptly when the sink manufacturer advises doing so. When water droplets leave visible mineral residue, drying after use can reduce the buildup that later requires deeper cleaning.
Periodic deeper cleaning can also be appropriate, but use the method specified for the material rather than automatically increasing chemical strength.
Common mistakes that can shorten the life or change the appearance of a sink include:
- Using steel wool, harsh scouring pads, or aggressive abrasives on finishes that can scratch or dull
- Assuming baking soda, vinegar, bleach, or another familiar cleaner is safe for every sink and nearby fixture
- Mixing cleaning products or applying a second chemical before thoroughly rinsing the first
- Scrubbing a polished, coated, or directional finish aggressively
- Leaving cleaner residue in corners or around the drain
- Letting overspray sit on a faucet, countertop, drain trim, or accessory made from a different material
- Treating persistent stains or plumbing symptoms as a reason to keep escalating routine cleaning
A gentler repeat cleaning is often a better next step than immediately moving to a harsher product. If that does not work, identify the mark and the sink material before choosing a targeted treatment.
FAQs
Is dish soap appropriate for cleaning every kitchen sink?
Mild dishwashing liquid is a common routine-cleaning choice in manufacturer guidance for several sink materials, including some stainless-steel, composite, and fireclay products. That does not make every formulation universally compatible with every finish.
If you are learning how to clean kitchen sink surfaces and do not know what material you have, identify the sink first. Then confirm that the cleaner is appropriate for that specific surface.
Is baking soda safe for every kitchen sink?
No single abrasive or mildly abrasive cleaning method should be assumed safe for every sink. Surface hardness, polish, glazing, coatings, and manufacturer treatments differ.
If ordinary washing does not remove a mark, first determine whether you are dealing with grease, mineral buildup, transferred metal, or another type of stain. Then use a method suited to that material instead of treating baking soda as an all-purpose solution.
Can I use vinegar on the sink and faucet at the same time?
Do not assume so. Some manufacturers permit vinegar or diluted vinegar for particular sink or faucet finishes, while other products have different chemical restrictions.
The safest approach is to treat the basin and faucet as separate surfaces. Use only a method compatible with each one, control overspray, and rinse as required.
Why does my sink still look dull after I clean it?
Dullness may come from remaining cleaner film, hard-water deposits, an altered finish, fine surface wear, or residue that routine soap does not remove. Rinse thoroughly and dry the sink first.
If the appearance does not improve, identify the material and likely deposit before polishing or using a stronger cleaner. Aggressive scrubbing can make finish damage more noticeable instead of correcting it.
Final Thoughts
The safest way to approach how to clean kitchen sink surfaces is to identify the material and finish first, choose compatible soft tools and routine cleaners, remove soil gently, rinse completely, and dry when it benefits the surface.
When a stain survives routine cleaning, or when the real complaint is an odor, gurgling, or slow drainage, treat it as a separate problem. Correct identification is more useful than stronger scrubbing.