
kitchen faucet dripping: common causes and what to do
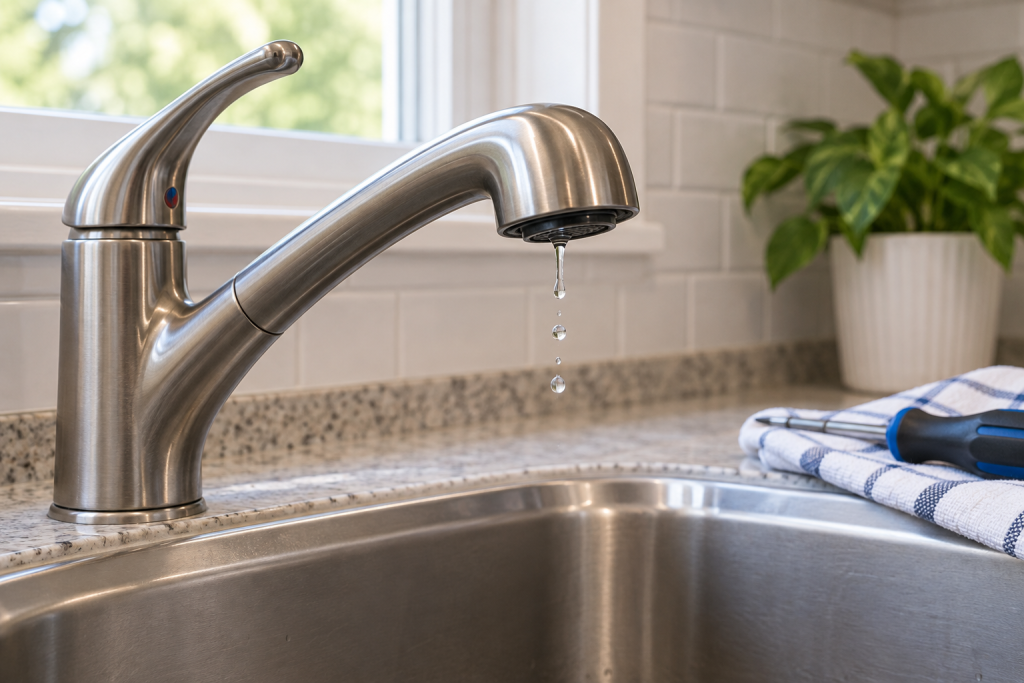
A kitchen faucet dripping from the spout after the handle is fully turned off usually means an internal sealing component is worn, damaged, dirty, or no longer closing completely. On many modern faucets, the cartridge is the likely culprit. Older or different designs may use other valve parts, so identify the faucet before buying a washer, cartridge, or repair kit.
| What you see | Likely direction | Next step |
|---|---|---|
| Continuous drip from spout | Cartridge or internal valve problem | Identify faucet and correct repair part |
| Brief dripping that stops | Residual water or temporary outlet issue | Observe before disassembling |
| Leak around handle | Different faucet leak | Diagnose the handle area separately |
| Leak at faucet base | Base seals or another issue | Use base-leak guidance |
| Water below sink | Supply, hose, connection, or other leak | Investigate the under-sink leak |
| Poor spray or low flow | Faucet head or flow issue | Do not replace a cartridge solely for this symptom |
First Confirm Where the Water Is Leaking
This article is specifically about water continuing to come from the faucet outlet after the faucet has been shut off.
Before taking anything apart, dry the faucet and sink and watch closely after turning the water off. Confirm that drops are forming at the end of the spout or spray wand.
Water around the handle is a different leak. Water collecting where the faucet meets the sink or countertop belongs to faucet-base troubleshooting. Moisture appearing below the sink may involve a hose, connection, supply line, or another plumbing component.
Those problems can occur at the same time as a dripping spout, but replacing a cartridge for the wrong symptom wastes time and may leave the actual leak untouched.
A clogged faucet head or aerator is also different. Restrictions at the outlet normally affect flow or spray performance rather than serving as the faucet’s main internal shutoff. Post #313 covers faucet-head cleaning and restoring flow.
If the water is appearing around the faucet body rather than dripping from the spout, see our guide to a faucet leaking at the base for the more likely causes.
Is a Few Seconds of Dripping Always a Problem?
Not necessarily.
Water already sitting in the spout, pull-down wand, or hose can sometimes drain after the valve has closed. A few drops that occur immediately after shutoff and then stop are different from a faucet that produces repeated drops indefinitely or resumes dripping after initially stopping.
Manufacturer troubleshooting also distinguishes temporary post-shutoff dripping from a continuous valve leak. The practical test is time: dry the outlet, turn the faucet off normally, and observe it.
If the dripping stops shortly and stays stopped, avoid assuming that the cartridge has failed. If drops continue repeatedly long after shutoff, an internal sealing problem becomes more likely.
Why Does a Kitchen Faucet Keep Dripping?
The exact cause depends on how the faucet controls water.
Worn or damaged cartridge
Many modern kitchen faucets use a replaceable cartridge or manufacturer-specific valve assembly beneath the handle. The cartridge controls water flow, and its internal seals must close properly when the handle moves to the off position.
Wear, a damaged sealing surface, or a failed internal seal can allow a small amount of water to pass after shutoff. Major manufacturers such as Moen and Kohler identify the cartridge or valve as a common cause of continuous dripping from the spout.
Debris or mineral material inside the valve
Small particles or mineral material can interfere with internal sealing surfaces. Instead of closing cleanly, the valve may allow water through a tiny gap.
That does not mean every dripping cartridge can simply be cleaned and reused. Some manufacturers provide model-specific flushing or cartridge-cleaning procedures, while others direct homeowners toward replacement.
Follow the repair procedure for the actual faucet rather than improvising a universal cartridge-cleaning method.
If mineral buildup is also affecting the faucet outlet or spray pattern, see how to clean a kitchen faucet head and restore normal flow.
Washer or seat problems on some faucet designs
Some older compression-style faucets use a rubber washer that presses against a valve seat to stop water. If the washer becomes worn, hardened, damaged, or fails to seat correctly, dripping can result.
Other two-handle faucets use stem assemblies, seats and springs, or ceramic-disc cartridges instead. A faucet having two handles does not automatically mean it uses traditional compression washers.
Damaged sealing or valve surfaces
A replacement cartridge, washer, seat, or other valve component has to seal against another surface inside the faucet.
If that mating surface is damaged, badly worn, contaminated, or corroded, installing one new part may not stop the drip. This is one reason repeated parts replacement without identifying the faucet can become frustrating.
Do not grind, cut, or aggressively resurface an unknown faucet’s internal valve surfaces. Manufacturer-specific service or professional repair is a better next step when the sealing area itself appears damaged.
Identify the Faucet Before Buying Parts
There is no universal kitchen-faucet cartridge.
Even within one manufacturer’s product line, different models can use different cartridges, stems, seats, springs, retainers, clips, and installation orientations. Moen, for example, states that its kitchen faucet cartridges are not all interchangeable. Delta likewise lists different repair components for different faucet families.
Start with the manufacturer name or logo on the faucet. Then look for:
- A model number on paperwork, packaging, or purchase records
- An identifying tag on accessible faucet components or supply tubing
- The original installation or parts sheet
- The manufacturer’s online faucet-identification tool
- A parts diagram for the matching model
If you cannot identify the faucet, take clear photographs showing the entire faucet, handles, and other distinguishing features. Several manufacturers offer identification help using product descriptions or photographs.
Do not buy a cartridge because it looks approximately the same as the old one. Small differences in dimensions, tabs, seals, or orientation can make a part incompatible.
Cartridge, Ceramic Disc, or Compression: Why It Matters
“Cartridge faucet” covers several designs.
Many single-handle kitchen faucets use one cartridge that controls both volume and temperature. Two-handle faucets may use separate hot and cold cartridges or stem assemblies.
A ceramic-disc valve uses hard ceramic sealing surfaces within its valve or cartridge design. American Standard, for example, sells two-handle kitchen and bath replacement cartridges specifically identified as ceramic-disc valve cartridges.
Traditional compression mechanisms operate differently and may rely on a washer pressing against a seat.
You do not need to become an expert in faucet mechanisms before repairing a drip. You do need to identify which mechanism your faucet actually contains, because the correct replacement part and disassembly procedure depend on it.
Shut Off the Water Before Internal Faucet Work
Internal faucet repair requires shutting off the water first.
Close both hot and cold supply valves serving the faucet. Then open the faucet and confirm that water flow stops. This verifies the shutoff and releases remaining pressure before internal components are opened.
Protect the sink drain with a stopper or cloth so screws, clips, and other small parts cannot fall into it.
Do not force a shutoff valve that will not move normally. Stop if a valve begins leaking when operated, appears severely corroded, or will not actually stop the water.
A defective supply shutoff is a separate plumbing issue. Do not begin cartridge removal with the faucet still pressurized, and do not turn this repair into a supply-valve replacement project.
Safe Repair Framework for Kitchen Faucet Dripping
Exact disassembly varies by faucet. Use this sequence to organize the repair while following the manufacturer’s model-specific instructions for accessing the internal parts.
- Confirm the spout is actually dripping. Dry the faucet and verify that water continues forming at the outlet after shutoff rather than leaking from the handle, base, or under-sink plumbing.
- Identify the faucet. Determine the manufacturer, model or product family, and valve mechanism before purchasing repair parts.
- Get the correct repair component. Use the manufacturer’s parts diagram or support guidance to match the cartridge, stem, washer, seats and springs, or other specified component to the faucet.
- Shut off both water supplies. Close the hot and cold valves beneath the sink. Open the faucet and confirm that flow has stopped before proceeding.
- Protect the drain and work area. Cover the drain so small parts cannot disappear into it, and place removed components where their order and orientation can be tracked.
- Follow the model-specific access procedure. Faucets use different handles, screws, caps, clips, retainers, and bonnet nuts. Do not substitute generic cartridge-removal instructions for the manufacturer’s procedure.
- Inspect accessible parts. Look for obviously damaged seals, wear, debris, mineral material, or another condition identified in the manufacturer’s troubleshooting guidance. Do not scrape precision sealing surfaces with sharp tools.
- Install the specified replacement part. Follow the required orientation and assembly instructions. Some cartridges or stem assemblies must face a particular direction to operate correctly.
- Reassemble without unnecessary force. Return clips, retainers, handles, and other components to their specified positions. Avoid overtightening threaded or decorative parts.
- Restore water and test. Turn the supplies back on gradually, operate the faucet, and inspect it. Confirm that the spout stops dripping and that no new leak has appeared around the handle, faucet body, or below the sink.
Why a New Cartridge May Not Stop the Drip
A cartridge replacement solves many shutoff leaks, but not every one.
The replacement may be wrong for the faucet, installed in the wrong orientation, or not seated correctly. Debris may remain in the valve body, or another manufacturer-specific seal or component may be worn.
Delta’s support material, for example, includes cases where debris can prevent a cartridge from sealing properly even after replacement. Other faucet families may use separate seats, springs, stems, gaskets, or valve components.
If you have confirmed the model, installed the specified part correctly, and the faucet still drips, avoid repeatedly buying cartridges without reconsidering the diagnosis.
The internal faucet body or sealing surface may also be damaged. At that point, manufacturer support or a plumber can help determine whether another repair is appropriate.
When Replacing the Faucet May Make More Sense
Repair is often worthwhile when the correct cartridge or sealing component is available, and the faucet body remains in good condition.
Replacement becomes more reasonable when the correct parts are unavailable, several internal components are deteriorated, the faucet body is cracked or badly corroded, or previous correct repairs have not lasted.
Cost and convenience also matter. An older faucet that requires difficult-to-find parts and repeated internal work may not be worth another repair.
This does not mean a dripping cartridge automatically requires a new faucet. Make the decision after identifying the actual faucet and checking whether its normal repair parts are still available.
Common Mistakes
Avoid creating a second problem while fixing the first.
- Buying a cartridge before identifying the faucet
- Assuming every two-handle faucet uses rubber washers
- Forcing a corroded or leaking supply shutoff valve
- Losing screws, clips, or other small parts down the drain
- Installing a cartridge or stem in the wrong orientation
- Overtightening retainers or decorative components
- Using generic disassembly instructions for a different faucet
- Replacing the aerator to solve a continuous internal shutoff leak
- Overlooking water that is actually leaking from the base or below the sink
When to Call a Plumber
A cartridge or other model-specific valve repair can be reasonable DIY work for a homeowner comfortable with basic hand tools and careful disassembly.
Call a plumber when:
- The hot or cold shutoff valve will not close properly
- A shutoff valve leaks when you operate it
- The faucet cannot be identified well enough to match repair parts
- Internal components are heavily corroded, seized, or visibly damaged
- The specified repair does not stop the drip
- A new leak develops somewhere other than the outlet
- The faucet body appears cracked or damaged
- Repair would require work on supply plumbing or concealed piping
- You are uncomfortable disassembling the faucet’s internal valve
Stopping before questionable shutoff or plumbing work is preferable to turning a small spout drip into an uncontrolled leak.
If you also find water below the sink cabinet, use our guide to water leaking under a kitchen sink to help identify whether the problem is coming from the faucet, supply connections, drain, or another source.
Frequently Asked Questions
Why is my kitchen faucet dripping after I turn it off?
A continuous kitchen faucet dripping from the outlet after shutoff commonly points to a cartridge, internal seal, washer, seat, or other valve component that is worn, damaged, contaminated, or not sealing completely. The correct part depends on the faucet design.
Does a dripping faucet always need a new cartridge?
No. Some faucets do not use the type of cartridge you may be expecting, and debris or another sealing component can sometimes cause the symptom. Identify the faucet and follow its manufacturer-specific troubleshooting before ordering a part.
Can mineral buildup make a faucet drip?
Mineral material or debris can interfere with internal valve sealing on some faucets. Whether cleaning, flushing, or replacement is appropriate depends on the faucet. Do not assume that cleaning the faucet head will correct an internal shutoff leak.
Can I replace a kitchen faucet cartridge myself?
Often, yes, if the supplies shut off properly, you can identify the correct part, and the manufacturer’s procedure is straightforward. Stop if the shutoffs leak, parts are seized, the faucet body is damaged, or the required work extends into the supply plumbing.
Why does my faucet still drip after replacing the cartridge?
Possible reasons include the wrong cartridge, incorrect orientation, debris preventing a proper seal, another worn valve component, or damage to an internal sealing surface. Recheck the model-specific instructions rather than automatically installing another cartridge.
Final Thoughts
A kitchen faucet dripping continuously from the outlet usually points toward an internal valve or sealing problem, but the correct repair depends on the faucet. First confirm where the water is coming from, identify the manufacturer and valve mechanism, and obtain the specified replacement component.
Shut off both water supplies and verify that the faucet is depressurized before internal work. Do not force questionable shutoff valves or rely on a universal cartridge-removal procedure. If the correct repair does not stop the drip or another leak develops, professional service is the appropriate next step.