
how to clean a shower head
How to clean a shower head safely starts with identifying the exact model and finish, then using the gentlest manufacturer-approved method that will remove the buildup. For routine care, that often means wiping the exterior with a soft cloth and cleaning permitted flexible nozzles by hand. Mineral deposits may need a separate descaling method, but vinegar, citric acid, commercial descalers, and soaking are not universally safe.
Before using any cleaner, check the shower head’s care instructions. A method that is acceptable for one manufacturer or finish can damage another.
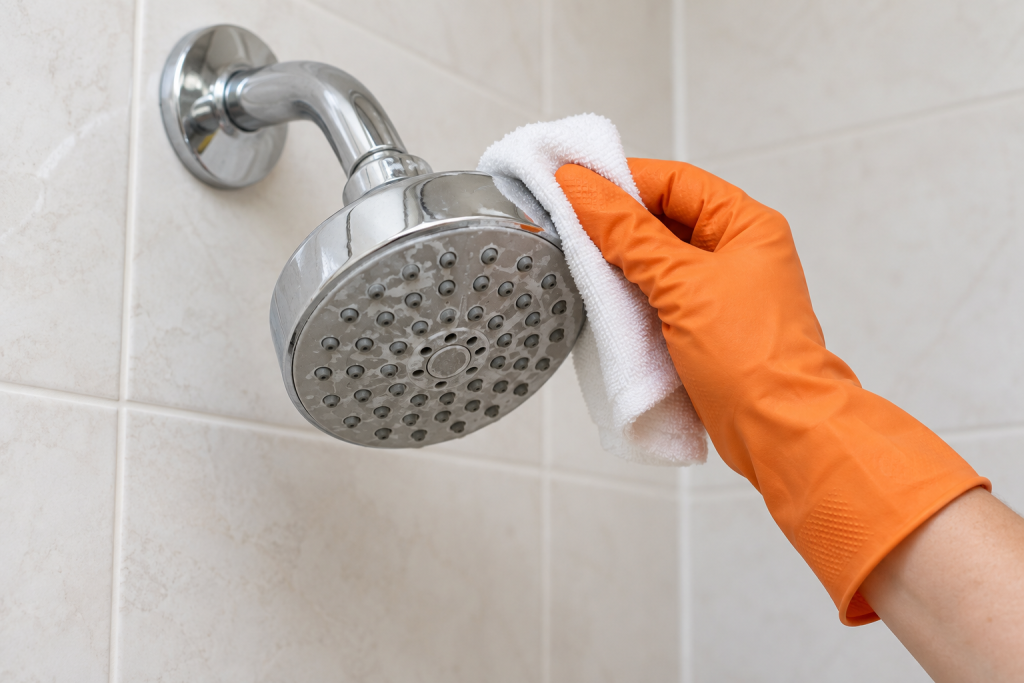
Check the Shower Head Before You Clean It
First, decide whether you are dealing with ordinary surface dirt, mineral deposits around the spray openings, or a problem that cleaning may not solve.
White, chalky deposits around nozzles or on the face are commonly associated with minerals left behind as water evaporates. A few jets spraying sideways or unevenly can also occur when deposits collect around permitted flexible nozzles.
Routine exterior cleaning and mineral removal are different jobs. A manufacturer may approve mild soap and water for routine care but specify a particular descaling product, concentration, contact time, or technique for mineral deposits.
Look for the model number in the original documentation, packaging, purchase record, or manufacturer product information. Pay attention to the finish as well. Polished chrome, matte black, brushed finishes, plated surfaces, painted finishes, and specialty coatings may have different restrictions.
Do not assume a spot test makes a prohibited cleaner acceptable. Testing an inconspicuous area can reveal an unexpected reaction, but it does not override the manufacturer’s instructions.
Also inspect the installation before cleaning. Stop if the shower arm moves where it enters the wall, the connection appears cracked or badly corroded, or leakage seems to originate behind the wall. Do not pull on the arm to steady yourself or use the shower head as a handhold.
If you cannot comfortably reach the fixture from a dry, stable surface, use suitable stable access rather than standing on a shower curb, chair, or slippery tub surface.
Supplies and a Finish-Safe Cleaning Method
For ordinary cleaning, you may need only:
- A soft, clean cloth
- A second cloth for drying
- Warm water
- A mild detergent if the manufacturer permits it
- Gloves when required by the cleaner label
- The shower head’s care or installation instructions
For mineral removal, use only a cleaner and method approved for the exact product or finish. Do not substitute vinegar because it is commonly recommended online, or citric acid because another brand permits it.
Manufacturer instructions differ substantially. Some shower heads permit diluted white vinegar for mineral deposits. Other manufacturers specifically prohibit acetic acid, which is the acid in vinegar, and instead recommend a compatible citric-acid product. Some instructions also limit how long a cleaner can remain in contact with the fixture.
Avoid abrasive pads, scouring powders, stiff brushes, metal tools, and aggressive polishing unless the product documentation specifically permits them. These can scratch or dull decorative surfaces.
Never mix cleaning products. In particular, never mix bleach with vinegar or another acid, and never mix bleach with ammonia. Do not combine drain cleaners with other cleaning products. If changing from one cleaner to another, follow both product labels for rinsing, ventilation, and separation rather than applying a second chemical over residue from the first.
Protect nearby natural stone, grout, metal trim, and other surfaces from cleaner drips or overspray. A cleaner that is safe for the shower head may not be suitable for everything underneath it.
Routine cleaning and descaling remove dirt and mineral buildup; they do not necessarily disinfect or sterilize the shower head.
How to clean a shower head step by step
- Identify the model, finish, and approved care method. Read the manufacturer’s current cleaning instructions before applying anything beyond water. Confirm whether the directions distinguish between routine surface cleaning and mineral removal, and note any prohibited acids, bleach products, abrasives, soaking methods, or maximum contact times.
- Make the area safe to work in. Turn the shower off, let hot surfaces cool, and make sure your footing is dry and stable. Move bottles and other trip hazards out of the way. If cleaner could drip onto stone, metal, grout, a tub surface, or another material with different care requirements, protect that area before you begin.
- Wipe the exterior gently. Start with a soft cloth dampened with warm water. If the manufacturer allows mild detergent, use it according to the product directions rather than assuming a stronger cleaner will work better. Wipe without aggressive scrubbing, then rinse or wipe away the cleaner as directed. Drying the surface afterward can reduce the water droplets that leave additional spots as they evaporate.
- Clean flexible spray nozzles only when permitted. Some shower heads use flexible silicone or rubber-like nozzles designed so mineral deposits can be loosened by rubbing them with a finger or soft cloth. If your manufacturer specifically describes this feature, gently work across the nozzle face without pulling, cutting, or stretching the nozzles. Do not poke needles, drill bits, pins, wire, or other objects into the spray openings.
- Use an approved mineral-removal method if buildup remains. If ordinary wiping and permitted nozzle cleaning do not remove the deposits, follow the manufacturer’s descaling instructions for your specific shower head and finish. Use only the approved cleaner, dilution, application technique, and contact time. Do not extend the exposure because the deposits are stubborn, and do not convert a wipe-on instruction into a prolonged soak.
- Rinse away cleaner thoroughly. Follow the fixture manufacturer’s directions and the cleaner label for rinsing. Pay attention to seams and spray openings where residue can remain. If you plan to use a different cleaning product afterward, do not layer it over the first one; complete the required rinsing and separation steps before introducing another chemical.
- Run the shower and inspect the spray. Once all cleaner has been removed, run the shower normally. Look for jets that have returned to their usual direction and pattern, and check accessible connections for new drips. Cleaning can improve spray that was obstructed by deposits, but it does not increase the water pressure supplied by the home’s plumbing.
- Dry the accessible exterior and stop if something looks wrong. Wipe the exterior dry if that is compatible with the finish. Stop rather than forcing anything if the connection starts moving, a component appears damaged, or water is emerging from the wall opening. Cleaning should not require loosening a seized fitting or disturbing concealed plumbing.
When Descaling or Removing the Shower Head Makes Sense
A deeper mineral-removal treatment may be appropriate when the care instructions specifically recommend it and surface cleaning has not cleared the deposits.
This does not mean every shower head should be soaked. Avoid treating the familiar vinegar-filled plastic bag as a universal solution. In addition to possible finish or material incompatibility, suspending a liquid-filled bag from an installed fixture adds weight to the shower head and arm.
If a manufacturer approves soaking, follow its directions about which portion of the fixture may be immersed, which cleaner is permitted, and how long the treatment may remain in contact.
Some shower-head manuals identify an inlet screen or screen washer as a homeowner-serviceable item. Clean one only when the instructions for your exact model identify it as removable and explain how it is serviced. A screen is not the same thing as a flow restrictor or pressure compensator.
Never remove, drill, enlarge, bypass, or modify a flow control, pressure-compensating component, or backflow device to change the spray. Preserve washers, seals, screens, and other factory components according to the product instructions.
If approved cleaning requires removing the shower head, follow the manufacturer’s removal and reinstallation instructions. Washer, sealant, and tightening requirements vary by connection. See How to Replace a Shower Head for guidance on handling an accessible threaded connection. Stop if the fitting is seized or damaged, or the arm moves at the wall.
If approved cleaning requires removal, our guide on how to replace a shower head explains how to handle a straightforward threaded connection and when to stop.
What If the Spray Is Still Uneven?
Cleaning is successful when deposits are removed without damaging the fixture and the spray returns to its normal pattern. If the spray remains uneven, do not keep escalating to harsher chemicals or mechanical scraping.
Recheck the model instructions for any manufacturer-approved maintenance that you have not completed. If the manual identifies a serviceable inlet screen, that may be worth checking according to those specific directions.
Persistent weak flow is different from a few obstructed spray openings. If the shower remains broadly weak after appropriate cleaning, or other fixtures are also affected, the problem may lie outside the shower head. Cleaning is not a substitute for plumbing-pressure or supply diagnosis.
Replacement may also become reasonable if the head is physically damaged, its permitted cleaning method no longer restores normal operation, or a required service part is no longer practical to obtain. The replacement procedure itself is a separate task.
How Often Should You Clean a Shower Head?
There is no single cleaning interval that fits every shower head and home. Base the schedule on the fixture manufacturer’s guidance and what you actually observe.
Clean sooner when:
- Mineral spots or crust begin appearing on the spray face.
- Flexible nozzles develop visible deposits.
- Individual jets start spraying at odd angles.
- Your water leaves mineral deposits quickly on nearby fixtures.
- The manufacturer calls for particular recurring care.
Between deeper cleanings, gentle routine wiping may slow visible buildup. Drying accessible surfaces after use can also reduce water spotting when the finish instructions permit it.
Homes with harder water may need attention more often than homes where deposits accumulate slowly. The useful trigger is the condition of the fixture, not an arbitrary calendar date.
Use our bathroom cleaning checklist to include shower-head care in your broader bathroom maintenance routine.
Frequently Asked Questions
Can I use vinegar to clean every shower head?
No. Vinegar is permitted by some shower-head manufacturers but prohibited by others because its acetic acid can damage certain materials or finishes. Check the care instructions for the exact model and finish before using it. Do not assume a diluted solution or brief spot test makes vinegar acceptable when the manufacturer says not to use it.
Can I soak a shower head overnight?
Do not use overnight soaking as a general cleaning method. If a manufacturer approves soaking, follow its specified cleaner, concentration, immersion method, and contact time. Extending the treatment beyond the instructions can expose finishes, plastics, seals, and internal parts to a chemical longer than intended.
Does cleaning a shower head improve water pressure?
Cleaning may restore spray openings that were partially obstructed by mineral deposits, so the shower can feel more normal afterward. It does not raise the water pressure supplied by the plumbing. If weak flow persists after appropriate cleaning or affects several fixtures, the cause may require separate assessment.
Final Thoughts
Learning how to clean a shower head is less about finding the strongest descaler and more about matching the cleaning method to the fixture. Start with the exact manufacturer and finish instructions, use gentle routine cleaning first, and move to mineral removal only when the approved care guidance supports it.
Once the head is rinsed, check that the spray is even and the connections remain dry and stable. If proper cleaning does not restore normal operation, avoid increasingly aggressive chemicals or modifications and consider whether maintenance has reached its practical limit.