
how to replace a shower head
Learning how to replace shower head fittings starts with checking the existing arm and the new head’s connection. For a conventional replacement, turn the shower fully off, remove the old head without twisting the arm, prepare the exposed connection exactly as the new head requires, install the head without overtightening, and check for leaks. This guide covers the shower head only—the existing arm and its connection inside the wall must remain sound and stable.
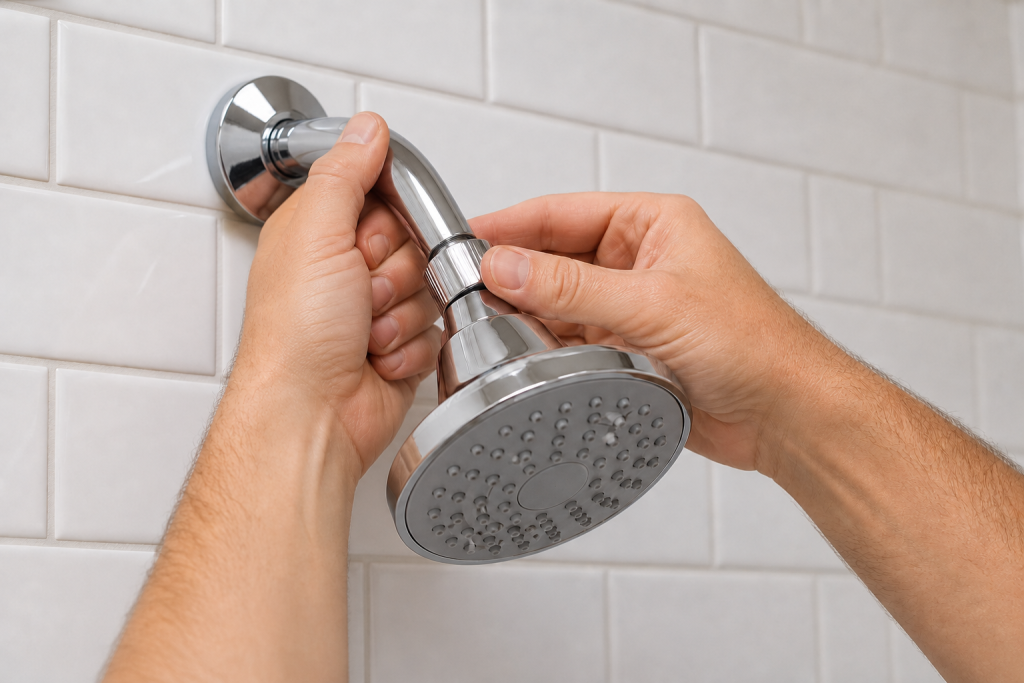
Confirm This Is a Straightforward Shower Head Replacement
A conventional shower head threads onto the exposed shower arm coming from the wall. Replacing that removable head can be a reasonable beginner project when the arm itself is secure and undamaged.
Before removing anything, read the new product’s installation instructions and account for all included parts. Depending on the design, the connection may use thread-seal tape, an internal washer or gasket, a filter screen, or a combination specified by the manufacturer.
Do not assume the new head fits simply because both products are described as shower heads. Verify the connection specified for the new product against the existing shower arm. Proprietary, concealed, ceiling-mounted, integrated, or specialty shower systems can require a different installation.
Inspect the exposed arm and the area where it enters the wall. Stop if you find:
- An arm that moves noticeably when gently handled.
- Damaged, severely corroded, or badly deformed threads.
- Active leakage where the arm enters the wall.
- Heavy corrosion that makes the connection questionable.
- A shower head that will not loosen without substantial force.
- A proprietary connection that does not match the new head.
- Signs that the concealed fitting moves with the shower arm.
A stuck shower head is not permission to apply greater leverage. Twisting the shower arm can loosen or damage the concealed connection behind the wall, turning a simple replacement into a plumbing repair.
If you are still choosing a replacement, our guide to types of shower heads explains the differences between fixed, handheld, rain, and combination designs.
Tools and Supplies
Have the new product and its instructions in front of you before starting. Typical supplies include:
- A compatible fixed shower head or handheld kit.
- Any manufacturer-supplied washers, gaskets, screens, adapters, or backflow components.
- Soft cloths for wiping parts and protecting finishes.
- A towel or protective covering for the shower base and drain area.
- An adjustable wrench or other tool only when the product instructions permit it.
- Thread-seal tape only where the particular connection requires or permits it.
A cloth between a tool and a finished fitting may reduce scratching, but it does not make aggressive gripping or overtightening safe. Some shower heads are designed for hand tightening, while others allow limited tool use.
Do not use the shower arm, door, grab handle that is not designed for support, or enclosure as something to pull against while working. Use stable footing and safe reach instead of standing on a shower curb, chair, or slippery surface.
Turn the Water Off Appropriately
For the conventional head-only replacement covered here, place the shower control fully in its off position before opening the shower-head connection. A normally functioning shower valve stops active flow to the shower arm, so a whole-house shutdown is not normally part of this limited head swap.
Allow the head to drain before removing it. Stand to the side rather than directly beneath the connection because residual water can remain in the head and arm.
If water continues flowing after the shower control is fully off, do not proceed as though the pipe is depressurized. Isolate the appropriate water supply before opening the connection or have the valve problem addressed.
A dripping head that releases a small amount of trapped water immediately after shutoff is different from continuing water flow. Persistent flow is a valve issue and is outside this shower-head replacement procedure.
How to Replace Shower Head Connections Step by Step
- Prepare the shower and turn the control fully off. Place a towel or other non-slip protective covering where it can cushion a dropped tool without creating a tripping or slipping hazard, and cover the drain so small parts cannot fall into it. Confirm that water has stopped flowing and let the existing head drain before working beneath it.
- Keep the existing shower arm stable. Identify the point where the old head connects to the exposed arm and position yourself so you can work without pulling downward on the pipe. If removal requires a tool, follow the product or fixture guidance and keep the arm from rotating; if the arm begins moving at the wall, stop rather than trying to overpower the connection.
- Remove the old shower head. Try turning the head or its connecting nut counterclockwise by hand first. When permitted, a wrench may be used on an appropriate metal fitting with reasonable finish protection, but do not use heat, extreme leverage, or chemical soaking around unknown finishes to free a seized head. If safe force does not loosen it, stop and have the connection assessed.
- Inspect and gently clean the exposed connection. Remove loose remnants of old thread-seal tape when the previous installation used it, and wipe away accessible debris without filing, reshaping, or aggressively brushing the threads. Check again for corrosion, cracks, deformation, or movement at the wall. If an old washer has remained inside the connection where it does not belong, remove it using the new product’s instructions rather than stacking another seal on top of it.
- Identify how the new connection seals. Read the new shower head instructions before adding tape or a washer. Some products seal at the shower-arm threads and call for thread-seal tape, while others rely on a washer or gasket compressed inside the fitting. Manufacturer instructions can even prohibit tape on certain plastic connections, so do not automatically wrap every threaded joint.
- Start the new shower head by hand. Align the fitting squarely with the shower-arm threads and turn it gently in the installation direction, making sure it threads smoothly instead of binding. If it immediately feels crooked or unusually tight, back it off and start again rather than forcing crossed threads. Tighten only as the manufacturer directs, and stop if the shower arm begins to turn.
- Install handheld components separately when applicable. If the new assembly includes a bracket, diverter, hose, or handheld head, install each connection according to its own sealing method. Place supplied hose washers or screens in the locations shown in the instructions, orient a hose with a vacuum breaker or other directional component as specified, and hand-tighten washer-sealed hose fittings when that is what the manufacturer requires.
- Restore flow gradually and inspect every accessible connection. Stand outside the direct spray path, turn the shower on gradually, and watch the shower-arm-to-head connection as well as any adapter and hose connections. Check for a steady spray, proper operation, and visible leakage. Do not use your face or hand directly under an uncertain connection while first pressurizing the assembly.
- Correct a minor accessible leak only according to the sealing method. Turn the shower off before reopening any connection. If a washer-sealed hose joint leaks, verify that the correct undamaged washer is properly seated rather than adding thread tape or repeatedly tightening it. If a thread-sealed head connection leaks, follow that product’s directions for reseating the fitting or renewing its specified seal. Stop for crossed threads, cracked components, damaged seals, arm movement, or leakage at the wall.
Handheld Shower Kits Have Additional Connections
A handheld kit that mounts to the existing shower arm may replace the fixed head with a bracket or adapter, then add a flexible hose and handheld sprayer. That creates several connections instead of one.
Treat those connections individually.
For example, current Moen handshower guidance shows why there is no universal tape rule. For one bracket arrangement, Moen specifies thread-seal tape when the bracket connected to the shower arm is metal but says tape is not needed when that bracket is nonmetallic. Washers are placed at the hose connections, and those hose-to-bracket and hose-to-handshower joints are not treated as though they seal the same way as the shower-arm connection.
Waterpik provides another example. Its current ShowerCare handheld instructions specify a washer and filter screen at the pivot-ball assembly, hand-tightened hose connections, and no pipe tape for that particular installation. Other Waterpik designs use different instructions, including tape on certain metal pivot-ball connections.
Some handheld hoses also include a vacuum breaker or another backflow-protection component. If supplied, keep it in its required location and orientation. Do not remove it to improve flow.
Make sure the hose hangs naturally without twisting and that the existing shower arm is not being asked to support unintended loads. Installing a separate drilled slide bar or new water supply is outside this guide.
What to Do if the New Shower Head Leaks
The location of the leak helps determine your next step.
At the accessible head-to-arm connection: Turn the shower off, then check the sealing method. A thread-sealed connection may need to be removed and resealed according to the head instructions. A gasket-sealed design may need the correct gasket seated properly.
At a handheld hose connection: Check the supplied washer, gasket, hose orientation, and instructions. Do not automatically add thread-seal tape to a joint intended to seal against a washer.
At a cracked fitting or crossed thread: Stop. More tightening can make the damage worse. Replace the damaged compatible part or get appropriate help.
Where the shower arm enters the wall: Stop using the shower and have the connection assessed. Do not attempt to tighten a concealed fitting by rotating the exposed arm.
Water continues after the shower is shut off: A small amount of residual draining can be normal immediately after use, but persistent flow is not a shower-head installation problem. Keep valve diagnosis outside this project.
If you need to disassemble an accessible connection for correction, turn the shower off first and confirm flow has stopped.
Common Shower Head Replacement Mistakes
- Buying without verifying the connection. Match the new product’s documented connection requirements to the existing arm.
- Letting the shower arm rotate. Movement can disturb the concealed plumbing connection.
- Adding thread tape everywhere. Washer-sealed and thread-sealed fittings are not interchangeable.
- Leaving out washers or screens. Supplied components may be necessary for sealing, filtration, or proper operation.
- Cross-threading the fitting. Start threaded connections gently by hand.
- Overtightening to chase a leak. Identify why the joint leaks before applying more force.
- Removing flow-control or backflow components. Leave manufacturer-supplied flow restrictors, vacuum breakers, and related parts intact.
- Ignoring a leak after testing. Correct an accessible installation issue or stop if it points to damaged or concealed plumbing.
If uneven spray is your only reason for replacing an otherwise sound fixture, first check our guide on how to clean a shower head using a manufacturer-approved method.
FAQs
Do you need to shut off the main water supply to replace a shower head?
Usually not for the limited head-only replacement described here when the shower valve functions normally and fully stops water flow. Turn the shower completely off and allow residual water to drain. If water continues flowing, isolate the appropriate supply before opening the connection or get plumbing help.
Does every shower head need thread-seal tape?
No. Some shower heads call for tape at the shower-arm threads, while other designs seal with a washer or specifically prohibit tape on certain connections. Waterpik, for example, warns that tape on some plastic pivot balls can increase the connection diameter enough to damage the part. Follow the instructions for the exact product.
What should you do if the old shower head will not loosen?
Stop before using enough force to rotate the shower arm or concealed plumbing. A manufacturer may permit an adjustable wrench on an appropriate fitting, but heat, extreme leverage, and improvised chemical treatments can damage finishes or plumbing. If reasonable removal methods fail, have the connection removed professionally.
Final Thoughts
Learning how to replace shower head fittings is mostly about protecting the connection you are not replacing. Confirm compatibility, keep the existing shower arm stable, use the sealing method specified for the new head, and do not confuse washer-sealed hose joints with thread-sealed pipe connections.
After installation, test each accessible joint and correct minor leaks according to the product instructions. If the shower arm moves, water leaks at the wall, threads are damaged, or the old head cannot be removed safely, stop before a simple upgrade becomes a concealed plumbing repair.