
how to clean shower grout and remove buildup
To learn how to clean shower grout without damaging it, start with a cleaner that is compatible with the grout, adjoining tile, any sealer, and nearby finishes. Work in small sections, give the cleaner only its permitted working time, gently agitate the joints with an approved nonabrasive tool, then remove the dirty solution completely. Let the grout dry before judging the result because persistent darkening or discoloration is not always removable dirt.
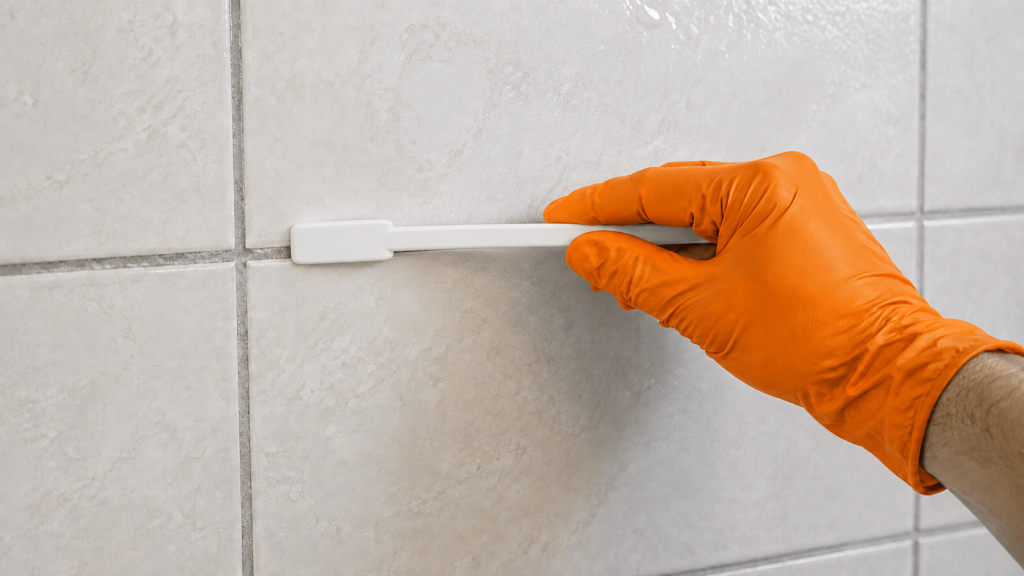
Identify the Grout and Check Its Condition
Before choosing a cleaner, determine what type of grout you have, if possible.
- Cement-based grout is made with cement and may have been treated with a penetrating sealer.
- Epoxy grout uses epoxy resins and generally has different stain resistance and maintenance requirements from cement grout.
- Premixed or single-component grout is a broad category. Different products use different formulations, so their cleaning and sealing requirements are not interchangeable.
Check installation records, leftover packaging, receipts, or information from the installer or grout manufacturer. Grout type and sealer status cannot always be identified reliably by appearance alone.
Also make sure you are looking at grout. Flexible sealant is commonly used instead of grout at inside corners, where walls meet the shower floor, and at other changes of plane. Do not scrub those flexible joints as though they were cement grout.
Inspect the joints before cleaning. Stop if you find crumbling or missing grout, widening cracks, loose tile, or material that feels soft around the installation. Harder scrubbing will not correct physical deterioration.
If the grout was installed recently, follow its specific curing and initial-cleaning instructions. A routine maintenance method intended for fully cured grout may be inappropriate for new grout.
Work Out What Needs Cleaning
The appearance of a grout joint can suggest the next step, but it does not always reveal the cause.
| What you see | Possible issue | Best next move |
|---|---|---|
| Light film or general dinginess | Ordinary dirt or residue | Start with routine cleaning |
| Slick, cloudy, or greasy-looking film | Soap or body-product buildup | Clean routinely, then reassess |
| Chalky or crusty deposits | Possible minerals | Identify compatible targeted treatment |
| Uneven or stubborn color | Staining, original color variation, or residue | Let dry and compare before escalating |
| Dark spotting or patches | Possible surface mold or staining | Do not diagnose by appearance alone |
| Cracks, gaps, crumbling | Physical deterioration | Stop cleaning and have it assessed |
Grout often looks darker while wet, particularly when it absorbs some water. Darkening during a shower is not by itself proof of mold or failure. Judge the color after the area has had an appropriate chance to dry.
Persistent unexplained dampness is different. If sections remain wet-looking while comparable areas dry, or discoloration repeatedly returns with other moisture symptoms, investigate the moisture source rather than repeatedly applying stronger cleaner.
If you suspect visible surface mold, see our guide to removing mold from shower surfaces safely, including when to stop and seek help.
Choose Compatible Supplies
Gather only what the grout and surrounding surfaces can tolerate:
- A routine cleaner approved for the grout, tile, and any existing sealer.
- A soft nylon grout brush or another manufacturer-permitted nonabrasive tool.
- Soft, clean cloths or sponges.
- Clean rinse water and a suitable way to remove it.
- Gloves, eye protection, or other protective equipment required by the cleaner label.
A small brush can focus cleaning on grout joints without scrubbing the entire tile face. Avoid wire brushes, metal tools, very stiff bristles, and excessive pressure because aggressive abrasion can roughen grout or damage neighboring finishes.
Consider where the cleaner will run. A product that is acceptable on one grout joint may still be unsuitable for a natural-stone accent, metal trim, flexible sealant, shower base, or another material below it.
One example shows why grout identification matters: for routine maintenance of PERMACOLOR Select cement-based grout, its manufacturer specifies a clear, pH-neutral cleaner such as its Stone & Tile Cleaner. That is a useful model for gentle routine cleaning of that particular grout system, not a universal approval for every cement, epoxy, or premixed grout installation.
Never mix cleaning products. Never mix bleach with ammonia or acids, including vinegar. Never mix drain cleaners with other products. Follow the cleaner label for ventilation and protective equipment, and keep cleaning water away from outlets and electrical equipment.
Do not apply a second cleaner over residue from the first. Follow both products’ directions for safe sequential use. If the directions do not clearly establish that switching products is safe, do not combine the treatments on that surface.
A hidden-area test can reveal an unexpected appearance change, but it does not override a manufacturer’s restriction against using a product on a particular material.
How to Clean Shower Grout
- Ventilate and inspect the work area. Turn on appropriate bathroom ventilation or provide fresh air as required by the cleaner label, read the complete directions before opening the product, and check again for cracked, loose, missing, or crumbling grout. Keep stable footing throughout the job, and do not stand on a shower curb, chair, or slippery surface to reach high joints.
- Remove loose debris and accessories. Move bottles, mats, and other removable items away from the section you are cleaning, then remove loose hair and surface debris so the cleaner can contact the grout instead of mixing with material that can be wiped away first. Do not dismantle drains, plumbing fixtures, tile, or other shower components for routine grout cleaning.
- Prepare the surface as directed. Some cleaners are used on a dry surface while others require the area to be dampened first, so follow the product directions rather than automatically wetting the grout. Protect or avoid adjacent materials that are excluded by the cleaner instructions, especially natural stone, metal, flexible sealant, and specialty finishes.
- Apply cleaner to a small section. Treat an area small enough to finish completely within the product’s permitted working time. Focus the cleaner where it is needed instead of flooding the enclosure, and control runoff so it does not sit on incompatible materials.
- Allow only the permitted working time. Give the cleaner the contact or dwell period specified for that product, but do not extend the time in an attempt to improve results. Do not let the cleaner dry on the surface unless its instructions explicitly permit that, and do not leave one section soaking while you work around the rest of the shower.
- Gently agitate the grout. Use the approved soft nylon brush or another permitted nonabrasive tool with moderate pressure. Work along the grout joint rather than attacking it with hard repeated strokes, and stop if the surface begins to erode, shed particles, noticeably change color, or otherwise deteriorate.
- Remove the dirty cleaner and residue. Wipe, rinse, or otherwise remove the cleaning solution exactly as directed, using clean cloths, sponges, tools, and rinse water as needed. Avoid merely moving dirty liquid from one grout joint to the next; replacing dirty rinse water and using a clean wiping surface helps remove soil instead of redistributing it.
- Let the grout dry and reassess it. After the required residue removal, allow the cleaned section to dry appropriately before deciding whether it needs more work. Compare it with nearby grout, remembering that the original grout may be colored or permanently stained and that successful cleaning does not necessarily mean making every joint white.
When Routine Cleaning Leaves Buildup Behind
First make sure the apparent buildup is not cleaner residue. An incomplete rinse or wipe can leave a film that makes the surface look dull or dirty.
If the routine-cleaner instructions permit another application, repeating the same compatible process may be safer than immediately moving to a stronger chemical. Continue working in manageable sections and stop if the grout or surrounding finish begins to change.
For deposits that remain, identify the likely material before choosing a targeted cleaner. Mineral deposits, heavy soap residue, staining, and suspected mold are different problems and may require different products.
Acidic mineral-deposit removers deserve particular caution. Acids can etch materials such as marble, limestone, and travertine, and repeated acidic cleaning can discolor or weaken some cement-based grout. A specialty acidic cleaner may be appropriate for a particular acid-resistant installation when its directions specifically allow it, but it is not a universal shower-grout treatment.
Do not substitute a general vinegar, baking soda, peroxide, bleach, abrasive powder, or solvent recipe for verified compatibility. A homemade mixture can introduce chemical interactions or expose grout, sealers, stone, metals, and other finishes to something their manufacturers did not approve.
If the remaining material appears to be heavy soap scum or suspected mold, address that specific problem rather than repeatedly escalating the grout-cleaning process.
Avoid Common Grout-Cleaning Mistakes
- Using toilet-bowl cleaner on grout. Strong acidic or other aggressive formulations may damage grout and nearby surfaces.
- Mixing cleaners or layering them over residue. Chemical combinations can create dangerous reactions or damage finishes.
- Scrubbing with wire brushes or aggressive tools. More abrasion does not necessarily mean better cleaning.
- Assuming bleach restores grout color. Discoloration may be permanent, intentional, or connected to a moisture issue that cleaning cannot solve.
- Treating sealer as chemical-proof protection. A sealer can change absorption or stain resistance without making the grout immune to incompatible cleaners.
- Using pressure washers or assuming steam is safe. Do not use either unless the manufacturers of the complete installation explicitly permit the method.
Prevention, Sealing, and When to Stop
Clean shower grout when ordinary film and residue begin to accumulate rather than waiting for thick deposits that require more aggressive treatment. Remove routine surface residue, help the enclosure dry between uses, and use bathroom ventilation appropriately.
Cleaning does not automatically mean the grout needs to be sealed. Some grout products are designed to function without sealer, while other installations may use one. Whether sealing is appropriate depends on the specific grout, existing treatment, surrounding tile or stone, cleaner used, and current manufacturer directions.
If your grout requires sealing, our guide to choosing a grout sealer for showers explains what to check for compatibility with the grout and surrounding surfaces.
Stop cleaning and seek appropriate professional help if you find:
- Crumbling or missing grout.
- Loose or cracked tile.
- Soft surrounding material.
- Persistent unexplained dampness or signs of a concealed leak.
- Recurring, widespread, or suspected hidden mold.
- Significant water damage.
A tile professional can assess damaged joints and tile movement. Persistent moisture or suspected concealed leakage may require a qualified contractor or plumbing professional, while widespread or hidden mold may require appropriate moisture and remediation expertise.
Grout and flexible sealant are finish components; they do not replace a functioning shower waterproofing system. Repeated staining, chronic dampness, or deterioration can therefore be a reason to investigate the assembly rather than continuing to scrub the visible surface.
FAQs
Can you use vinegar to clean shower grout?
Vinegar should not be a default grout cleaner. It is acidic, can etch acid-sensitive natural stone, and frequent acidic cleaning can weaken or discolor some cement-based grout. Use an acidic treatment only when the specific grout, tile, sealer, and surrounding materials permit it.
Why does grout still look dark after cleaning?
The grout may still be damp, naturally darker than expected, permanently stained, unevenly colored, or affected by another condition. Let it dry before comparing the result. Persistent damp-looking areas, recurring discoloration, or other moisture symptoms deserve further investigation instead of stronger scrubbing.
Do you need to seal grout after cleaning?
Not automatically. Some cement-based grout installations may use a sealer, while many epoxy and certain ready-to-use grouts are designed without one. Base any sealing decision on the exact grout and existing treatment rather than treating resealing as a required step after every cleaning.
Final Thoughts
Clean sound shower grout with the gentlest compatible method that completes the job: identify the materials, work in small sections, use moderate agitation, remove residue thoroughly, and judge the result after drying.
If discoloration remains but the grout is solid and dry, stronger cleaning may not be the answer. Crumbling joints, persistent dampness, loose tile, or recurring moisture-related problems are signals to stop cleaning and have the installation assessed.