
how to clean vinyl siding without damaging it
To learn how to clean vinyl siding without damaging it, start with the gentlest method: a garden hose, a soft-bristle brush or cloth, and a mild cleaner approved for the siding. Work in manageable sections and rinse thoroughly. Avoid abrasive tools, harsh chemical mixtures, high-pressure spray, and directing water upward behind the siding, where it can reach the wall assembly.
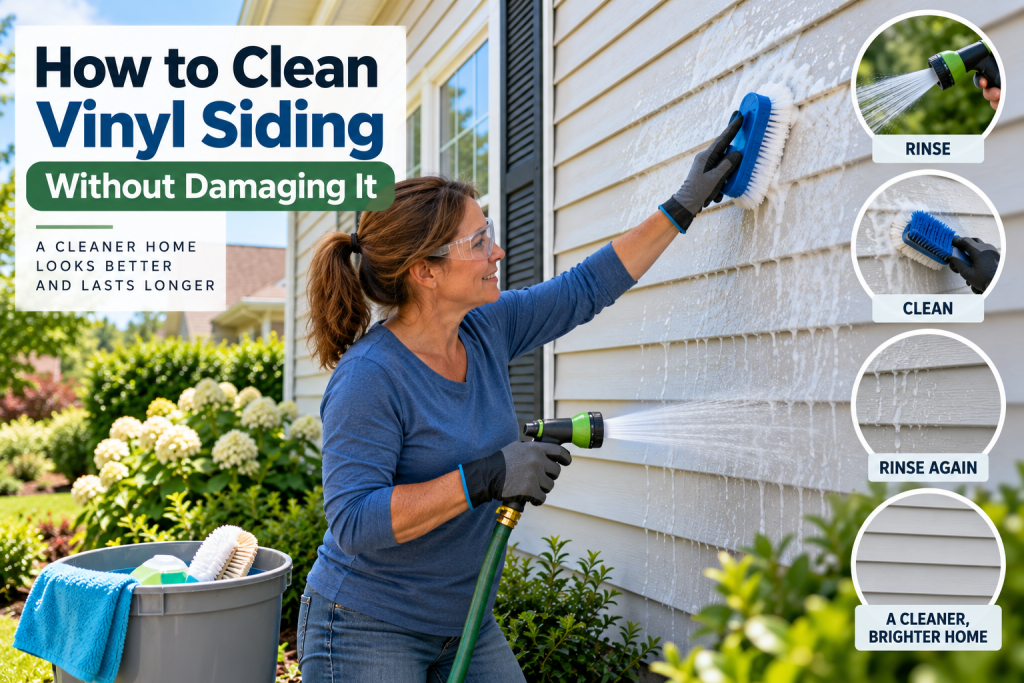
What You Need to Clean Vinyl Siding
Most routine cleaning does not require specialized equipment. Gather a few basic supplies before starting:
- Garden hose with a gentle spray nozzle
- Soft-bristled cleaning brush
- Soft cloth or nonabrasive sponge
- Bucket
- Mild cleaner suitable for vinyl siding
- Cleaning gloves
- Eye protection when using cleaning solutions
- Drop cloths or protective coverings when needed
Avoid wire brushes, stiff abrasive pads, and aggressive scouring products. They can scratch the surface or change its sheen, leaving cleaned areas noticeably different from the surrounding siding.
If you are unsure which cleaning product fits the type of dirt or stain you are dealing with, our guide to the best cleaner for vinyl siding compares options for mildew, algae, rust, grease, and general grime.
Before You Start
Inspect the siding from the ground before applying water or cleaner. Look for loose, cracked, warped, or missing panels. Cleaning damaged siding aggressively can make an existing problem worse or force water through an opening.
Close windows and exterior doors. Move patio furniture, grills, decorations, and other obstacles away from the work area.
Pay attention to electrical outlets, light fixtures, vents, utility penetrations, and other openings. Do not direct a stream of water into them, remove electrical covers, or attempt electrical work as part of the cleaning job.
Wet nearby plants with clean water before using a cleaning solution, and protect sensitive landscaping when appropriate. Follow the cleaner label and siding manufacturer’s care instructions because approved methods can vary among products.
If the siding can only be reached by working from an unsafe ladder position or near a roof edge, leave that portion for a professional.
How to Clean Vinyl Siding Step by Step
For routine dirt and grime, hand cleaning with a hose and soft brush is usually the safest starting point.
Step 1: Inspect the siding
Walk around the house and look at the siding from safe ground-level locations.
Note cracked panels, loose sections, openings around penetrations, or other damage that could admit water. Do not use forceful cleaning on those areas. Significant damage or signs of water intrusion should be evaluated before cleaning proceeds.
Step 2: Protect nearby plants and surfaces
Move objects away from the wall and cover surfaces that should not receive cleaning solution.
Pre-wet grass, shrubs, and other nearby plants with clean water. If you use a chemical cleaner, follow its label directions for protecting landscaping and surrounding materials.
Step 3: Rinse loose dirt
Use a garden hose to remove loose dust, pollen, cobwebs, and surface dirt.
Direct the water straight toward the wall or slightly downward. Avoid spraying upward underneath the overlapping edges of the siding.
Use moderate water flow rather than trying to blast dirt away. The goal is to loosen and rinse contamination without driving water behind the cladding.
Step 4: Apply a mild cleaning solution
Prepare or use a mild vinyl-compatible cleaner according to its label and your siding manufacturer’s instructions.
Work on a manageable section rather than coating an entire wall at once. This helps prevent cleaning solution from drying before you can scrub and rinse it.
Test an unfamiliar cleaner in a small, inconspicuous location first. Stop if it alters the color, gloss, or surface appearance.
Step 5: Gently scrub stained areas
Use a soft-bristle brush, soft cloth, or nonabrasive sponge to loosen dirt that the hose did not remove.
Manufacturers commonly recommend working upward from the lower portion of a section when applying and scrubbing cleaner because this can reduce streaking. Use light pressure rather than aggressive scrubbing.
Give extra attention to sheltered areas beneath eaves, porches, and overhangs. These locations may collect more grime because normal rainfall does not rinse them as effectively.
Step 6: Rinse thoroughly
Rinse the cleaned section with fresh water before the solution dries.
Keep the spray aimed straight at or slightly downward across the siding rather than underneath panel laps. Pay particular attention around windows, doors, vents, trim, and penetrations where concentrated water can enter gaps.
Do not leave cleaner residue on the surface.
Step 7: Check for remaining spots
After rinsing, inspect the section for dirt or staining that remains.
Repeat gentle cleaning on small areas if necessary. Do not automatically respond to a stubborn stain with a harsher chemical or more aggressive scrubbing.
Rust, grease, tar-like residue, or other unusual stains may require a cleaner specifically approved for the siding. Cleaner selection should be based on both the stain and the siding manufacturer’s guidance.
Step 8: Let the siding dry
Allow the siding and surrounding surfaces to dry naturally.
Once dry, check whether stains are gone and whether previously hidden cracks, loose panels, or other defects have become noticeable. Cleaning should not include dismantling siding to investigate behind it.
How to Clean Mildew or Algae From Vinyl Siding
Shaded and damp sections of exterior walls can develop green growth or dark spotting, particularly where trees, overhangs, or landscaping limit sunlight and drying.
Start with the same gentle cleaning approach used for ordinary grime. A siding-safe cleaner intended for mildew or algae can be used when necessary, provided the product is compatible with your particular siding.
Do not assume every dark stain is mold. Dirt, pollution, staining from nearby materials, and biological growth can sometimes look similar from a distance.
If you use a cleaner containing bleach or sodium hypochlorite, follow the product label carefully and protect yourself and surrounding surfaces as directed. Never mix bleach with ammonia, vinegar, acids, or other cleaners. Mixing cleaning chemicals can create dangerous fumes.
Large areas of persistent biological growth, especially when accompanied by moisture problems inside the home, deserve further evaluation rather than repeated surface cleaning.
How to Handle Common Vinyl Siding Stains
Different stains may need slightly different treatment, but the basic rule is to begin gently.
Dirt, mud, and pollen usually respond to water, mild cleaner, and light brushing.
Spider webs and loose debris can often be removed with a soft brush followed by a rinse.
Mildew or algae may require an appropriate siding-safe cleaner in addition to gentle scrubbing.
Grass and plant stains should be treated promptly with a vinyl-compatible cleaner rather than an abrasive pad.
Rust staining may require a stain-specific product. Check its compatibility with vinyl and test it in a concealed location before treating a large area.
Grease or oily residue may also require a specialized cleaner. Avoid experimenting with strong solvents unless the siding manufacturer specifically allows them.
Stubborn stains are a reason to change cleaning chemistry carefully, not a reason to scrub harder.
Can You Pressure Wash Vinyl Siding?
Pressure washing vinyl siding is possible with some products, but it carries more risk than cleaning with a garden hose and soft brush.
Manufacturer guidance differs. Some vinyl siding manufacturers provide specific instructions for cautious pressure washing, while others advise against power washing because it can cause water intrusion, surface damage, or discoloration.
For that reason, check the instructions for your siding before using a pressure washer. When you do not know the manufacturer or its guidance, the lower-risk choice is hand cleaning with a garden hose.
If pressure washing is permitted, use the lowest effective pressure, a broad spray pattern, and enough distance to prevent concentrated force on the panels. Test an inconspicuous location first.
Keep the stream straight toward the siding or slightly downward. Never aim upward beneath panel laps.
Stay away from windows, doors, vents, electrical fixtures, damaged siding, and other openings. Keep the wand moving instead of concentrating spray on one spot.
Do not pressure wash siding while standing on a ladder. The reaction force and need to control the spray can create a serious fall hazard. If upper walls cannot be reached safely from the ground with appropriate equipment, hire a professional.
What Can Go Wrong With Pressure Washing?
A pressure washer can create problems that may not be obvious while the siding is still wet.
Excessive or poorly directed pressure can:
- Force water behind siding
- Drive water around windows and doors
- Crack, puncture, or loosen panels
- Damage trim, caulked joints, or nearby finishes
- Force water into vents or other openings
- Damage nearby windows or painted surfaces
- Cause injuries from the high-pressure stream
- Increase fall risk when used from unstable positions
Vinyl siding sheds exterior water, but it is not the home’s primary waterproof layer. Water deliberately driven behind the panels can reach sheathing and other components that were never intended to receive a concentrated spray.
Should You Clean Vinyl Siding From the Top Down or Bottom Up?
For applying cleaner and scrubbing, working from the bottom upward is commonly recommended because it helps reduce streaks caused by dirty cleaner running down a dry wall.
The more important rule is to work in small sections and rinse promptly before the cleaner dries.
When rinsing, make sure all cleaning residue and loosened dirt leave the wall. Keep the hose stream directed straight at or downward across the siding regardless of which section you are rinsing.
Do not confuse working direction with spray direction. Even when cleaning from the bottom upward, water should not be sprayed upward underneath the siding laps.
How Often Should Vinyl Siding Be Cleaned?
There is no single mandatory cleaning schedule for every house.
An annual inspection is a reasonable way to see whether washing is needed, but some homes need cleaning more or less often. Visible buildup is more important than a calendar date.
Siding may get dirty faster when a house has:
- Heavy shade
- Nearby trees
- High pollen levels
- Humid conditions
- Road dust or pollution
- Coastal exposure
- Sheltered walls that receive little rainfall
Cleaning when buildup becomes noticeable is generally more useful than repeatedly washing siding that is already clean.
Regular cleaning and basic maintenance can also help you spot aging or damage earlier; our guide on how long vinyl siding lasts explains the lifespan factors and replacement signs to watch for.
Cleaning Vinyl Siding Around Windows, Doors, and Vents
Use extra care anywhere the siding meets an opening.
Reduce water force around windows and doors, and do not spray directly into joints or underneath trim. Avoid prolonged spraying at vent openings or utility penetrations.
From the ground, look for visible failed caulk, gaps, loose trim, or damaged flashing before cleaning. Do not dismantle the siding or try to correct hidden wall problems as part of routine washing.
If cleaning repeatedly results in water appearing indoors, stop. That suggests a building-envelope problem that needs evaluation rather than a different cleaning technique.
Protect Landscaping While Cleaning
Start by wetting nearby grass and plants with clean water. This can reduce direct exposure to cleaning solution.
Use only as much cleaner as necessary and prevent concentrated runoff from sitting on leaves or soil. Rinse plants afterward when the cleaning-product label recommends it.
Cover unusually sensitive landscaping when appropriate, but do not leave plants sealed under plastic longer than necessary, especially in hot sun.
Common Vinyl Siding Cleaning Mistakes
Most cleaning damage comes from using more force or stronger chemistry than the job requires.
Avoid these common mistakes:
- Scrubbing with stiff or abrasive brushes
- Using harsh chemicals without checking compatibility
- Mixing different cleaning chemicals
- Allowing cleaner to dry on the siding
- Spraying water upward beneath siding laps
- Using unnecessarily high pressure
- Concentrating pressure on windows, vents, or damaged areas
- Aggressively cleaning cracked or loose siding
- Ignoring the siding manufacturer’s care instructions
- Using a pressure washer while standing on a ladder
Gentler methods may take slightly longer, but they reduce the chance of turning a cleaning job into a siding or moisture problem.
When to Call a Professional
Professional cleaning is the safer choice when upper stories cannot be reached from the ground, extensive cleaning would require difficult ladder work, or the property has awkward roof and wall intersections.
Professional evaluation also makes sense when siding is loose or damaged, stains repeatedly return because of a suspected moisture problem, or a large exterior area has heavy biological growth.
Older exteriors deserve additional caution. Some older cementitious siding products may contain asbestos and should not be cut, sanded, drilled, ground, broken, removed, or otherwise disturbed when asbestos is suspected. Painted surfaces on older homes may also contain lead and should not be casually scraped or sanded.
Final Thoughts
The safest approach to how to clean vinyl siding is usually the simplest: mild cleaner when needed, a soft brush or cloth, manageable sections, and a thorough garden-hose rinse.
Use pressure washing only when the siding manufacturer permits it and you can work safely from the ground. Keep water directed straight or downward, avoid excessive force, and never spray upward behind the panels. Gentle cleaning removes most normal buildup without creating the damage or moisture problems that aggressive methods can cause.