
how to clean a kitchen faucet head and restore flow
If you are trying to learn how to clean kitchen faucet head components, first determine whether your faucet has a removable aerator, a pull-down or pull-out spray head, or an integrated spray face. Remove only parts intended for homeowner service, rinse away debris, and use a manufacturer-compatible mineral treatment when needed. If cleaning the outlet does not restore flow, the restriction may be elsewhere in the faucet or supply system.
| What you notice | Likely outlet problem | First check |
|---|---|---|
| Uneven or sideways spray | Mineral buildup on spray holes | Inspect and gently clean the spray face |
| White or chalky deposits | Hard-water minerals | Use an approved mineral-cleaning method |
| Reduced flow from all modes | Aerator or screen debris | Inspect accessible outlet components |
| One spray mode is weak | Localized spray-head issue | Clean the affected nozzles or outlet |
| Debris visible in aerator | Sediment in screen | Remove and rinse if serviceable |
| Flow remains weak after cleaning | Problem may be upstream | Move to broader low-flow diagnosis |
Signs the Faucet Head Needs Cleaning
Mineral deposits and sediment can gradually change how water leaves a kitchen faucet. The most obvious signs include spray jets that point sideways, an uneven spray pattern, visible white buildup, or debris trapped behind an accessible aerator screen.
Reduced flow can also result from a clogged outlet. Some faucet manufacturers specifically identify mineral deposits and debris in aerators or spray wands as causes of restricted flow.
Do not assume every weak faucet needs aerator cleaning, however. A partially closed shutoff valve, kinked hose, cartridge problem, supply restriction, or another internal component can produce similar symptoms.
One useful clue is whether the problem is concentrated at the outlet. On some manufacturer-supported designs, removing a serviceable aerator or spray head and comparing flow can help distinguish an outlet restriction from an upstream problem. Follow the faucet’s instructions before performing that test.
Identify the Faucet Outlet Before Taking It Apart
Kitchen faucet outlets are not all built the same way.
A threaded aerator is usually visible at the end of a conventional spout. The aerator body threads onto or into the faucet, but even exposed aerators do not all loosen in the same direction when viewed from different positions.
A recessed or cache-style aerator sits nearly flush inside the end of the spout. These often require a matching aerator key that engages small notches or teeth.
A pull-down or pull-out spray head may contain an aerator, screen, spray nozzles, and mode selector within one assembly. Some have removable aerators. Others are not intended to be taken apart internally.
A fixed spray face may use flexible nozzles that are designed to be wiped or rubbed clean without removing the head.
Integrated or specialty outlets can use still other arrangements. The practical rule is simple: do not assume a component unscrews because another faucet’s did.
Check the Brand and Model When Possible
Identifying the faucet can prevent damaged finishes, broken components, and incorrect reassembly.
Look for the manufacturer’s name or logo and, if available, the model number on paperwork, purchase records, packaging, or an identifying label beneath the sink. Manufacturer websites may provide parts diagrams and faucet-identification resources.
This matters because service methods vary considerably. Moen documents exposed, concealed, and non-accessible aerator arrangements. Pfister distinguishes conventional pull-out aerators from flush-mounted versions that require an aerator key. Some Delta pull-down spray wands do not have a removable aerator at all.
The parts diagram can also tell you whether a screen, washer, aerator insert, or complete spray head is available separately.
Protect the Faucet Finish
Start with your hands whenever a component is designed to loosen by hand.
If a tool is required, use the tool specified for the faucet. A recessed aerator may need its matching key, while certain exposed designs provide flats intended for a wrench.
Avoid clamping bare pliers around a decorative faucet finish. Do not use steel wool, harsh scouring pads, or aggressive abrasives on the spray head or spout.
If a component will not move with reasonable effort using the correct method, stop rather than increasing force. Mineral buildup, damaged threads, or an unfamiliar retention method may be involved.
For broader sink-area care, see how to clean a kitchen sink without damaging the surrounding finish or materials.
How to Clean Kitchen Faucet Head Aerators
For a removable aerator, the goal is to clean accessible screens and flow components without mixing up their order or damaging the housing.
Step 1: Identify the removal method
Confirm whether the aerator is exposed, recessed, or part of a spray head. Check the manufacturer’s instructions before turning it.
Step 2: Protect the sink drain
Close the drain or cover it with a cloth. Aerators may contain small washers, screens, or inserts that are easy to drop.
Step 3: Remove the aerator carefully
Use your fingers when the aerator is designed for hand removal. For a recessed unit, use the correct aerator key. If the manufacturer specifies a wrench on dedicated flats, place the tool only where directed.
Step 4: Keep the parts in order
Set the components down in the same orientation in which they came out. Do not assume every aerator contains the same stack of screens and washers.
Step 5: Rinse loose debris
Run clean water over serviceable screens and inserts to dislodge sediment. A soft brush can help when the manufacturer permits it.
Step 6: Treat mineral deposits if necessary
For stubborn chalky buildup, use only a method compatible with the faucet and finish. Some manufacturers permit diluted household vinegar for specific faucets, but that does not make every acidic treatment universal.
Step 7: Rinse thoroughly
Remove loosened mineral residue and any cleaner before reassembly.
Step 8: Reassemble in the original order
Return screens, inserts, and washers to their correct positions. Missing or reversed parts can change the spray or cause leakage around the aerator.
Step 9: Reinstall without overtightening
Thread the aerator into place using the manufacturer’s method. Tighten only enough to seat it properly.
Step 10: Test the flow
Run the faucet and check the spray pattern, flow, and aerator connection. If the outlet is clean but flow remains weak, stop repeatedly cleaning it and investigate the broader low-flow problem separately.
Cleaning a Pull-Down or Pull-Out Spray Head
Pull-down and pull-out faucets require extra attention because the visible spray head may contain multiple components.
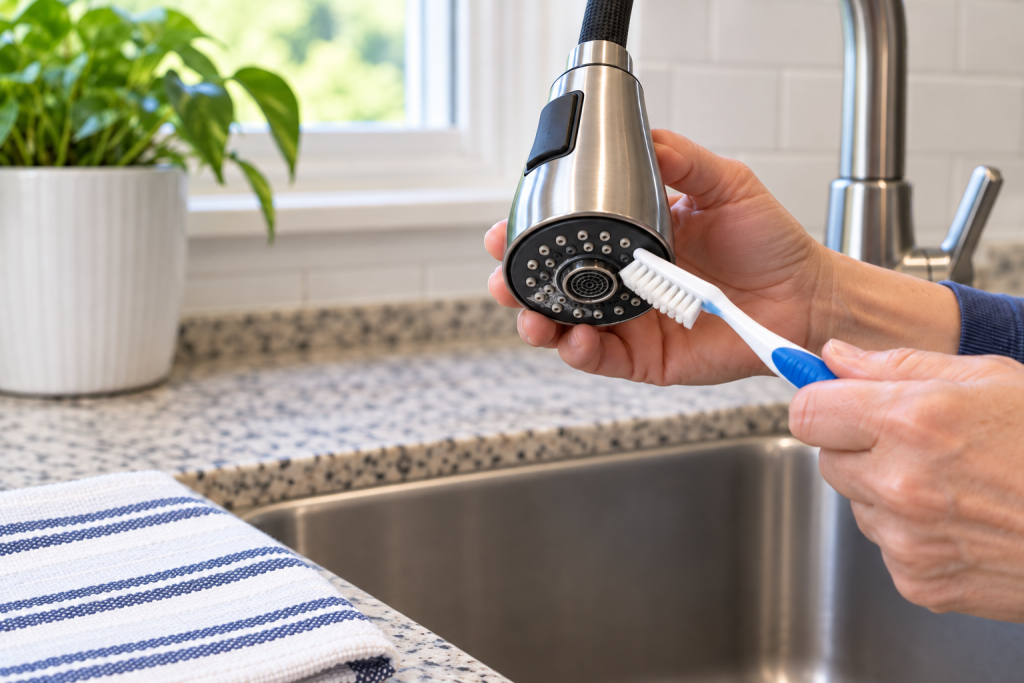
Begin by inspecting the spray face. If the faucet uses flexible rubber-like nozzles designed for mineral removal, gently rub or wipe them according to the manufacturer’s care instructions. Delta’s Touch-Clean and GROHE’s SpeedClean systems are examples of designs intended to let users wipe mineral deposits from flexible spray openings.
Do not poke pins, needles, drill bits, or metal wire into spray holes unless the manufacturer specifically directs that method. Enlarging or deforming a nozzle can permanently change the spray pattern.
If the manufacturer’s instructions say the spray head can be removed from its hose for cleaning, follow that procedure while preventing the hose from retracting into the faucet body. Some heads have an accessible screen or screen washer at the connection that can be rinsed.
Other spray heads are not designed for internal disassembly. Delta, for example, states that certain pull-down wand assemblies should not be taken apart even though the complete wand may be removed from the hose for cleaning.
If a sealed head remains obstructed after the approved cleaning method, replacement may be more appropriate than forcing it apart.
Removing Hard-Water Mineral Buildup
Hard-water deposits often appear as a chalky white crust around spray openings or aerator components.
Start with gentle physical cleaning where the nozzle design permits it. Flexible nozzles intended for fingertip cleaning may release dried mineral material without any chemical treatment.
For more persistent deposits, check the faucet manufacturer’s care instructions. Delta permits a white-vinegar-and-water method for mineral deposits on its products and provides specific treatment instructions for some spray wands. Moen likewise allows a vinegar-and-water approach for dried water spots on several of its finishes.
Those examples should not become a universal soaking recipe. Finish coatings, plastics, rubber components, adhesives, and internal parts can differ among faucets. Use the concentration and contact time specified for your model or finish rather than extending a soak because buildup looks severe.
After any approved acidic treatment, rinse the component thoroughly.
Cleaning Screens and Debris
Sediment can collect on the back of an aerator screen or at another accessible screen in a serviceable spray-head connection.
Rinse loose particles with clean water. If material remains, use a soft brush when permitted rather than scraping the screen with a metal pick.
Do not permanently remove a flow regulator, restrictor, check valve, or screen because the faucet seems stronger without it. Some of these components serve flow-control or other design functions and are intended to remain installed.
If the manufacturer’s troubleshooting procedure identifies an upstream screen as homeowner-serviceable, follow that specific procedure. Otherwise, stop at the accessible outlet components.
What If Only One Spray Mode Is Weak?
Different behavior between spray modes is a useful clue.
If the normal stream is strong but several spray jets are weak or pointing sideways, mineral buildup at the spray face is a reasonable first suspect. Clean the flexible nozzles or accessible spray openings using the approved method.
If the spray pattern is clean but one mode still performs poorly, the selector or another internal spray-head component may be involved.
Do not turn a cleaning job into diverter or selector-valve disassembly unless the manufacturer specifically identifies that component as homeowner-serviceable. A complete replacement head may be the intended repair on some faucets.
What Not to Use
Avoid methods that can damage the outlet or decorative finish:
- Steel wool or harsh abrasive pads
- Strong acids not approved for the faucet
- Corrosive household cleaners
- Sharp metal objects pushed into spray holes
- Bare pliers directly on decorative finishes
- Excessive force on a stuck aerator
- Improvised tools on recessed aerators
- Mixed household cleaning chemicals
Even when a cleaner is compatible with mineral deposits, it may have different limitations on the faucet’s exterior finish. Keep the treatment confined to the component and method the manufacturer approves.
What If Cleaning Does Not Restore Flow?
Once the aerator, accessible screens, and spray face are clean, continuing to repeat the same procedure is unlikely to help an upstream restriction.
Weak flow may instead involve a partially closed shutoff valve, kinked or damaged hose, supply-side debris, cartridge or valve problem, or another manufacturer-specific flow component.
You can sometimes gain a useful clue from a model-specific test. Pfister, for example, instructs users of certain pull-out faucets to remove the spray head and compare flow from the hose. Moen similarly distinguishes good hose flow with a restricted spray wand from low flow originating farther upstream.
Those are manufacturer-specific troubleshooting paths, not universal disassembly instructions.
If the clean outlet is clearly not the restriction, move to HRA’s broader low-water-pressure guidance rather than dismantling the faucet under this cleaning procedure.
If the faucet head is clean but flow is still weak, see our guide to low water pressure in one faucet for other causes to check.
When Replacement Makes More Sense
An aerator or spray head does not have to be cleaned indefinitely.
Replacement may be appropriate when the component is cracked, threads are damaged, an internal screen or insert has failed, deposits cannot be removed without aggressive treatment, or the manufacturer specifies replacement after cleaning fails.
A sealed spray wand with an internal obstruction may also require replacement if it is not designed for disassembly.
Match replacement components to the faucet model. Spray heads and aerators that look alike are not necessarily interchangeable.
Common Mistakes
Most faucet-head cleaning problems come from assuming the outlet is simpler than it is.
- Using pliers directly on the faucet finish
- Forcing a recessed aerator without the proper key
- Losing or reversing small screens and washers
- Using an aggressive acid or abrasive
- Poking metal objects into flexible spray holes
- Taking apart a sealed spray wand
- Permanently removing a flow restrictor
- Assuming every weak-flow problem is an aerator problem
- Repeatedly cleaning the outlet after the restriction has proved to be upstream
Frequently Asked Questions
How do you clean mineral buildup from a kitchen faucet head?
Identify the spray-head or aerator design first. Remove loose deposits gently, clean flexible nozzles by the manufacturer’s approved method, and use a compatible mineral treatment only when needed. Rinse thoroughly before reassembling any removable components.
Can you soak a kitchen faucet head in vinegar?
Some manufacturers specifically permit vinegar solutions on certain faucets or spray heads, but the method and exposure time vary. Do not assume every finish, hose connection, plastic component, or spray assembly is suitable for soaking. Follow the care instructions for the actual faucet.
How do you clean a pull-down faucet spray head?
For how to clean kitchen faucet head problems on a pull-down model, start with the spray face and any flexible nozzles intended for wiping. Remove the head or an accessible screen only when the manufacturer’s instructions identify those parts as serviceable.
Why is my kitchen faucet spraying sideways?
Mineral deposits around individual spray openings commonly distort the water jets. Gently clean the nozzles using the method approved for your faucet. If a nozzle appears physically damaged, cleaning may not restore the original spray pattern.
Why is my faucet still weak after cleaning the aerator?
The restriction may be upstream from the outlet. Possible areas include the hose, supply, shutoff position, cartridge, or another internal flow component. At that point, use broader single-faucet low-pressure troubleshooting rather than repeatedly cleaning the aerator.
Final Thoughts
The key to how to clean kitchen faucet head components safely is identifying the outlet before taking anything apart. Clean accessible mineral buildup and debris, use the correct aerator key or service method when required, protect the faucet finish, and return screens and washers to their original positions.
If the spray face and aerator are clean but flow remains weak, stop treating the outlet as the problem. The restriction may be elsewhere in the faucet or supply system and belongs in a broader flow diagnosis.