
how to test a sump pump before heavy rain
Knowing how to test a sump pump before heavy rain can reveal a problem before the pit begins filling quickly. The basic test is simple: inspect the pit and visible components, slowly add clean water, and confirm that the float rises, the pump starts automatically, the water level drops, and the pump shuts off afterward.
Do not reach into the sump pit while the pump is energized. Never handle electrical equipment with wet hands or while standing in water. If the pump, cord, plug, receptacle, alarm, or nearby wiring appears damaged or has been exposed to flooding, stop and arrange appropriate professional service.
When to Test a Sump Pump
A sump pump is easiest to evaluate before it is needed during a major storm.
Useful times to check an existing pump include:
- Before periods of forecast heavy rain
- At the beginning of a wet season
- After a long period when the pump has not operated
- After noticing unusual sounds or cycling
- After a storm that made the pump work heavily
- Whenever you are unsure whether the system is operating normally
Testing does not guarantee that a pump can handle every storm. It does give you a chance to confirm basic automatic operation while conditions are manageable.
If the pit is already rapidly filling or overflowing, that is no longer a routine maintenance test. Avoid electrical hazards and get professional help if the existing system cannot keep up.
If heavy rain regularly leads to basement moisture or water entry, our guide to water in the basement after rain can help you compare the most common entry patterns and likely sources.
Inspect the Sump Pit Before Testing
Before adding water, look at the pump and pit from a safe position.
The pit should not be packed with leaves, loose sediment, stones, or other visible debris that could interfere with the pump or float.
Look at the float mechanism without reaching into the pit. Depending on the pump, the float may move vertically or swing through a defined range. It should appear to have room to operate without catching against the pump, pit wall, piping, cords, or other components.
Do not force, bypass, adjust, or disassemble the float switch as part of a routine test. If it appears stuck or obstructed and correcting the problem would require reaching into an energized pit or dismantling components, stop and arrange service.
Also inspect the visible discharge piping. Look for:
- Pipe sections that appear disconnected
- Obvious cracks or damage
- Loose-looking accessible connections
- Signs of previous leakage
- Components pressing against or obstructing the float
This inspection is visual. Do not disconnect piping, open a check valve, cut pipe, or take apart the discharge system simply to test the pump.
How to Test a Sump Pump Safely
A water test checks whether the pump responds to a rising water level the way it should during normal operation.
Use clean water and add it gradually. You are trying to activate the normal float mechanism, not fill the pit as quickly as possible.
Step 1: Inspect the pit and visible components
Before adding water, confirm that there are no obvious obstructions around the float and that the visible discharge piping appears connected.
Make sure the surrounding floor is dry enough to work safely. Do not proceed if electrical equipment has become wet or you would need to stand in water during the test.
Step 2: Add clean water slowly
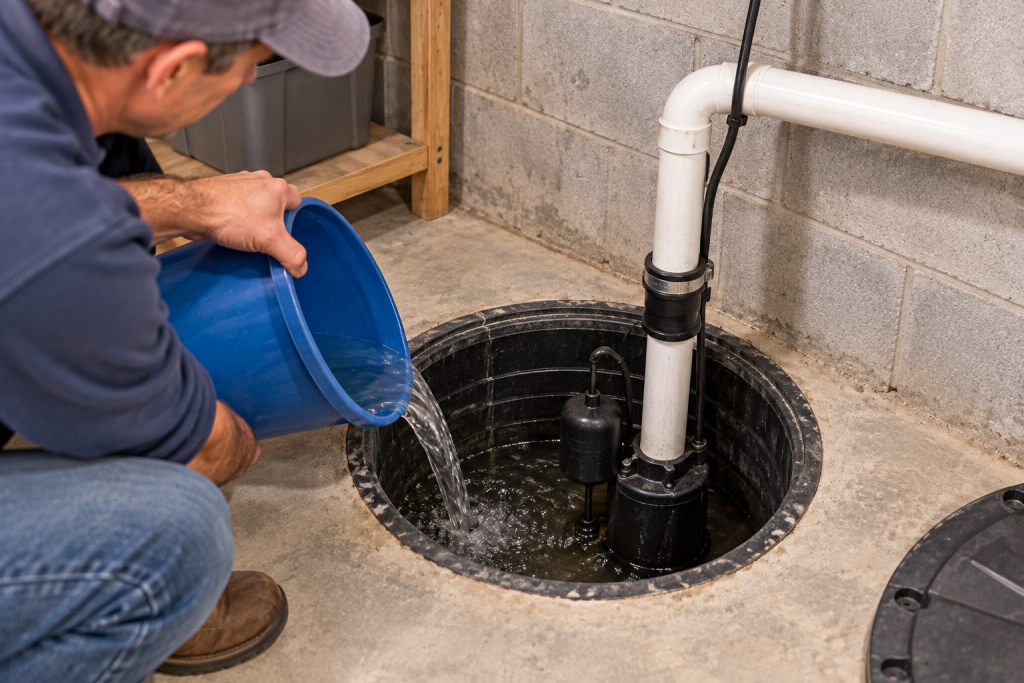
Slowly pour clean water into the sump pit.
Keep your hands, container, and other objects away from the pump, float, wiring, and electrical connections. There is no need to touch the pump during the test.
Continue adding water until the level approaches the point where the float normally activates the pump.
Step 3: Watch the float rise
As the water level rises, observe the float.
It should move through its normal path without visibly catching against the pit wall, discharge piping, pump body, or another obstruction.
Do not reach into the energized pit to move the float manually if it does not rise as expected.
Step 4: Confirm that the pump starts automatically
The pump should start when the float reaches its normal activation level.
Automatic starting is the key part of the test. A pump that can run only after someone manipulates a switch has not demonstrated that it will respond properly when groundwater rises during a storm.
If the water continues rising and the pump does not start, stop adding water. Do not bypass the float, open electrical components, or attempt live electrical testing.
Step 5: Verify that the water level drops
Once the pump starts, the water level in the pit should begin falling.
Watch from outside the pit. A running motor sound by itself does not prove that the system is moving water.
If the pump runs but the water level stays the same or continues rising, shut down the test by stopping the added water and arrange service. Several different pump or discharge problems can cause this symptom, so avoid assuming which component has failed.
Step 6: Confirm that the pump shuts off
As the water drops, the float should return toward its lower position and the pump should shut off automatically.
A pump that continues running after the water has fallen below its normal operating level needs attention. Do not reach into the pit to force the float down while the system is energized.
Step 7: Listen and watch during the cycle
A normal operating sound varies among pumps, so compare the test with what your system usually sounds like.
Grinding, pronounced rattling, or severe vibration deserves attention, particularly if the behavior is new.
Also watch accessible discharge connections for obvious leakage while the pump runs. Do not put your hands on leaking connections during operation to locate the source.
Check the Existing Discharge From a Safe Location
A sump pump can run normally at the pit while a discharge problem prevents water from leaving as intended.
If the exterior discharge location is readily visible and can be reached safely, observe it while or shortly after the pump operates.
Confirm that:
- The outlet is not visibly blocked
- Water is actually being discharged when the pump runs
- The existing outlet has not obviously separated or been damaged
- Water is leaving the foundation area as the existing system is designed to do
Do not disconnect buried piping, excavate to find a discharge line, open check valves, or redesign the routing as part of routine testing.
In freezing weather, use extra caution around icy surfaces and frozen discharge conditions. A visibly obstructed or malfunctioning discharge warrants correction rather than repeated pump testing.
Warning Signs the Pump Needs Attention
A successful test should show one complete automatic cycle: water rises, the pump starts, water drops, and the pump shuts off.
Professional service may be appropriate when:
- The pump does not start automatically
- The float appears stuck or cannot move freely
- The pump runs, but the water level does not drop
- The pump continues running after the water level falls
- The pump repeatedly turns on and off in very short cycles
- Grinding, rattling, or severe vibration occurs
- Accessible discharge connections visibly leak
- The pit repeatedly overflows
- The breaker or GFCI repeatedly trips
- The cord, plug, receptacle, wiring, or pump appears damaged
These symptoms can have more than one cause. Routine maintenance should not become a pump-repair or electrical-diagnostic project.
Repeated short cycling is particularly worth noting. A pump that starts and stops over and over can be responding to several system conditions, and identifying the exact cause may require inspecting components beyond a basic homeowner test.
Do not repeatedly reset a breaker or GFCI that continues tripping. Electrical protection that trips repeatedly is a stop condition, not something to bypass.
Check an Existing Alarm or Battery Backup
If your sump system already has a high-water alarm or battery-backup system, include its visible status in the pre-storm check.
Look at manufacturer-provided indicator lights, displays, or warning signals and follow the operating instructions for that specific system. If the system includes a manufacturer-provided test function intended for homeowners, use it only as directed.
This routine check does not require electrical measurements, opening a control enclosure, disconnecting battery wiring, or performing battery replacement procedures.
A warning light, fault message, damaged wiring, persistent alarm, or other status you cannot resolve through the owner instructions is a reason to arrange service before severe weather arrives.
If your home does not already have backup protection, our battery backup sump pump guide explains the main system types, compatibility questions, capacity considerations, and features to compare before buying.
What to Do If the Sump Pump Does Not Start
If the water reaches the normal activation area and the pump does not start, stop adding water.
Do not reach into the pit, force the float, bypass the switch, open the motor, remove electrical covers, or modify wiring.
If the pit is not flooding and all surrounding conditions are dry and safe, you can visually check for obvious issues such as a disconnected-looking plug or a float caught against another component. Do not handle damaged electrical components or plugs with wet hands.
A pump that still does not operate needs professional attention. Depending on the system and the nature of the problem, an experienced plumber, sump-pump service contractor, or qualified electrician may be appropriate.
If rising water creates a risk of flooding before service can be arranged, protect people first. Do not enter standing water around energized electrical equipment.
Pre-Storm Sump-Pump Checklist
Before heavy rain, use this quick check:
- Look for debris or sediment in the sump pit
- Confirm the float appears unobstructed
- Inspect accessible discharge piping for visible damage
- Slowly add clean water to the pit
- Watch the float rise
- Confirm the pump starts automatically
- Make sure the water level drops
- Confirm the pump shuts off afterward
- Listen for grinding, rattling, or severe vibration
- Look for obvious leaks at accessible discharge connections
- Observe the exterior discharge point if safely accessible
- Check existing alarm or backup-system status indicators
- Stop if electrical components appear damaged or wet
- Arrange service for abnormal operation before severe weather when possible
The purpose is to verify normal operation, not diagnose or rebuild the system.
Final Thoughts
Learning how to test a sump pump comes down to observing one complete automatic pumping cycle safely. Inspect the pit first, add clean water slowly, and confirm that the float rises, the pump starts, the water level falls, and the pump shuts off normally.
If the pump will not start, cannot lower the water, runs continuously, short cycles repeatedly, leaks, makes severe unusual noises, or shows electrical problems, stop routine testing and have the system evaluated. Finding that problem before heavy rain is far better than discovering it after the sump pit begins overflowing.