
Why Does My Wall Paint Look Blotchy?
If you are asking, “why does my wall paint look blotchy,” the cause is usually either uneven paint coverage or an uneven surface underneath the paint. Thin areas, inconsistent roller loading, unprimed repairs, stains, and changes in wall texture can all create a blotchy appearance.
Do not assume the wall automatically needs another coat. First, let the paint dry for the full time stated on the label. Then inspect it from several angles and under both daylight and normal room lighting. The shape, location, texture, and sheen of the blotches will usually tell you whether you are dealing with a simple coverage issue or a surface problem that needs attention before more paint is applied.
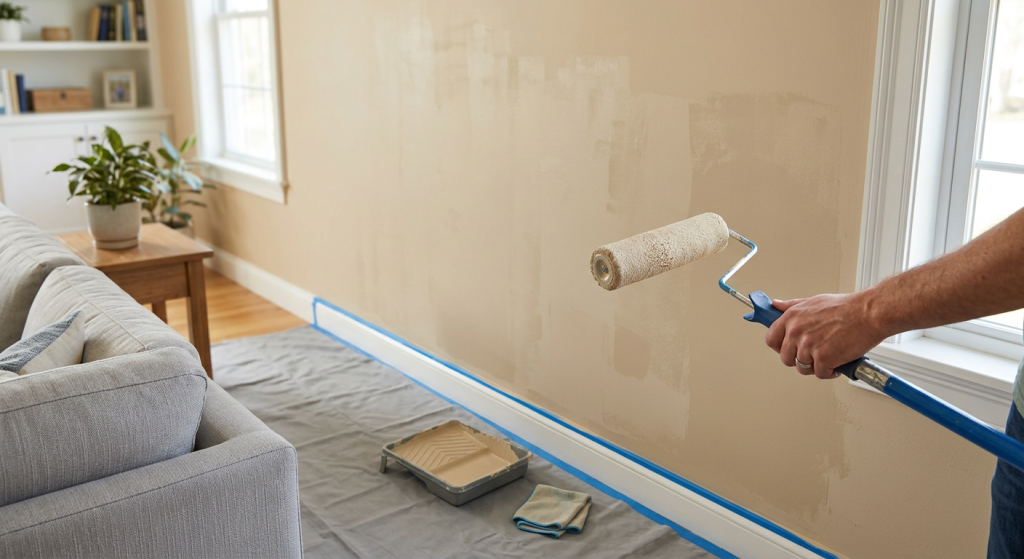
Quick Diagnosis Guide
Use the appearance of the wall to narrow down the most likely cause.
| What the blotches look like | Most likely cause | Likely next step |
|---|---|---|
| Broad light or dark areas where the old color shows through | Thin or uneven coverage | Another uniform coat may be enough |
| Random shiny or dull patches | Uneven paint thickness, porosity, or sheen | Check for repairs and unprimed areas |
| Circles, rectangles, or outlines around patches | Spackle or joint compound showing through | Smooth and prime the repaired area |
| Yellow, brown, or dark marks returning | A stain or moisture problem | Find the source before repainting |
A smooth wall with broad color variation usually points toward coverage. Blotches that follow repairs, stains, rough areas, or damaged paint are more likely to come from the surface.
Why Wall Paint Looks Blotchy After Drying
Paint looks uniform when the color, thickness, sheen, and surface texture remain consistent across the wall. If one of those changes, the wall may look blotchy even though the correct paint was used.
Some blotches come from the paint layer itself. A roller may deposit more paint in one area and less in another. The thin areas may reveal the previous color, while heavier areas may look darker, shinier, or more textured.
Other blotches begin beneath the paint. Bare drywall, spackle, joint compound, old paint, and previously finished drywall do not always absorb paint in the same way. A porous repair can pull moisture from the new coating and dry flatter than the surrounding wall.
Lighting can make small differences appear more severe. Side lighting from a window, lamp, or hallway can highlight roller texture, repair edges, sanding marks, and changes in sheen that are difficult to see when looking straight at the wall.
Fresh paint can also look temporarily uneven while it dries. Areas with heavier paint, more airflow, or warmer temperatures may dry at different rates. Wait until the coating has dried as directed before deciding whether the final finish is truly blotchy.
Coverage Problems vs Surface Problems
The most important diagnostic step is deciding whether the problem is in the new paint layer or the wall beneath it.
Coverage problems usually appear as broad areas of weak or inconsistent color on an otherwise smooth wall. Surface problems tend to follow repairs, stains, rough patches, damaged drywall, or places where the wall was prepared differently.
Uneven coverage and roller pressure
Uneven coverage is likely when the previous wall color shows through in wide, irregular areas but the surface feels smooth. This is common after a major color change or when the paint was spread too thinly.
A roller that is not loaded evenly can leave alternating heavy and light areas. Continuing to roll after the cover has released most of its paint may produce thin sections that lack color depth.
Pressing harder on a dry roller does not create better coverage. It can push paint toward the edges of the roller, leave ridges, or create visible changes in texture. Consistent loading and light, even pressure matter more than force.
Lap marks can form when fresh paint overlaps an area that has already started to dry. These marks may appear as darker bands or sections with a slightly different sheen. They are most noticeable on large walls, in warm rooms, or where the painter stopped for too long in the middle of the surface.
Primer and wall preparation problems
Primer becomes important when a wall contains materials with different levels of porosity. Bare drywall, exposed drywall paper, joint compound, and spackle may absorb finish paint differently from the surrounding painted surface.
When these areas are not sealed first, they can appear lighter, darker, shinier, or duller after the wall dries. This effect is often called flashing. It may be visible only from certain angles, especially when light travels across the wall rather than hitting it directly.
Sanding dust, grease, dirt, and cleaning residue can also affect the finish. Paint may not spread, bond, or dry consistently over a contaminated surface. If the blotches follow places that were sanded, handled frequently, or exposed to cooking residue, preparation may be the underlying issue.
For a closer look at why repaired areas can dry dull, shiny, lighter, or darker, see our guide to paint flashing over a drywall patch.
Stains, repairs, and old paint
A blotch shaped like a drywall patch usually points to the repair rather than the paint color. The patch may be rougher, smoother, more porous, or slightly raised compared with the surrounding wall.
Run your hand lightly over the area after the paint has dried. If you can feel an edge, ridge, depression, or texture change, another coat will not make the surface flat. The repair itself needs to be corrected.
Stains create a different pattern. Water marks, smoke residue, grease, ink, and rust-colored discoloration may return through ordinary wall paint. A stain that reappears in the same location is not simply thin coverage.
Old paint can also affect the match. Existing walls may have faded, accumulated residue, or changed sheen after years of cleaning and wear. Fresh paint made from the original color formula may still stand out from the aged finish.
What Different Blotchy Patterns Usually Mean
The pattern can help explain why your wall paint looks blotchy before you commit to more painting.
Uneven color
Broad light and dark sections usually suggest inconsistent coverage. Look closely to see whether the previous color is visible through the lighter areas.
Repeated roller-width bands, heavy edges, or narrow lines may indicate uneven roller loading, excessive pressure, or lap marks. If the wall is smooth and the variation does not follow patches or stains, coverage is the most likely explanation.
Shiny or dull patches
If the color appears correct but some areas reflect more light, the issue is probably sheen rather than color.
Shiny or dull patches can result from uneven paint thickness, porous repairs, or spot painting. Higher-sheen finishes tend to make these differences easier to see because they reflect more directional light.
A dull area over a repair often suggests that the patch absorbed paint differently. A shiny strip may indicate a heavier layer, a lap mark, or paint that was applied after the surrounding section began to dry.
Repaired areas showing through
Visible circles, rectangles, or feathered outlines commonly trace back to spackle or joint compound. The repair may not have been primed, sanded flat, or blended smoothly into the surrounding texture.
A patch that feels smooth but looks dull from the side is probably a porosity or sheen problem. A patch that can be felt with your fingertips is a surface-shape problem.
Paint adds color, but it does not reliably hide raised edges, torn drywall paper, deep sanding scratches, or a mismatched texture.
Stains bleeding through
Yellow, brown, gray, or reddish marks that return after painting are more likely to be stains than thin spots.
Before covering the area again, determine where the discoloration came from. A dry mark left by an old, repaired leak is different from a stain that grows, feels damp, or returns after rain.
Do not keep adding finish paint over an active moisture problem. The leak or source of dampness must be found before the wall finish is repaired.
Blotches that change with the lighting angle
If the wall looks even from the front but blotchy from a doorway or window, the light is probably revealing differences in sheen or texture.
Side lighting can emphasize roller stipple, repair edges, sanding marks, brushwork, and changes in paint thickness. The lighting may not have caused the problem; it is simply making a small difference easier to see.
Judge the wall from a normal viewing distance and under the lighting used in the room most often. A mark visible only from a few inches away under extreme side lighting may not require the same response as a blotch visible from across the room.
When Another Coat of Paint May Be Enough
Another coat may be enough when the wall is dry, smooth, clean, and free of stains or visible repair defects. The strongest sign is broad, uneven color where the previous finish still shows through.
This is common after changing from a dark color to a light one or when the first coat was applied too thinly. Mild roller bands caused by inconsistent coverage may also improve when the entire area receives a uniform finish coat.
Before continuing, make sure the paint was mixed thoroughly and that the color and sheen are correct. A second coat will not solve a mismatch between two different products or sheen levels.
Avoid dabbing paint only onto every light spot. Isolated touch-ups can create new texture and sheen differences, especially after the original coat has dried. The goal is an even paint film, not a collection of thicker patches.
Another coat is less likely to work when the blotches follow repairs, feel rough, contain stains, or remain shiny or dull in clearly defined areas.
When Primer, Sanding, Surface Repair, or Professional Help Is Needed
Surface correction is usually needed when the problem can be felt, follows a repair, or returns through previous coats.
A raised patch, roller ridge, dried drip, or rough section may need light smoothing before it is coated again. Paint will follow the shape beneath it, so uneven drywall or compound usually remains visible after additional coats.
Primer may be needed over bare drywall, exposed drywall paper, spackle, joint compound, porous areas, or persistent stains. The purpose is to create a more uniform surface or isolate discoloration before finish paint is applied.
Do not sand or scrape until you have considered the age and condition of the existing paint. Disturbing an older painted surface can create dust that requires more careful handling.
When to Stop and Call a Professional
Most blotchy paint is cosmetic. Professional help becomes appropriate when the wall shows signs of moisture, widespread failure, hazardous material, or damage beyond a small surface repair.
- The wall feels damp, discoloration is growing, or an active leak may be present.
- Water damage covers a large area or extends into the ceiling, trim, or adjoining walls.
- Mold is suspected, especially when the affected area is extensive or moisture keeps returning.
- Paint is peeling, bubbling, or failing across a large section rather than in one isolated spot.
- Drywall is soft, crumbling, badly cracked, bowed, or otherwise seriously damaged.
- Paint in a pre-1978 home may be disturbed and the lead status is unknown.
- The work requires unsafe access or drywall repair beyond what the homeowner can safely manage.
These conditions need investigation before cosmetic painting continues. A painter may handle surface preparation and finishing, while leaks, extensive drywall damage, mold, or suspected lead may require a contractor with the appropriate experience.
Final Thoughts
Blotchy wall paint usually comes from either uneven coverage or an uneven surface. Smooth areas with weak color may need another consistent coat. Repairs, stains, rough texture, moisture, and sheen changes usually require preparation or investigation first.
Identify the pattern and cause before adding more paint. Once you know what created the uneven finish, use the separate guide on how to fix patchy paint after it dries to choose the appropriate repair method without repeating the same mistake.